This tutorial will show you how to setup a POP email account with SSL in Outlook 2010
- 1 This tutorial will show you how to setup a POP email account with SSL in Outlook 2010
- 2 Setup a POP email account with SSL in Outlook 2010
- 2.1 Step 1: Open Outlook 2010
- 2.2 Step 2: Access Account Settings
- 2.3 Step 3: Add New Account
- 2.4 Step 4: Manually Configure Server Settings
- 2.5 Get Started with Email Hosting Today
- 2.6 Step 5: Internet Email Settings
- 2.7 Step 6: More Settings
- 2.8 Step 7: Test Account Settings
- 2.9 Step 8: Complete Setup
- 2.10 Step 9: Restart Outlook
- 2.11 Conclusion
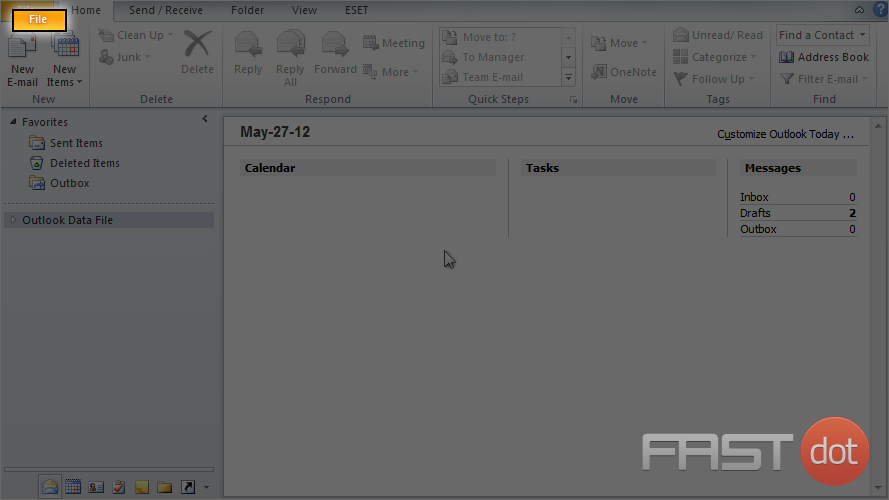
1) To configure a POP email account with SSL, first click the “File” tab.
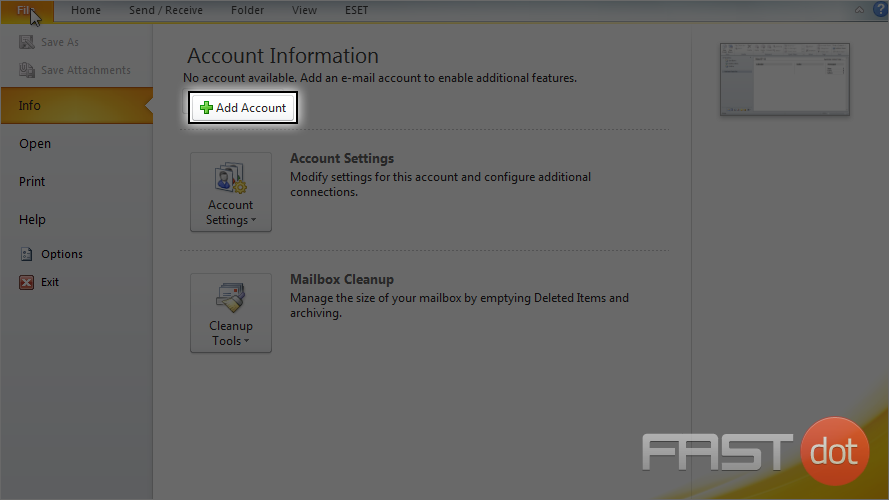
2) Then click The “Add Account” button.
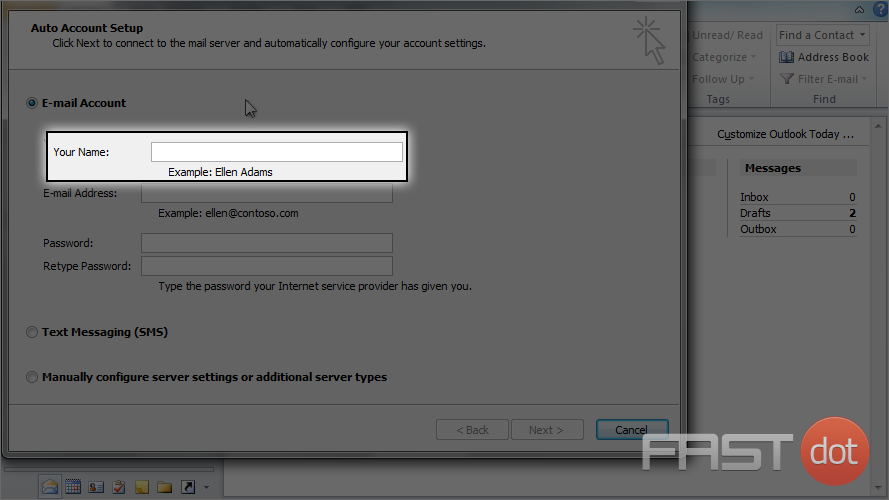
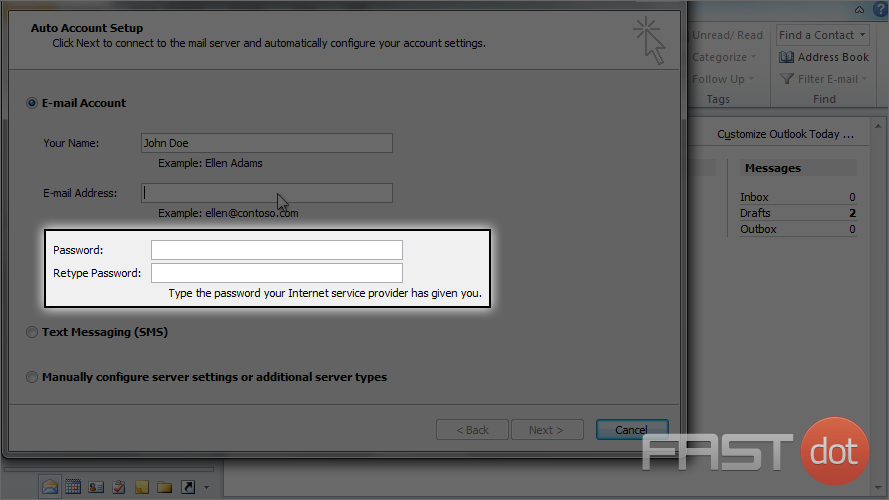
3) Enter your name as you would like it to appear in your emails.
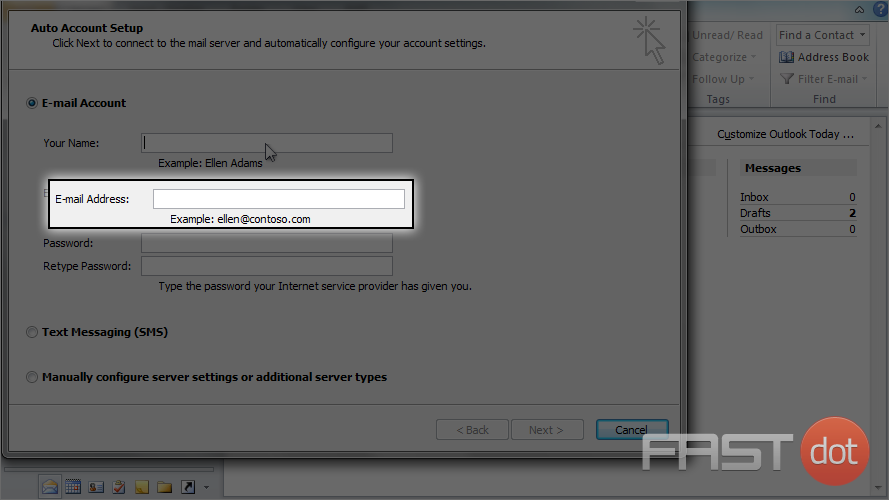
4) Then enter the email address you want to configure here.
5) Enter and confirm the email account’s password.
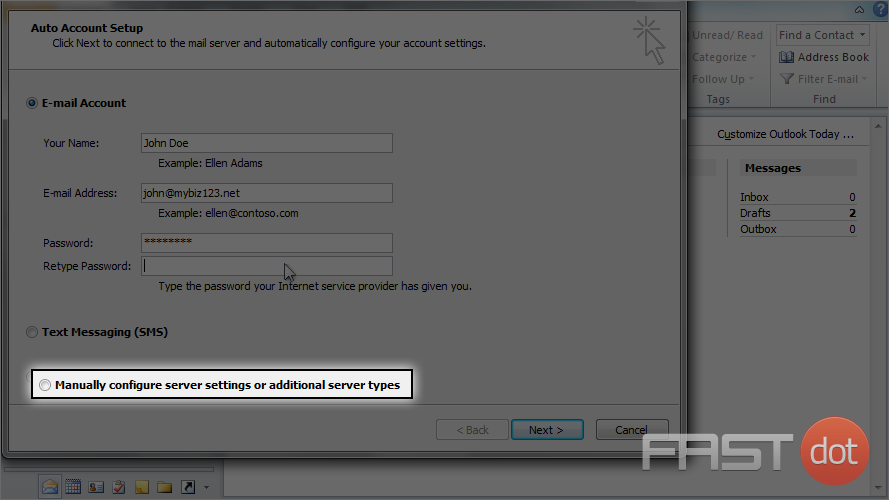
6) Click here to manually configure your mail server settings.
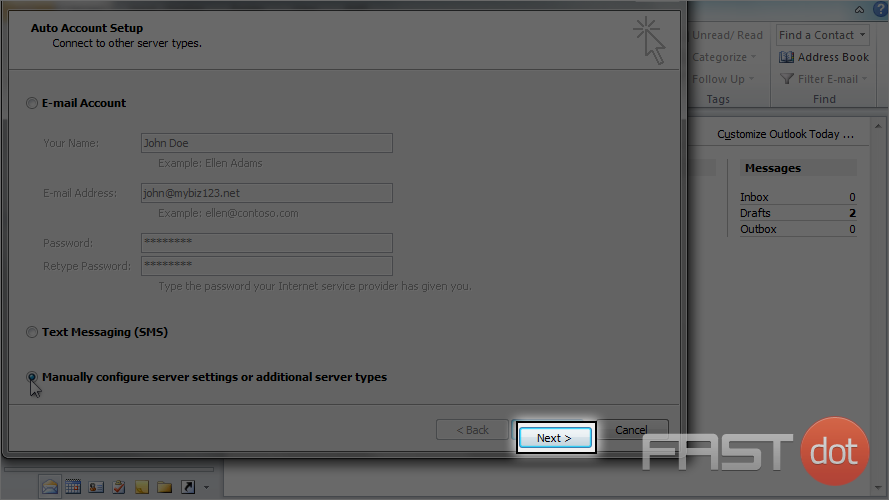
7) Then click “Next”.
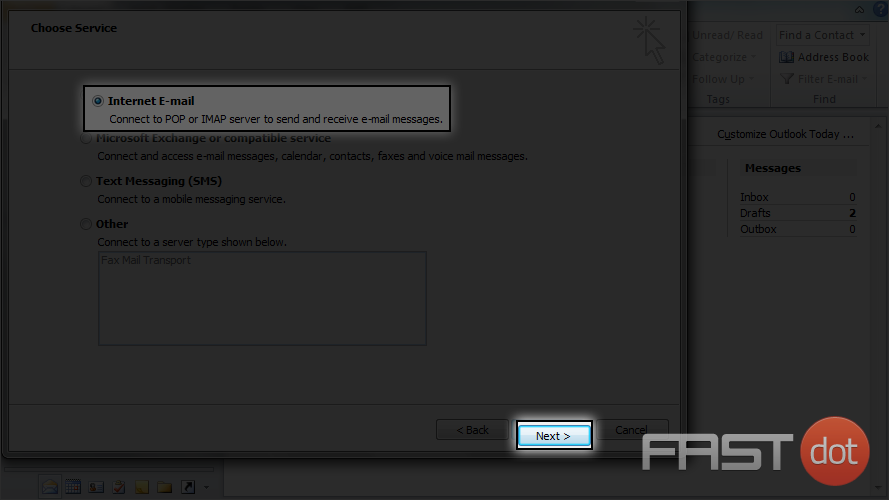
8) Ensure the “Internet E-mail” option is selected, then click “Next” again.
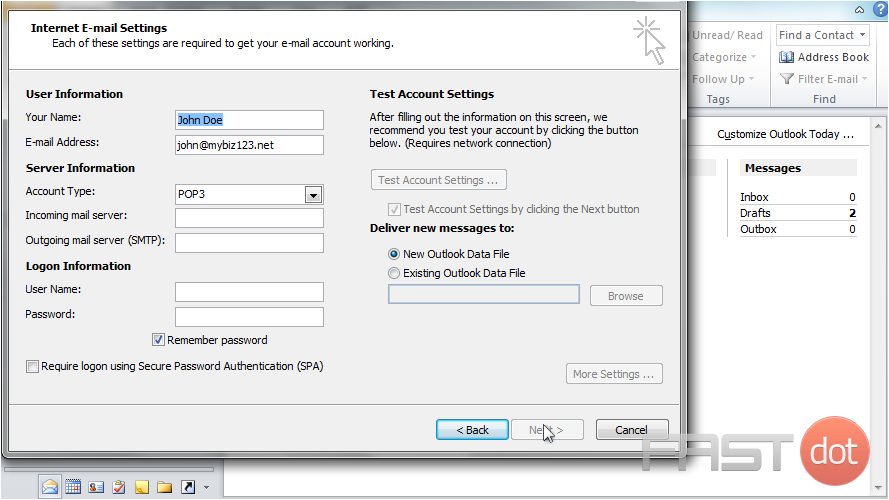
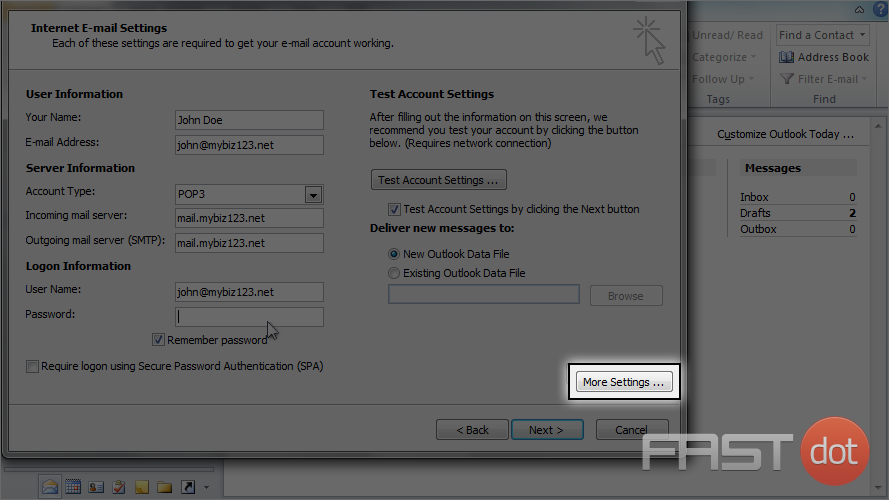
Next we have to configure our server settings.
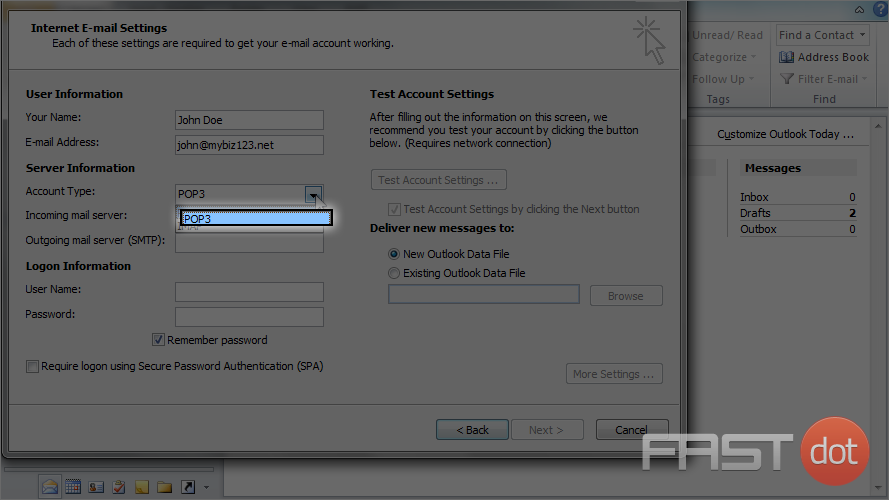
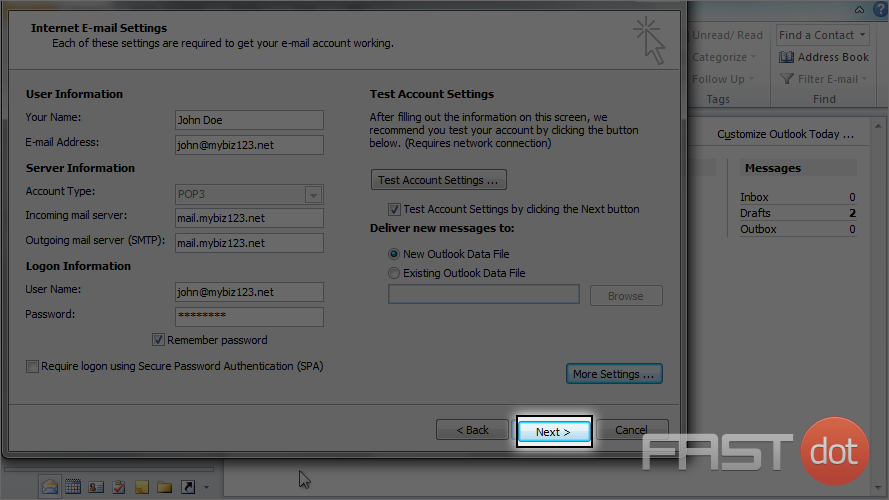
9) Ensure “POP3” is selected as the account type.
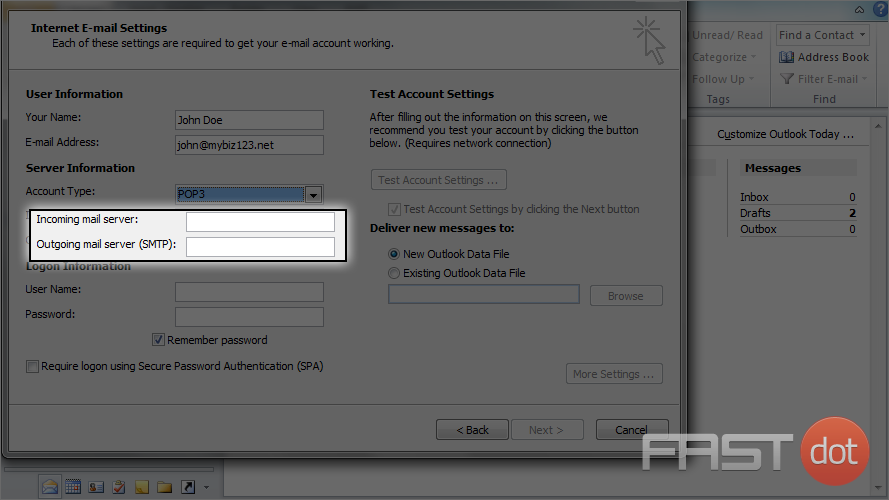
10) Then enter the incoming and outgoing mail server addresses.
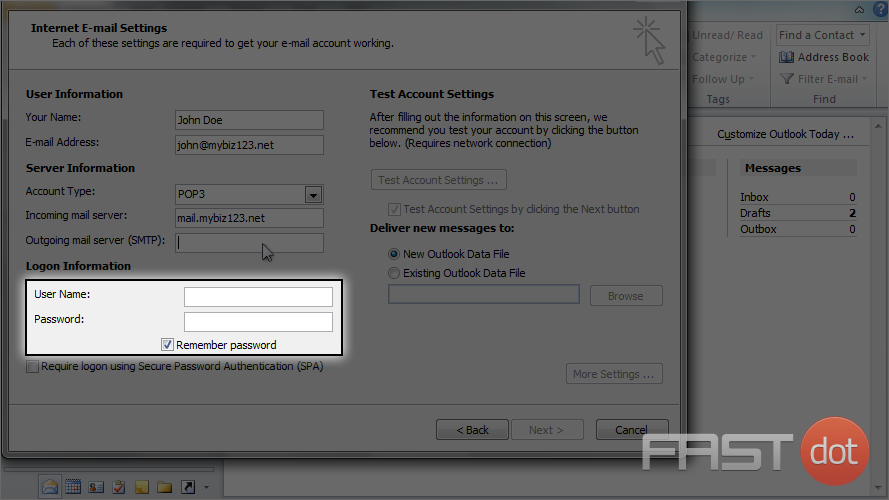
11) Enter your full email address as the user name, and the password.
12) Then click the “More Settings” button.
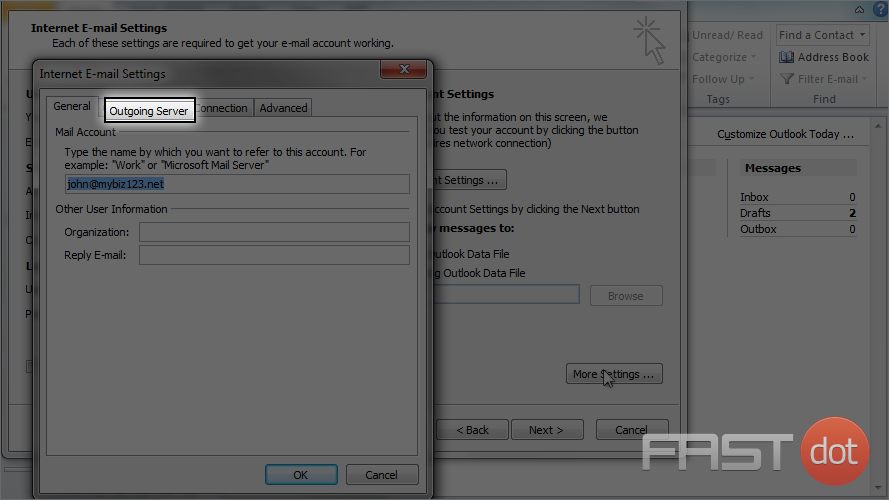
13) Click the “Outgoing Server” tab.
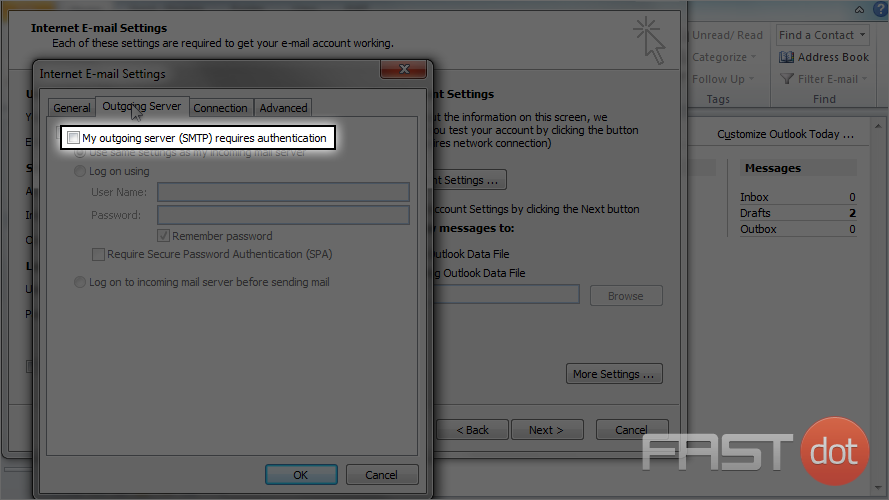
14) Then click here to require outgoing server authentication.
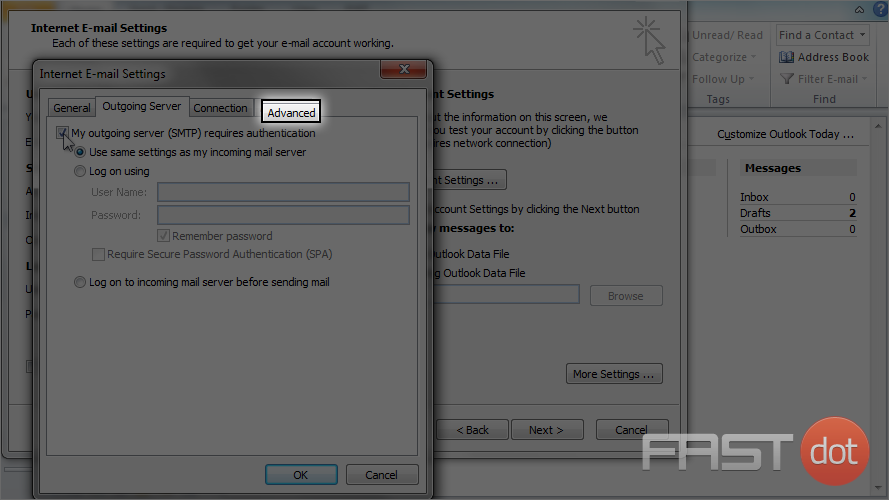
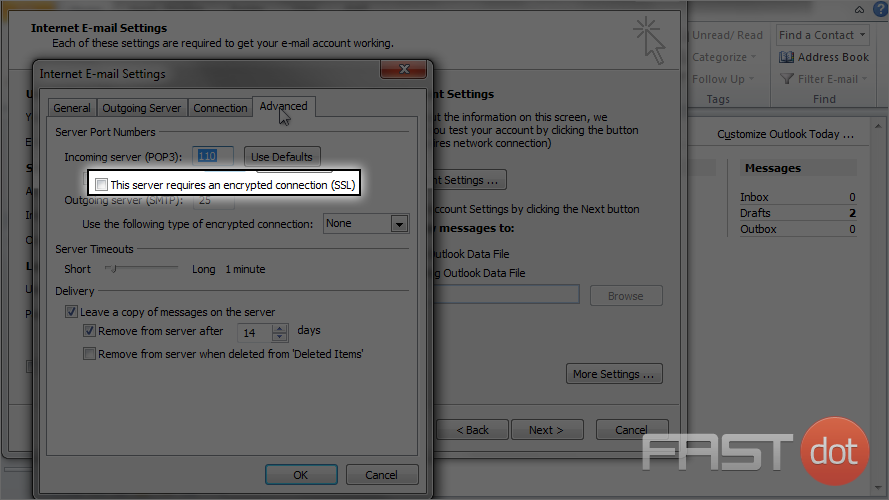
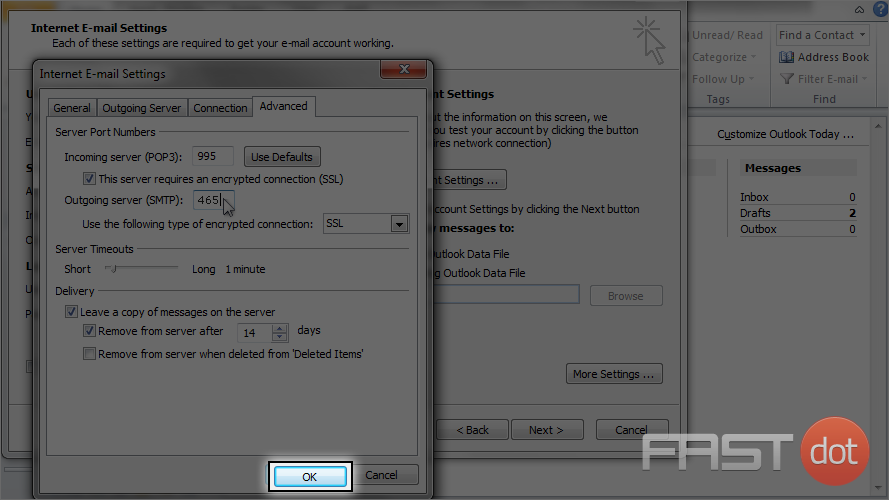
15) Click the “Advanced” tab.
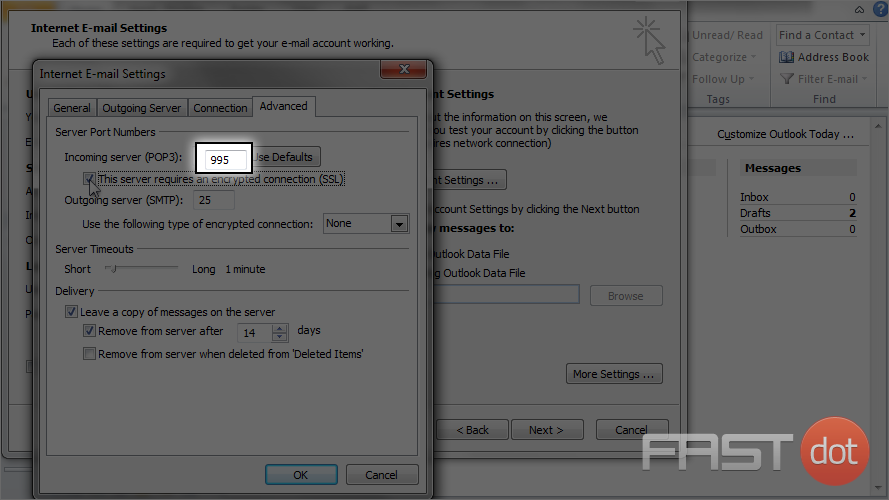
16) Click here to require a secure SSL connection.
Note that by doing so the port number changed to 995, the default email port for SSL.
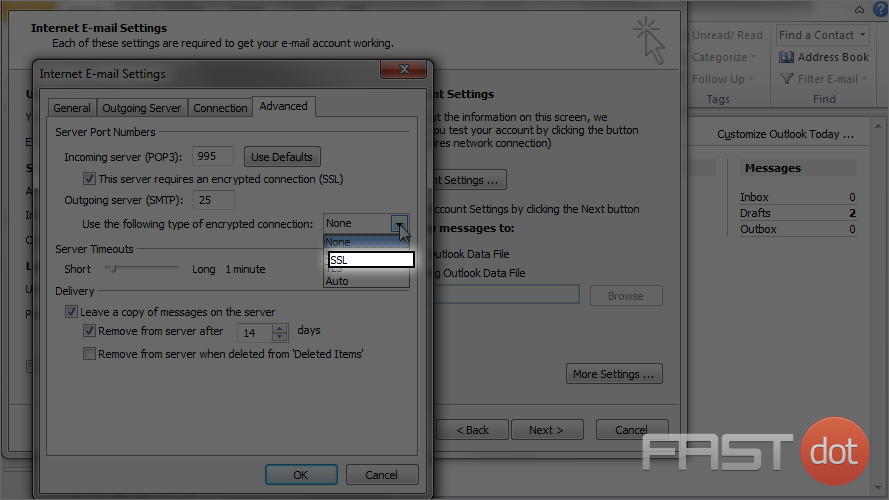
17) Select SSL for the outgoing server as well.
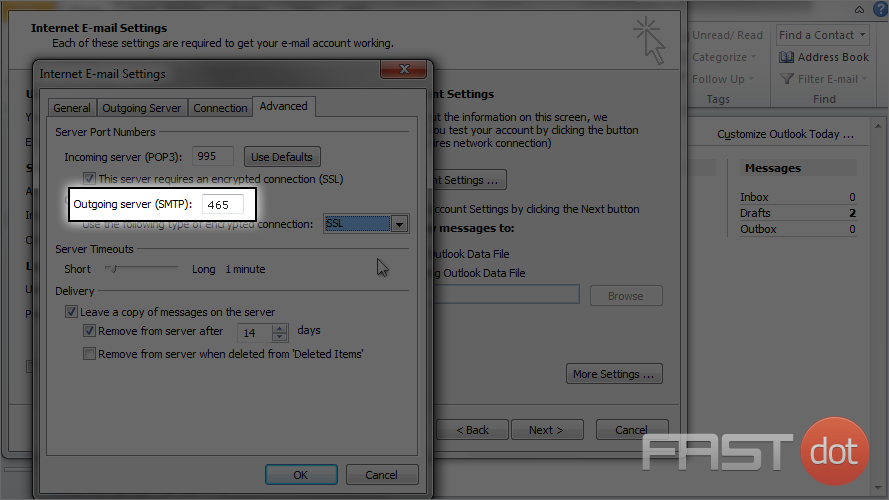
18) Be sure to enter 465 for the secure port number.
19) Then click “OK”.
20) Click “Next”.
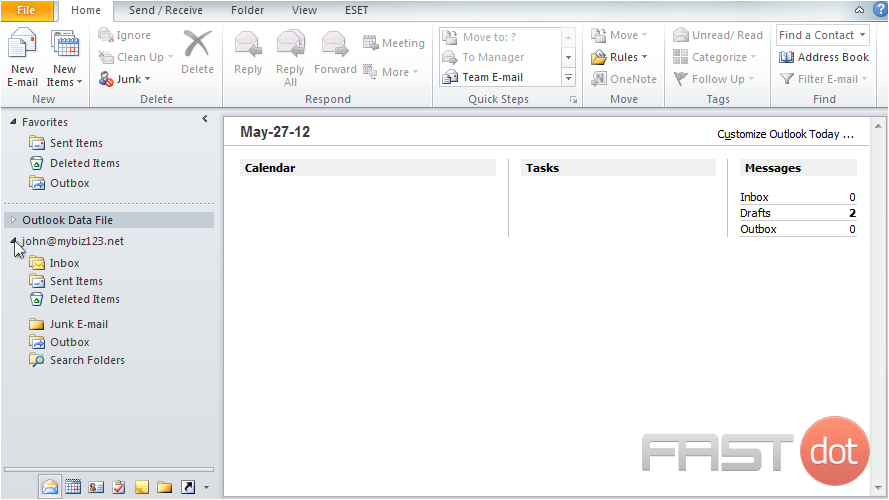
That’s it! The email account has been added.
Setup a POP email account with SSL in Outlook 2010
Setting up a POP email account with SSL in Microsoft Outlook 2010 involves several steps. This configuration ensures that your email communications are securely transmitted over the network. Below is a detailed guide on how to set up a POP email account with SSL in Outlook 2010:
Step 1: Open Outlook 2010
- Launch Outlook: Start Microsoft Outlook 2010. If this is the first time you’re opening Outlook, it might prompt you to set up an email account. If not, proceed to the next step.
Step 2: Access Account Settings
- Go to File: Click on the ‘File’ tab in the top-left corner of the Outlook window.
- Account Settings: Click on ‘Info’ if it’s not already selected, then click on the ‘Account Settings’ button, and choose ‘Account Settings’ from the dropdown.
Step 3: Add New Account
- Add Account: In the ‘Account Settings’ window, go to the ‘Email’ tab and click on ‘New’.
- Choose Email Service: Select ‘Email Account’ and then enter your name, email address, and password. Since you’re setting up a POP account with SSL, you’ll need to configure the settings manually.
Step 4: Manually Configure Server Settings
- Manual Setup: Check the box for ‘Manually configure server settings or additional server types’ and click ‘Next’.
- Choose Service: Select ‘Internet Email’ and click ‘Next’.
Get Started with Email Hosting Today
Get Started with Email Hosting Today
Step 5: Internet Email Settings
- User Information:
- Your Name: Enter the name you want recipients to see.
- Email Address: Enter your full email address.
- Server Information:
- Account Type: Select ‘POP3’.
- Incoming mail server: Enter the POP server name provided by your email hosting service. It typically looks like
pop.yourdomain.com. - Outgoing mail server (SMTP): Enter the SMTP server name, usually
smtp.yourdomain.com.
- Logon Information:
- User Name: Enter your full email address.
- Password: Enter the password for your email account.
- Remember Password: Check this if you don’t want to enter your password each time.
Step 6: More Settings
- Click ‘More Settings’:
- Outgoing Server Tab: Check ‘My outgoing server (SMTP) requires authentication’ and ensure ‘Use same settings as my incoming mail server’ is selected.
- Advanced Tab:
- Incoming server (POP3): Enter the port number provided by your email service. For SSL, it’s usually 995.
- This server requires an encrypted connection (SSL): Check this box.
- Outgoing server (SMTP): Enter the port for the SMTP server. For SSL, it’s often 465 or 587.
- Use the following type of encrypted connection: Choose ‘SSL’.
Step 7: Test Account Settings
- Test Settings: Click on ‘Test Account Settings’ to ensure everything is set up correctly. Outlook will test the connection to your incoming and outgoing servers and send a test email.
Step 8: Complete Setup
- Finish: If the test is successful, click ‘Next’ and then ‘Finish’.
Step 9: Restart Outlook
- Restart Outlook: Close and reopen Outlook to start using your email account.
Conclusion
Setting up a POP email account with SSL in Outlook 2010 enhances the security of your email communications. It’s important to have the correct incoming and outgoing server details, as well as the appropriate port numbers and encryption settings, as provided by your email hosting service. Regularly updating your password and monitoring your account settings are also good practices to maintain email security.

