You’ll probably need to suspend an account for some reason at some point in the future. Accounts can also be suspended automatically due to bandwidth overage.
In this tutorial, you’ll see how to suspend and unsuspend an account in WHM.
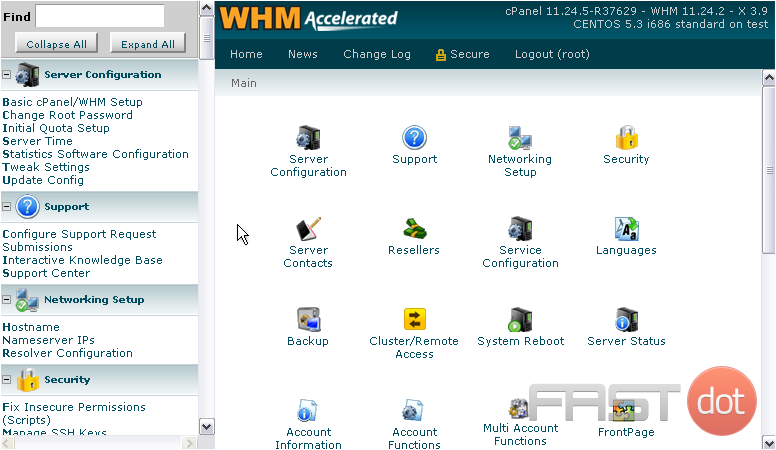
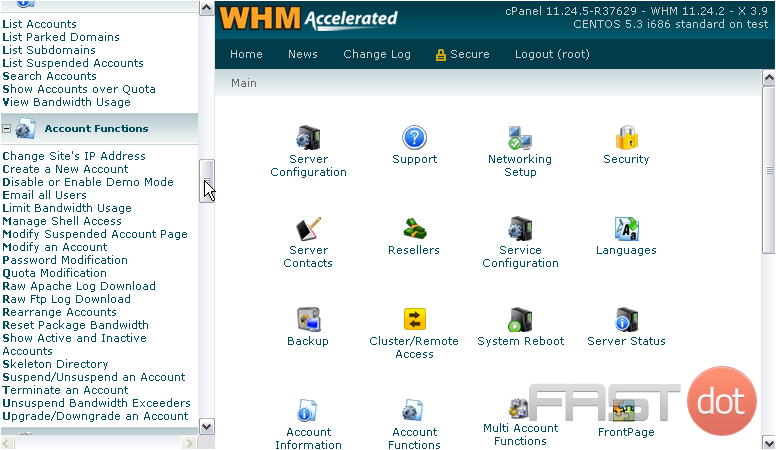
1) Go to Account Functions.
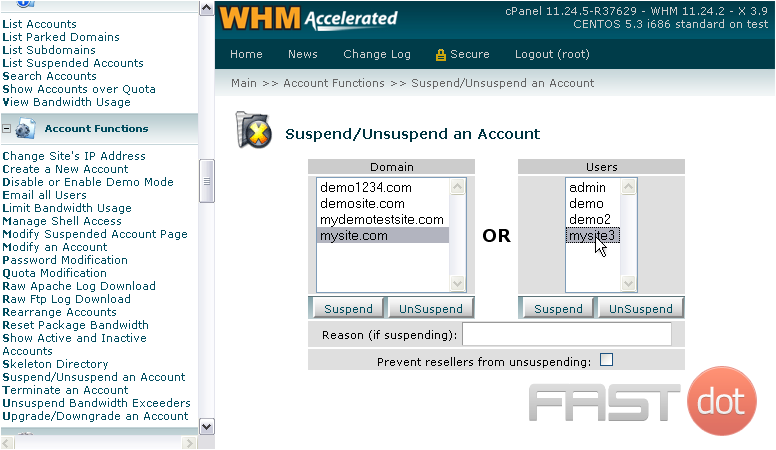
2) Click the Suspend/ Unsuspend an Account link.
3) Choose an account’s username or main domain name from the respective list.
4) Provide a reason for suspension, if you want.
5) By default, an account’s reseller will be able unsuspend the account. Click this checkmark if you don’t want them to be able to do that.
6) Click Suspend or UnSuspend, whichever action you wish to perform on the account. We’ll be suspending this account.
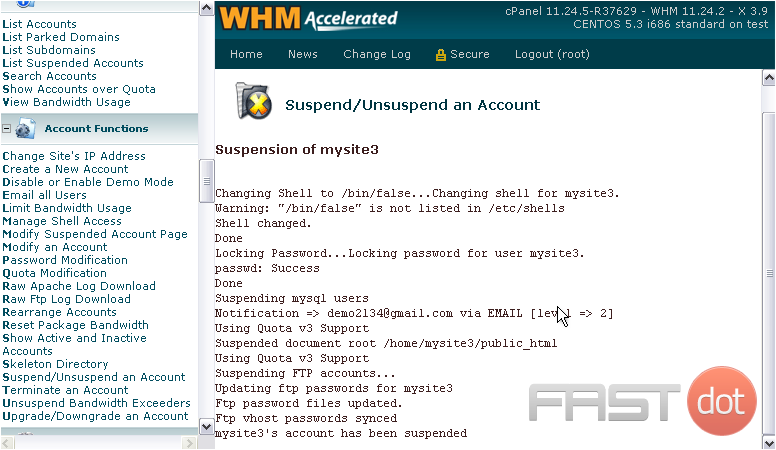
The account has now been suspended. All access to this account should now be locked.
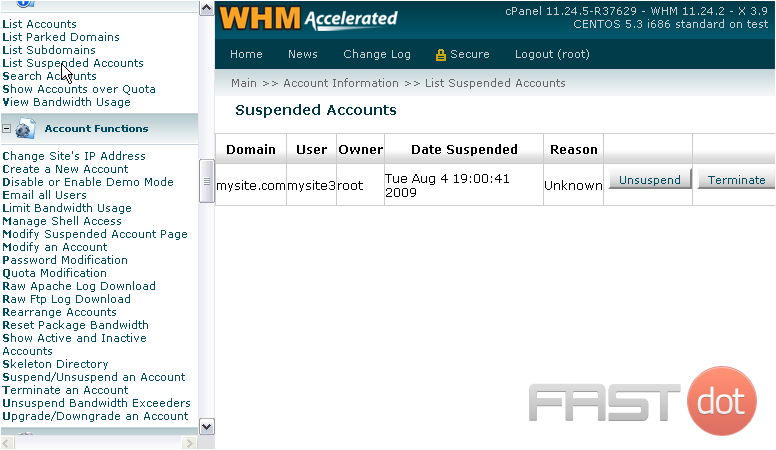
7) To verify, let’s go to List Suspended Accounts.
Here is the account we suspended.
8) You can Terminate and permanently delete this account using this button, if you wish.
9) Or, lift the suspension from the account with the Unsuspend button.
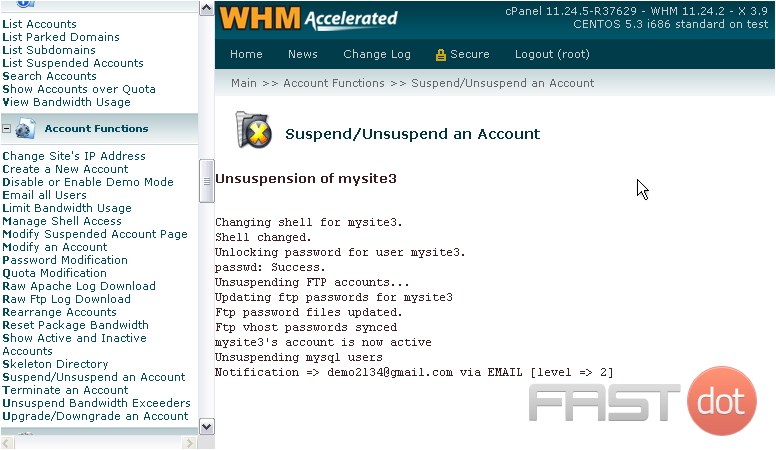
That’s it! The account has now been reactivated.
Suspending and unsuspending accounts in WHM (WebHost Manager) are crucial tasks for managing a web hosting server, especially for those who administer web hosting services. This feature is particularly useful for temporarily disabling access to an account due to maintenance, non-payment, or security concerns, without deleting the account or its data. Conversely, unsuspending an account restores full access to it, as if the suspension never occurred. Here’s an in-depth guide on how to suspend or unsuspend an account in WHM.
Accessing WHM
Before you begin, ensure you have administrative access to WHM. Typically, you can access WHM by navigating to https://yourserverip:2087 or https://yourdomain.com/whm and entering your username and password. The username for accessing WHM is usually root, coupled with your root password, unless specified otherwise by your hosting provider.
How to Suspend an Account in WHM
- Log into WHM: Use your credentials to access the WHM interface.
- Navigate to the Suspend/Unsuspend an Account Page: Once logged in, use the search function on the top-left corner of the WHM interface and type “suspend”. Click on “Manage Account Suspension” under the “Account Functions” section.
- Select the Account: You’ll see a list of hosted accounts on your server. Locate the account you wish to suspend. You can use the search bar to quickly find the account by its domain name or username.
- Suspend the Account: Once you’ve identified the account, click the “Suspend” button next to it. You will be prompted to enter a reason for the suspension. Although this is optional, providing a reason can be helpful for record-keeping and communication purposes. After entering a reason (if you choose to), click the “Suspend” button to proceed with the suspension.
- Confirmation: WHM will process the request, and you should see a confirmation message once the account has been successfully suspended. The suspended account’s website(s) will now display a default suspension message to visitors, and the account user will be unable to access their cPanel.
How to Unsuspend an Account in WHM
- Access Manage Account Suspension: Follow the same steps as above to navigate to the “Manage Account Suspension” page in WHM.
- Locate the Suspended Account: Suspended accounts are typically indicated by a different icon or text color. Find the account you wish to unsuspend.
- Unsuspend the Account: Click the “Unsuspend” button next to the account you’re unsuspending. WHM will immediately begin the process to restore the account’s access.
- Confirmation: Wait for a confirmation message from WHM indicating that the account has been successfully unsuspended. The account and its associated websites should now be fully accessible, with all services restored to their previous state before the suspension.
Important Considerations
- Data Integrity: Suspending an account does not affect the data stored within that account. All files, databases, and emails remain intact during the suspension.
- Communicate with the Account Holder: If you’re suspending an account for administrative reasons such as non-payment or a breach of terms, it’s best practice to communicate this action and its reason to the account holder before and after the suspension.
- Automated Tools: For web hosting providers who manage a large number of accounts, consider using automated tools or integrating billing systems that can handle suspensions and unsuspendings based on payment status or other criteria.
- Security Precautions: Use account suspension as a temporary security measure if you suspect an account has been compromised. This gives you time to investigate and address any security issues without permanent damage.
Conclusion
Managing account suspensions in WHM is a straightforward process that plays a critical role in server administration and hosting management. By following these steps, you can effectively control access to the resources on your server, ensuring operational continuity, enforcing policy compliance, and maintaining a secure hosting environment. Always remember to use this powerful feature judiciously and in line with your hosting provider’s policies and agreements

