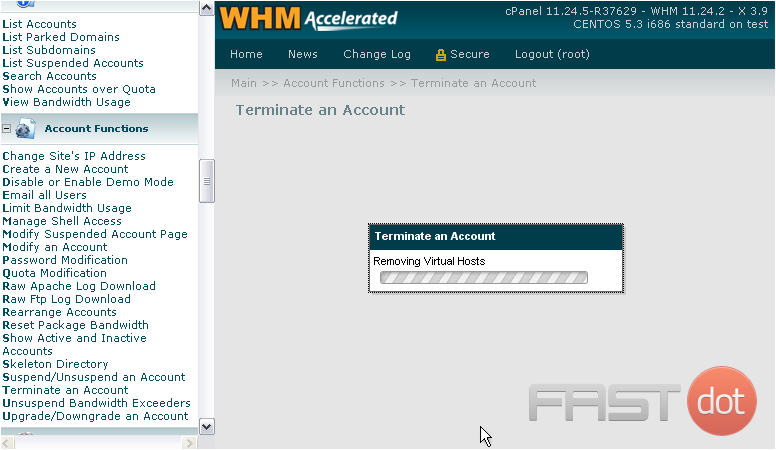
If you no longer wish for an account to reside on your server, you can terminate the account. Be warned that this will permanently delete the account from the server, so this action cannot be undone.
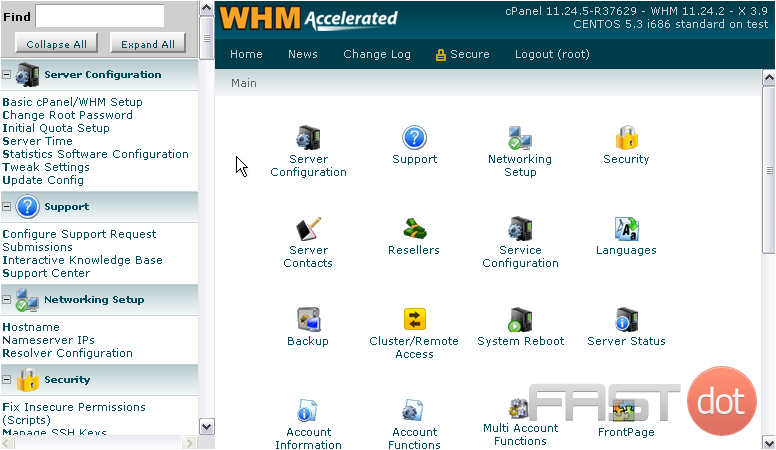
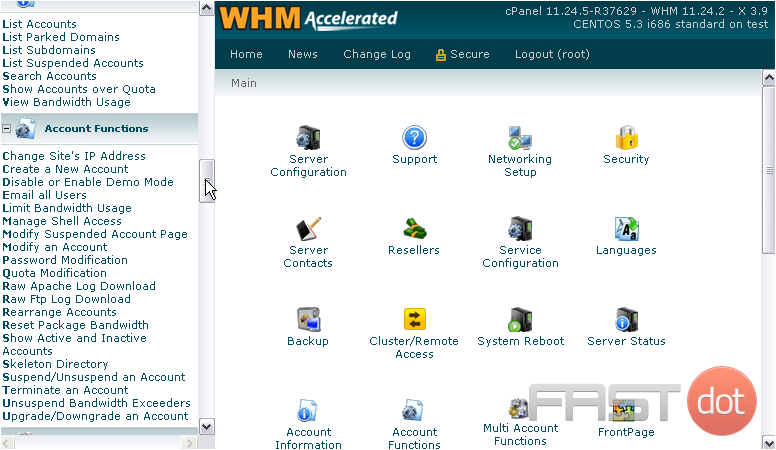
1) Start by navigating to the Account Functions.
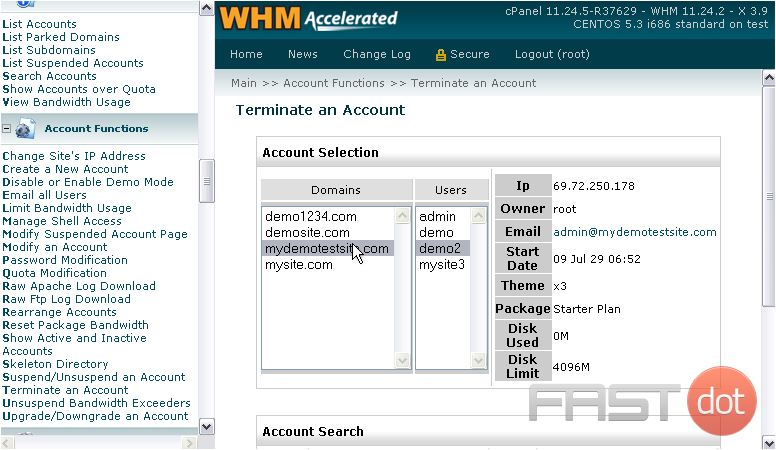
2) Then go to Terminate an Account.
3) Select an account using the main domain or user, or search for an account below.
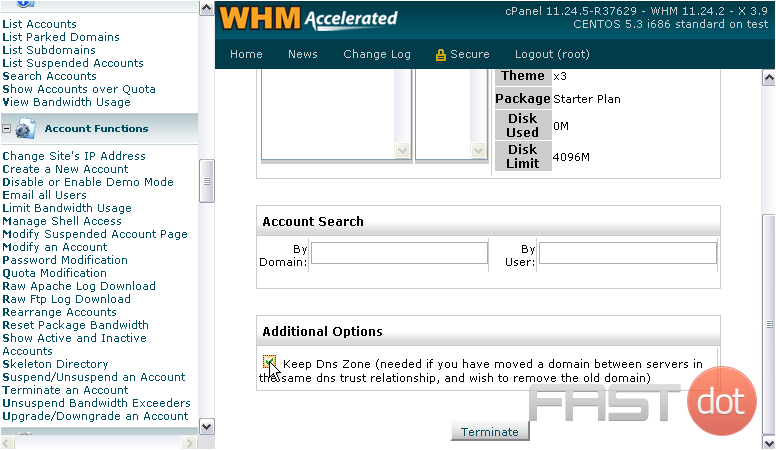
4) If you’d like to keep this account’s DNS Zone, click here.
Do not continue unless you’re absolutely sure the account should be terminated and permanently deleted from your server. You will receive no further warnings.
5) Press Terminate when ready.
It will take some time for everything to be removed from your server.
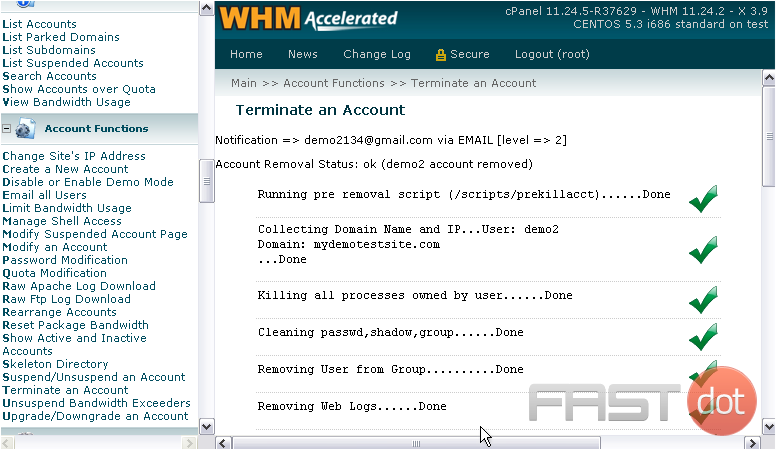
When finished, you should see an OK message followed by a bunch of checkmarks.
Terminating and permanently deleting an account from your WHM (WebHost Manager) server involves a process that irreversibly removes all of the account’s data, including websites, emails, and databases. This action is commonly required when a client cancels their service, or if you need to remove a no longer needed account. Given the permanent nature of this action, it’s crucial to proceed with caution, ensuring that you have backed up any important data and communicated appropriately with the account holder or stakeholders involved. Here’s how to carry out this process:
Pre-Termination Checklist
- Backup Important Data: Ensure you have a complete backup of the account’s data. WHM provides tools to back up accounts. This data cannot be recovered once the account is terminated.
- Inform the Account Holder: If the account belongs to a client or another user, notify them well in advance about the account termination.
- Check Dependencies: Make sure that terminating the account does not affect other accounts or services. For example, subdomains, DNS settings, or email services that might be interconnected.
Step-by-Step Guide to Terminate and Permanently Delete an Account
Step 1: Log into WHM
- Access WHM: Navigate to your WHM login page, which is usually found at
https://yourserverip:2087orhttps://yourdomain.com/whm. Replaceyourserveriporyourdomain.comwith your actual server IP address or domain. - Enter Credentials: Log in with your root or administrative credentials to access the full range of WHM features.
- In WHM’s search bar, type “Terminate” and select Terminate Accounts from the autocomplete suggestions. This will take you to the account termination interface.
Step 3: Select the Account to Terminate
- Identify the Account: You’ll see a list of all cPanel accounts on the server. Find the account you wish to terminate. You can use the search function if you’re managing a large number of accounts.
- Confirm Account Selection: Double-check that you have selected the correct account. This is crucial as the termination process is irreversible.
Step 4: Terminate the Account
- Initiate Termination: Once you’ve selected the account, click the “Terminate” button associated with that account.
- Confirm Termination: WHM will ask you to confirm your decision to terminate the account. This is your last chance to cancel the process if you’re not sure.
- Completion: After confirming, WHM will proceed with the account termination. This process may take a few moments to complete. You’ll see a progress indicator or a confirmation message once the termination is complete.
Additional Considerations
- Review Termination Logs: After the process is complete, WHM typically provides a log of the termination process. Review this log to ensure that all components of the account were successfully removed.
- Manual Cleanup: In rare cases, there may be remnants of the account left on the server (e.g., custom cron jobs or manual database installations outside the cPanel account’s home directory). You may need to manually check and remove these remnants.
- DNS Considerations: If the terminated account had a domain associated with it that you still control, consider updating or removing DNS records to reflect the change.
Conclusion
Terminating and permanently deleting an account from your WHM server is a straightforward process, but it requires careful preparation to ensure data is not lost unintentionally and that all stakeholders are informed. Always make sure to back up any important information before proceeding, and double-check your actions at each step to avoid accidental data loss.

