Certainly. Below is a professional and comprehensive guide on how to set up an email auto-responder in cPanel, useful for out-of-office replies, support acknowledgements, or general notifications.
How to Set Up an Auto-Responder in cPanel
- 1 How to Set Up an Auto-Responder in cPanel
- 1.1 Step-by-Step Guide to Configure Auto-Responders in cPanel
- 1.2 Step 1: Log in to cPanel
- 1.3 Step 2: Locate the Auto-Responders Tool
- 1.4 Step 3: Choose the Domain (If You Have Multiple Domains)
- 1.5 Step 4: Add an Auto-Responder
- 1.6 Step 5: Save the Auto-Responder
- 1.7 Optional: Editing or Deleting Auto-Responders
- 1.8 Advanced Tips
- 1.9 Common Use Cases
- 1.10 Troubleshooting Tips
- 1.11 Conclusion
- 2 This demo assumes you’ve already logged in to cPanel
An auto-responder is a powerful email utility within cPanel that automatically replies to incoming messages with a predefined response. This feature is commonly used to notify senders of your absence, confirm receipt of support queries, or acknowledge orders and contact form submissions.
Step-by-Step Guide to Configure Auto-Responders in cPanel
Step 1: Log in to cPanel
- Open your browser and go to:
https://yourdomain.com/cpanel - Enter your cPanel username and password.
Step 2: Locate the Auto-Responders Tool
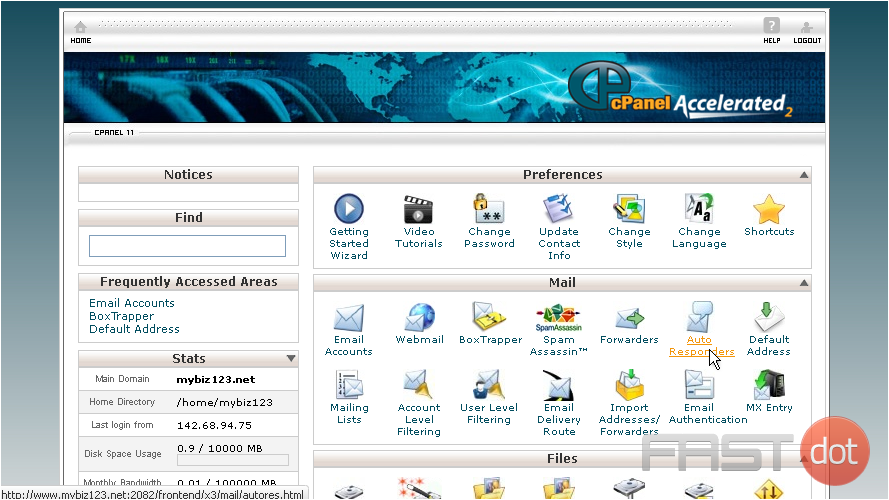
- In the EMAIL section, click on:
Auto Responders
Step 3: Choose the Domain (If You Have Multiple Domains)
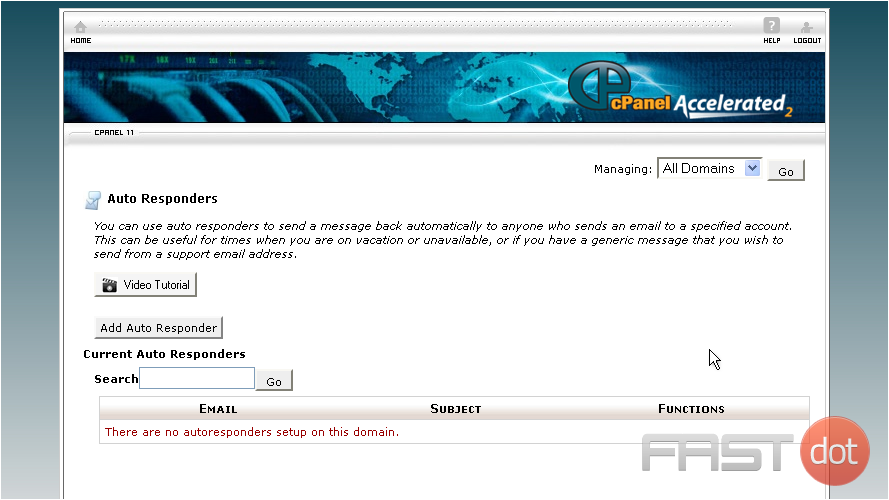
- If your account hosts multiple domains or subdomains, select the appropriate one from the drop-down menu at the top.
Step 4: Add an Auto-Responder
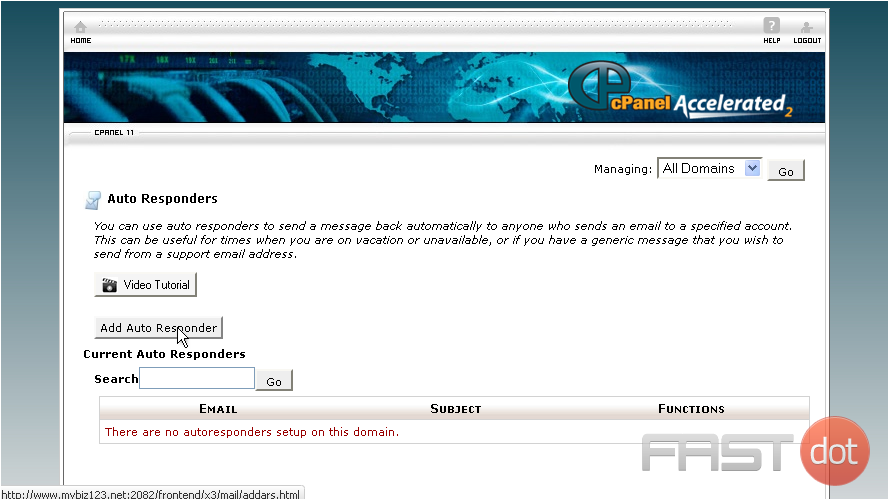
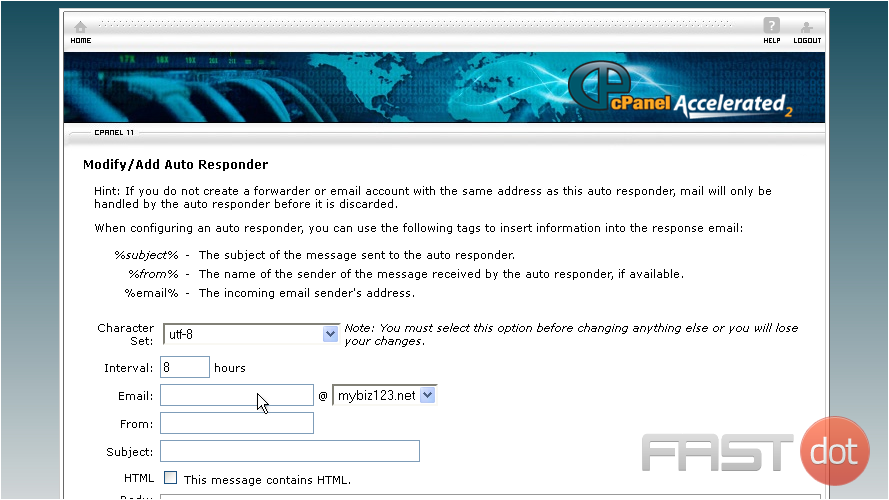
- Click the Add Auto Responder button.
- Fill in the required fields:
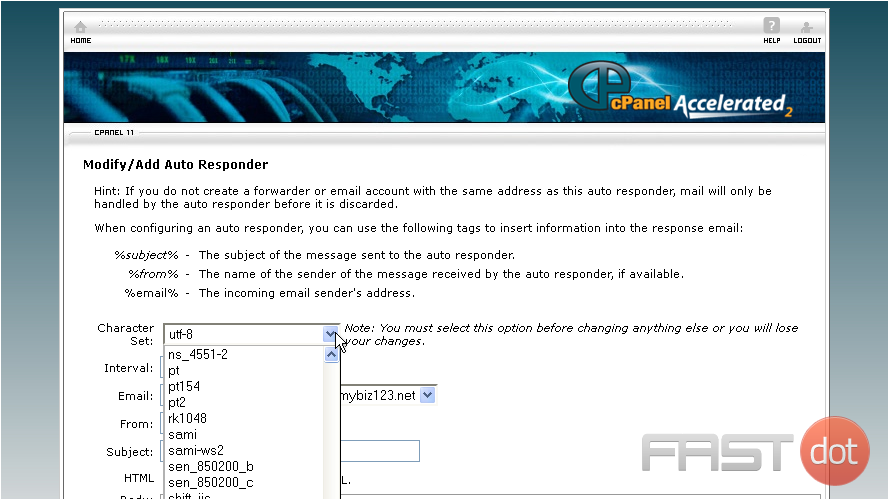
- Character Set: Default is
utf-8(leave as is unless needed). - Interval: Set the number of hours to wait between responses to the same email address. This prevents flooding.
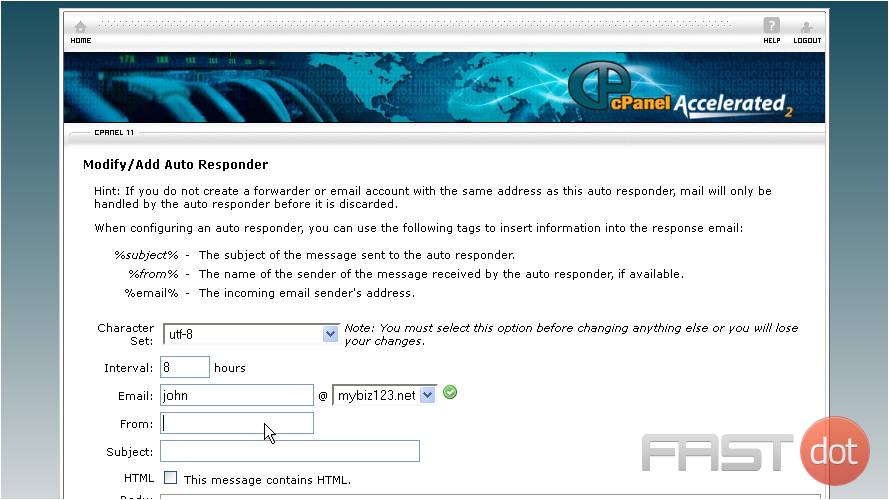
- Email: Enter the part before the
@(e.g.,support). - Domain: Select the domain from the dropdown.
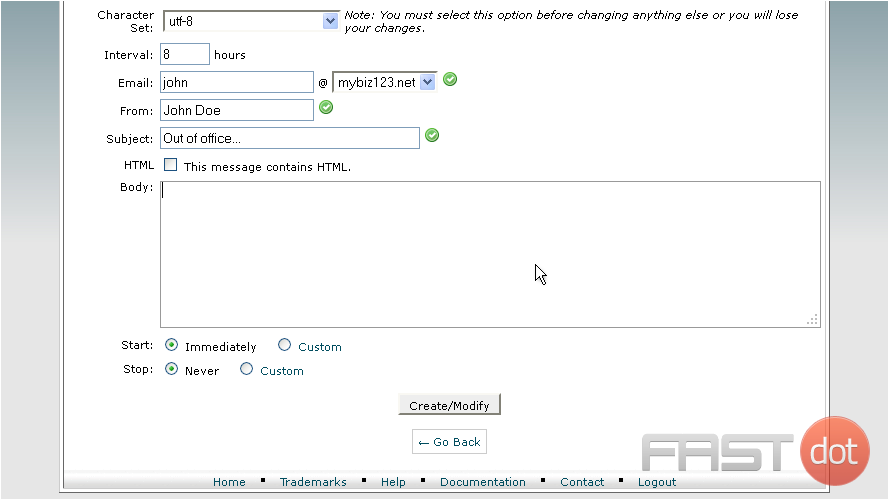
- From: The display name for the auto-reply (e.g.,
Support Team). - Subject: A brief, clear subject (e.g.,
Thank you for contacting us). - Body: Type your message. You can include HTML or plain text.
Example:
Thank you for contacting our support team. We have received your message and will respond within 24 hours. - Start: Choose when the auto-responder becomes active.
- Now
- Custom (to schedule start date/time)
- Stop: Choose when the auto-responder should stop.
- Character Set: Default is
Step 5: Save the Auto-Responder
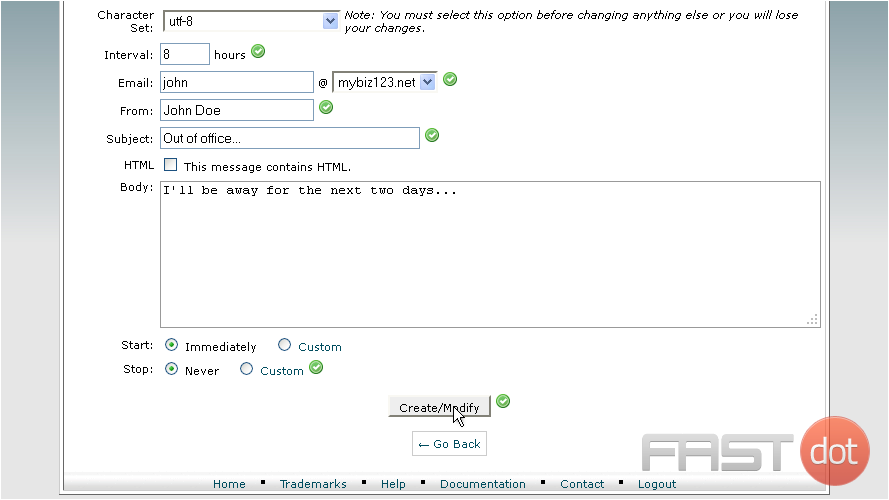
- Click the Create/Modify button to save your auto-responder.
Optional: Editing or Deleting Auto-Responders
- To edit an existing auto-responder:
- Click Edit next to the desired entry, make changes, and save.
- To delete:
- Click Delete and confirm removal.
Advanced Tips
- Use %subject% and %from% in your message body to dynamically include the sender’s email or original subject.
- Combine with email filters or forwarders to create robust communication workflows.
- If using autoresponders for marketing, ensure compliance with anti-spam laws such as GDPR and CAN-SPAM.
Common Use Cases
- Out-of-Office Replies:
I’m currently out of the office with limited access to email. I will return on [date] and respond as soon as possible. - Support Ticket Acknowledgements:
We’ve received your support request. A ticket has been opened and our team will respond shortly. - Order Confirmations or Contact Acknowledgements:
Thank you for contacting us! This is a confirmation that we received your message and will respond soon.
Troubleshooting Tips
- Ensure the domain and mailbox exist before assigning an auto-responder.
- Test your auto-responder using a non-hosted email address (e.g., Gmail).
- Check the spam folder of the sender’s mailbox if auto-responses are not being seen.
Conclusion
Setting up an auto-responder in cPanel is a straightforward yet highly effective way to maintain professional communication and manage customer expectations. Whether you’re away, managing high volumes of email, or simply streamlining responses, auto-responders are an indispensable part of your hosting toolkit.
Let me know if you’d like a visual HTML version, video script, or an auto-responder template library tailored for business, support, or eCommerce use.
This demo assumes you’ve already logged in to cPanel
Now let’s learn how to setup an email autoresponder
1) Click the Auto Responders icon
This is where you create auto-responders for your email addresses. Autoresponders send messages back automatically to anyone who sends an email to a specified account
2) Click the Add Auto Responder button
3) In most cases you’ll leave the character set to utf-8
4) Enter the email address you want to set an auto-responder for
5) Then type entries for the From and Subject fields of your email
6) Enter your message here
7) Then click Create/Modify
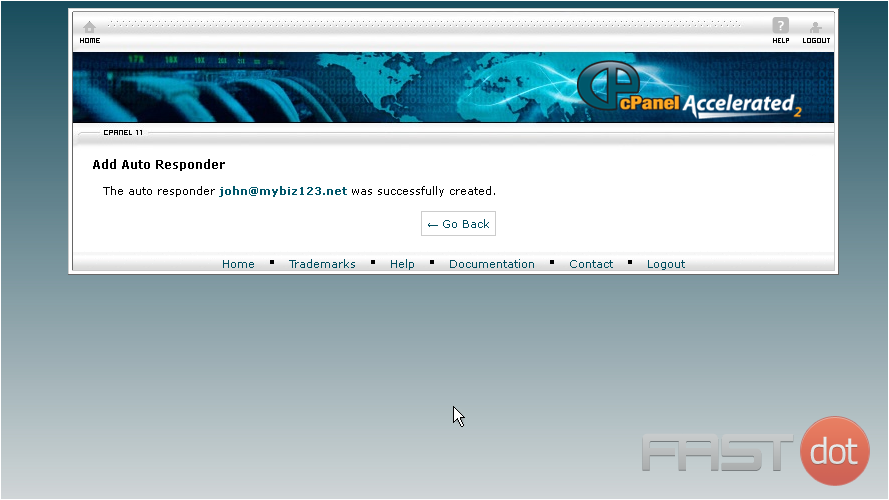
That’s it! The autoresponder has been created
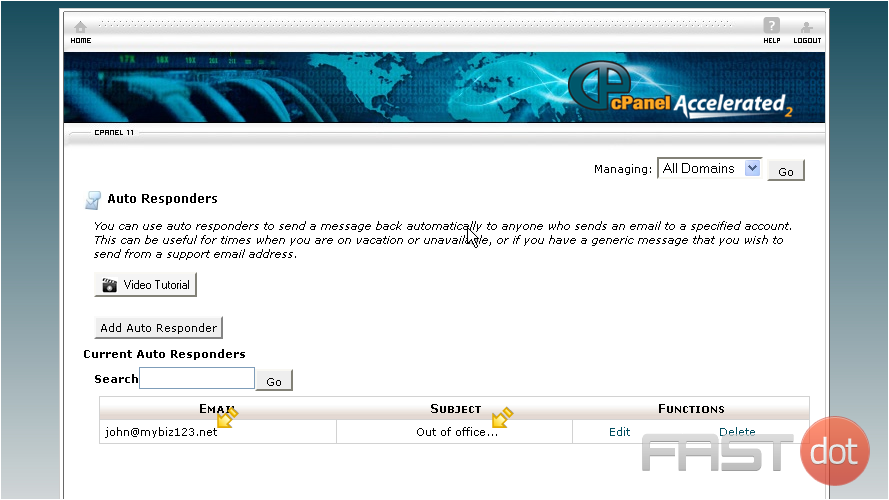
Now when someone sends an email to john@mybiz123.net, the “Out of Office” email will automatically be sent to them
This is the end of the tutorial. You now know how to setup autoresponders

