Why Choose Gravity Forms for Advanced Form Building in WordPress?
Gravity Forms is a popular plugin for WordPress that allows users to create advanced and customizable forms for their website. It offers a user-friendly interface and a wide range of features for creating and managing forms. This article will discuss why Gravity Forms is the go-to option for advanced form building in WordPress and how to effectively use it for your website.
Gravity Forms is a form builder plugin that allows users to create and manage various types of forms such as contact forms, registration forms, surveys, and more. It offers a drag-and-drop form builder, making it easy for users to customize and create complex forms without any coding knowledge.
The features of Gravity Forms make it stand out as the top choice for advanced form building in WordPress. Some of these features include:
- Drag-and-drop form builder
- Customizable form fields
- Conditional logic
- User management
- Payment integration
- Advanced notifications
- Customer support
These features make it a reliable and efficient tool for creating dynamic forms that can meet specific needs and requirements.
- Easy To Use: Gravity Forms offers a user-friendly interface that makes it easy for users to create and customize forms without any coding knowledge.
- Customizable Forms: Users can fully customize their forms with the drag-and-drop builder and various styling options to match their website’s design.
- Integration With Other Plugins And Services: Gravity Forms has built-in integration with popular plugins and services such as PayPal and MailChimp, making it easier to connect and manage data.
- Conditional Logic: This feature allows users to show or hide certain form fields based on user input, making forms more dynamic and personalized.
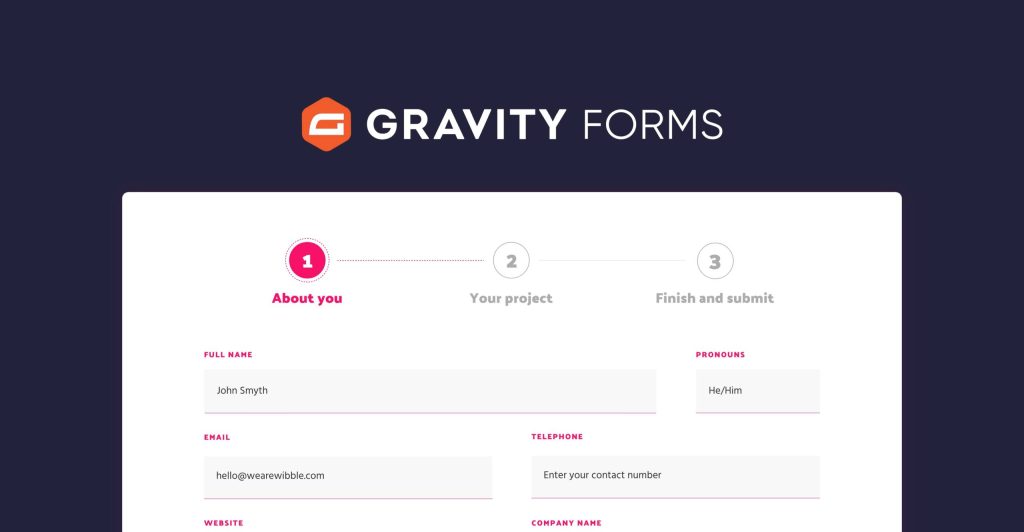
- Multi-Page Forms: Gravity Forms allows users to break their forms into multiple pages, making it easier for users to fill out longer forms.
- Advanced Form Fields: With Gravity Forms, users can add advanced form fields such as file uploads, calculations, and surveys.
- User Management: This feature allows website owners to manage user submissions and set up user registration forms.
- Payment Integration: Gravity Forms offers seamless integration with payment gateways, allowing users to easily collect payments through their forms.
- Advanced Notifications: Users can set up customized notifications to receive email alerts for new form submissions.
- Customer Support: Gravity Forms offers excellent customer support through multiple channels, including email, forums, and documentation.
To use Gravity Forms for advanced form building in WordPress, follow these steps:
- Install and activate the plugin from the WordPress dashboard.
- Create a new form and add form fields using the drag-and-drop builder.
- Customize the form fields and styling to match your website’s design.
- Set up conditional logic to make your form more dynamic.
- Add payment integration if necessary.
- Configure notifications to receive email alerts for new form submissions.
- Publish the form on your website using the shortcodes provided by Gravity Forms.
In conclusion, Gravity Forms is the ideal choice for advanced form building in WordPress due to its easy-to-use interface, customizable features, and reliable customer support. With Gravity Forms, creating and managing forms for your website becomes a hassle-free task.
Key Takeaways:
- Gravity Forms is a powerful tool for advanced form building in WordPress with customizable forms, conditional logic, and multi-page options.
- It offers integration with other plugins and services, such as payment gateways, and has a user-friendly interface for easy use.
- The plugin comes with excellent customer support and can be easily installed and configured to create professional and functional forms for your website.
What Is Gravity Forms?
Gravity Forms is a powerful WordPress plugin for creating advanced forms. It offers a user-friendly interface, extensive add-ons, and robust functionality for diverse form requirements.
Developed by rocket scientists turned web designers, Gravity Forms is the ultimate solution for seamlessly building forms on WordPress sites.
What Are The Features Of Gravity Forms?
- Easy To Use: Gravity Forms offers a user-friendly interface, making form creation effortless.
- Customizable Forms: Tailor forms to specific needs by adding various fields and adjusting layout.
- Integration With Other Plugins And Services: Seamlessly connect with email marketing, CRM, or payment platforms.
- Conditional Logic: Create dynamic forms that change based on user input.
- Multi-Page Forms: Break lengthy forms into multiple pages for improved user experience.
- Advanced Form Fields: Utilize advanced fields like file upload, signature, or survey.
- User Management: Manage user submissions, entries, and registrations effectively.
- Payment Integration: Easily collect payments through integrated payment gateways.
- Advanced Notifications: Set up personalized notifications for form submissions.
- Customer Support: Access reliable customer support and extensive documentation for assistance.
Why Choose Gravity Forms For Advanced Form Building In WordPress?
When it comes to building advanced forms in WordPress, there are many options available. However, one plugin stands out from the rest: Gravity Forms. In this section, we will discuss the various reasons why Gravity Forms should be your go-to choice for creating complex and dynamic forms. From its user-friendly interface and customizable forms to its integration with other plugins and services, we’ll explore all the features that make Gravity Forms the ultimate form building solution for WordPress users.
1. Easy To Use
- Install and activate the Gravity Forms plugin on your WordPress website.
- Navigate to the plugin settings and configure basic options for easy form building.
- Create a new form by selecting the fields you want to include and arranging them in your preferred order.
- Customize the form fields to collect the specific information you need from your website visitors.
- Preview and test the form to ensure it functions correctly and meets your requirements.
2. Customizable Forms
- To create customizable forms using Gravity Forms:
- Access the form builder interface.
- Select and add fields from the available options.
- Customize field properties such as labels, placeholders, or default values.
- Utilize advanced settings for conditional logic, entry limits, or calculations.
- Incorporate CSS classes for personalized styling.
Consider exploring the various form templates for inspiration and efficiency. Experiment with different form layouts to find the best fit for your website’s design and functionality.
3. Integration With Other Plugins And Services
- Install WordPress and Gravity Forms on your website.
- Access the WordPress dashboard and navigate to the Plugins section.
- Click on ‘Add New’ and search for the desired plugin or service.
- Install and activate the chosen plugin or service.
- Once activated, go to the Gravity Forms settings and locate the ‘Integrations’ tab.
- Choose the plugin or service you want to integrate with and follow the setup instructions.
To seamlessly integrate with other plugins and services, make sure they are compatible with your current WordPress version and regularly update all installed plugins.
4. Conditional Logic
- Access the WordPress dashboard and navigate to the Gravity Forms plugin.
- Select the form where you want to apply conditional logic.
- Click on the ‘Settings’ tab and then ‘Conditional Logic’.
- Set your conditional rules based on user input or form field values.
- Save your settings and preview the form to ensure the functionality of the conditional logic.
In 1852, George Boole introduced the concept of conditional logic in mathematics, which later became a fundamental concept in programming and computer science.
5. Multi-Page Forms
- Create a new form in Gravity Forms by navigating to the Forms section in the WordPress dashboard.
- Add the necessary form fields for the first page of the multi-page form, such as personal details.
- Set up page breaks to divide the form into multiple sections, ensuring a user-friendly experience.
- Customize each page with specific fields and conditional logic based on user input.
- Implement progress indicators to guide users through the Multi-Page Forms.
- Enable users to review and edit previous sections before final submission.
6. Advanced Form Fields
- Click on the ‘Advanced Fields’ button in the form editor menu.
- Select the field type you want to add, such as ‘Survey’, ‘Poll’, or ‘Signature’.
- Configure the field settings according to your requirements.
- Save the form to apply the advanced field changes.
Gravity Forms introduced the feature of advanced form fields in response to user demand for more dynamic and interactive form elements. The addition of advanced fields provided users with a greater degree of customization and functionality, enhancing the overall form building experience.
7. User Management
- Create user accounts with specific user roles through the form.
- Set up user registration forms with custom fields for collecting user data.
- Enable user login and profile update capabilities within your WordPress site.
- Integrate user management plugins to extend the functionality of Gravity Forms for improved control over user management.
Utilize user management tools to streamline user interactions and enhance the functionality of your site.
8. Payment Integration
- Ensure the Gravity Forms plugin is installed and activated on your WordPress website.
- Create a new form or edit an existing one to include payment fields.
- Set up the payment integration with your preferred payment gateway, such as PayPal or Stripe.
- Configure the payment options, including currency, pricing, and any recurring payment settings.
- Test the payment functionality to ensure a seamless user experience.
For a smooth payment integration process, it is recommended to use secure and widely supported payment gateways like PayPal or Stripe. It is also important to thoroughly test the payment functionality before making the form live on your website to ensure a smooth user experience.
9. Advanced Notifications
- To set up advanced notifications, first access the WordPress dashboard and navigate to the ‘Forms’ section in Gravity Forms.
- Select the desired form for which you want to configure advanced notifications.
- Click on ‘Form Settings’ and then ‘Notifications’.
- From here, you can customize and manage notifications for various form events, such as form submissions, entry updates, or failed entries.
- Adjust the notification settings, including recipient email addresses, message content, and conditional logic based on form field values.
- Once you have configured the settings, save them and test the form to ensure that the advanced notifications are functioning correctly.
10. Customer Support
- Visit the official Gravity Forms website to access their comprehensive knowledge base and FAQs.
- Submit a support ticket for personalized assistance with technical issues or inquiries.
- Engage in the Gravity Forms user community forum to seek advice from experienced users.
- Explore video tutorials and webinars provided by Gravity Forms for in-depth guidance on utilizing the plugin.
- Consider purchasing priority support for expedited responses and enhanced assistance, as part of their excellent customer support services.
How To Use Gravity Forms For Advanced Form Building In WordPress?
If you’re looking to create advanced forms on your WordPress website, Gravity Forms is the go-to plugin. In this section, we will discuss how to use Gravity Forms for advanced form building in WordPress. We’ll cover the steps to install and activate the plugin, creating a new form, customizing form fields, setting up conditional logic, adding payment integration, configuring notifications, and finally, publishing the form on your website. By the end, you’ll have a thorough understanding of how to utilize Gravity Forms for your form building needs.
1. Install And Activate The Plugin
- Access the WordPress dashboard and go to the ‘Plugins’ section.
- Select ‘Add New’ and search for ‘Gravity Forms’.
- Click on ‘Install Now’ and then ‘Activate’.
Gravity Forms is a widely-used WordPress plugin renowned for its user-friendly interface and robust features, making it the go-to option for creating advanced forms.
2. Create A New Form
- Access your WordPress dashboard.
- Navigate to the ‘Forms’ section and select ‘Add New’ to generate a new form.
- Assign a name to your form and begin adding the necessary fields, including text fields, checkboxes, and dropdowns.
- Personalize the appearance and functionality of the form to your liking.
- Once the form is finished and ready for implementation on your website, save it.
3. Customize The Form Fields
- Click on the form field that you want to customize.
- Choose the ‘Advanced’ tab to access additional customization options.
- Modify the field label, description, or placeholder text to tailor it to your specific requirements.
- Adjust the field size, input type, and validation settings as needed.
- Utilize the ‘CSS Class Name’ option to apply custom styling to the form fields.
4. Set Up Conditional Logic
- Access the form builder within Gravity Forms.
- Choose the field where conditional logic is needed.
- Click on the Advanced tab in the field settings.
- Set Up Conditional Logic based on user behavior or input.
- Save the changes to apply the conditional logic to the form.
5. Add Payment Integration
- To add payment integration, access your WordPress dashboard and go to the ‘Forms’ section in Gravity Forms.
- Select the form that you want to integrate with payment.
- Click on ‘Settings’ and then ‘Form Settings’.
- Next, go to the ‘Payment’ tab and enable the payment settings for the form.
- Configure the payment gateway and options, including currency, pricing, and recurring payments.
- Once you have made all the necessary changes, save them and publish the form on your website with integrated payment functionality.
6. Configure Notifications
- Access your WordPress dashboard and go to the Gravity Forms plugin.
- Select the form you wish to configure notifications for.
- Navigate to the Form Settings and choose Notifications.
- Select the notification you want to configure or add a new one.
- Adjust the email and notification settings to meet your needs.
- Save any changes made.
7. Publish The Form On Your Website
- Access your WordPress admin panel.
- Find ‘Forms’ on the WordPress dashboard.
- Choose the desired form to publish.
- Select ‘Settings’ and then ‘Form Settings’ to configure the form’s details.
- After customization, save the changes and click ‘Preview’ to preview the form’s appearance on your website.
- If satisfied, click ‘Publish’ to make the form live on your website.