Attributes are used to describe the features of a product and help your customers easily find what they want.
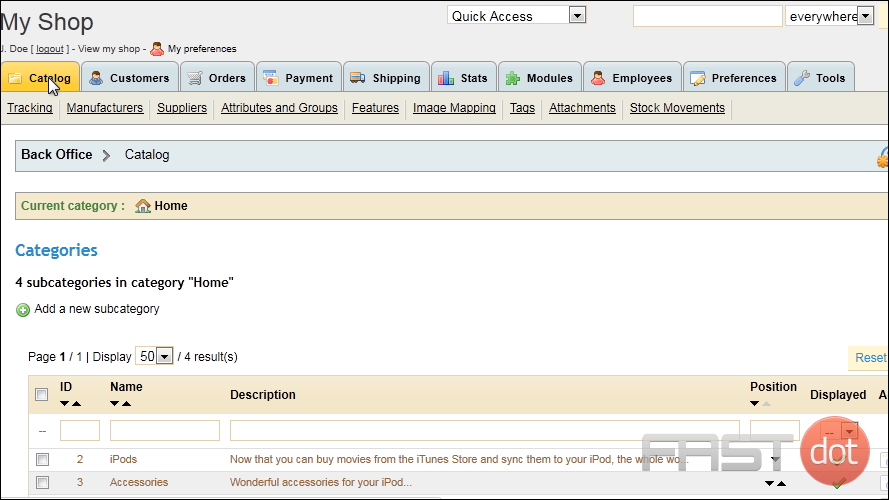
1) First, add an attribute group by going to Catalog.
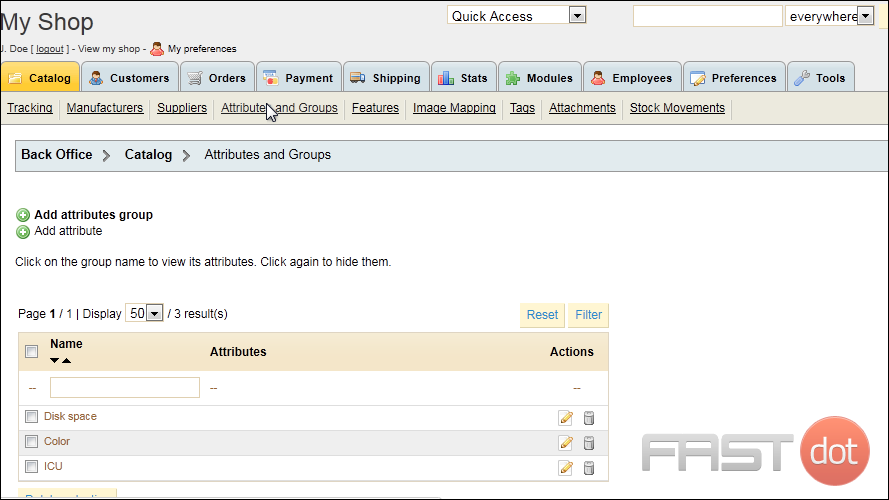
2) Then click Attributes and Groups.
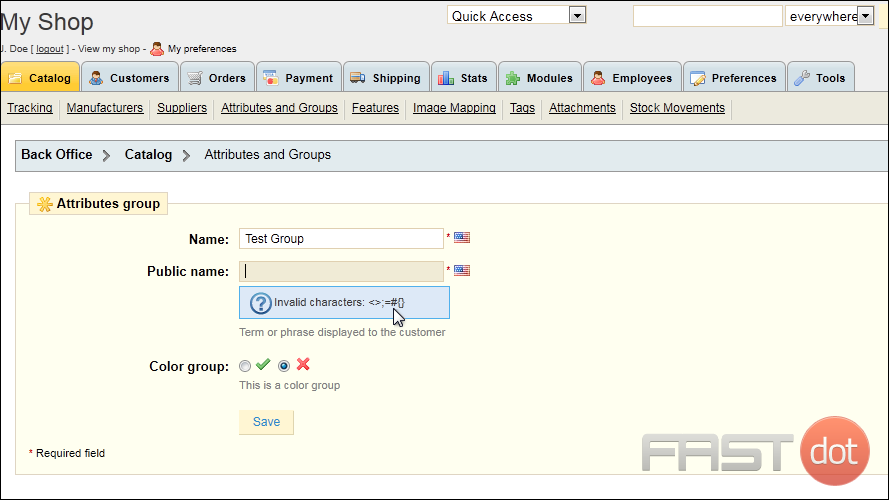
3) Click Add attributes group.
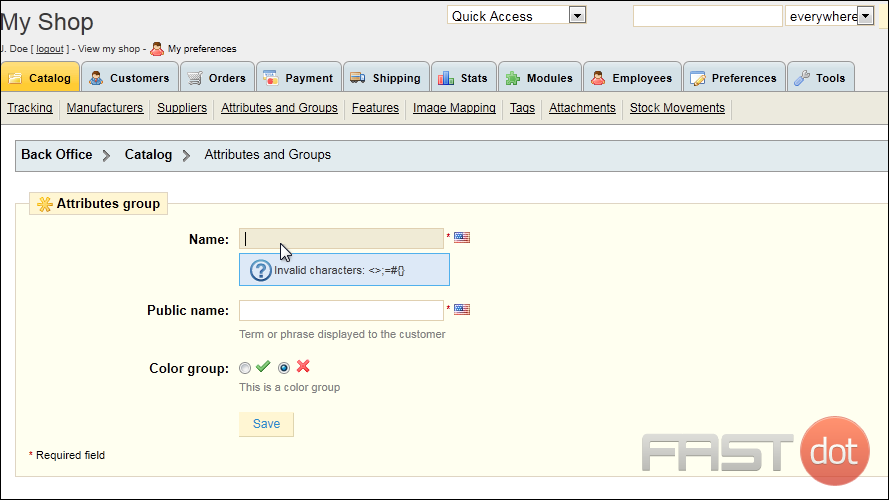
4) Type a Name for this group.
5) Type the Public Name which is what your customers will see.
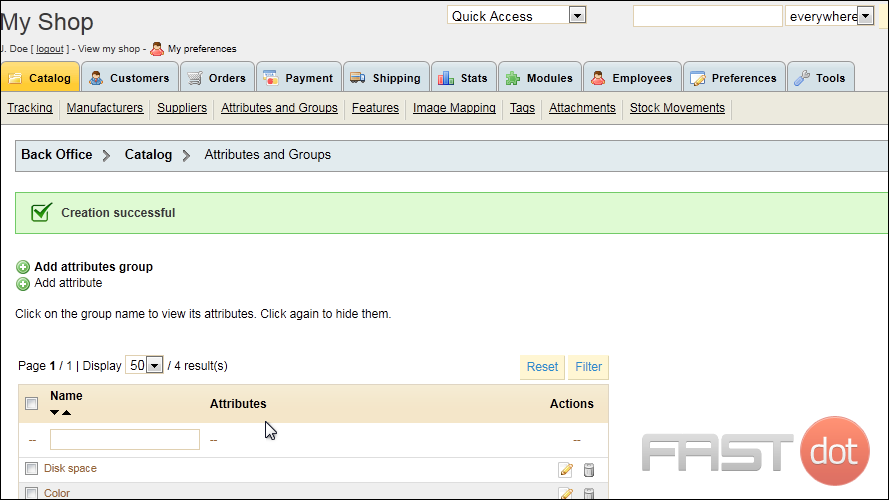
6) Click Save.
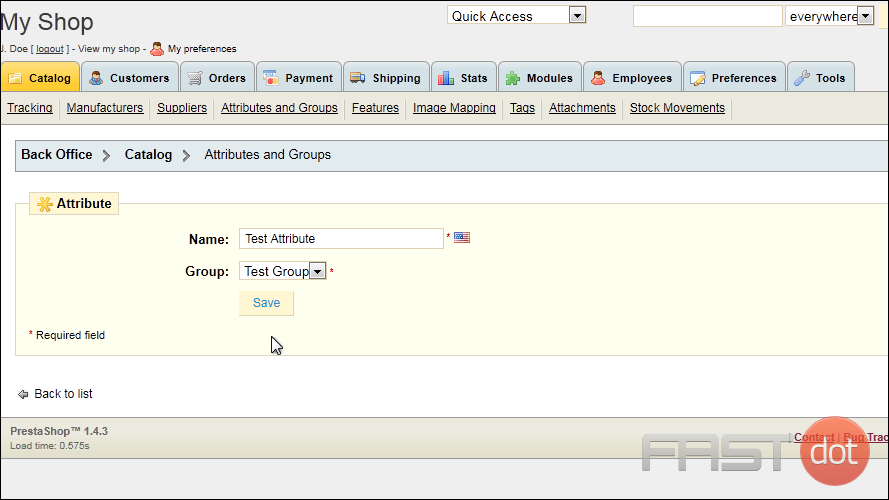
Now let’s create a new attribute for the group.
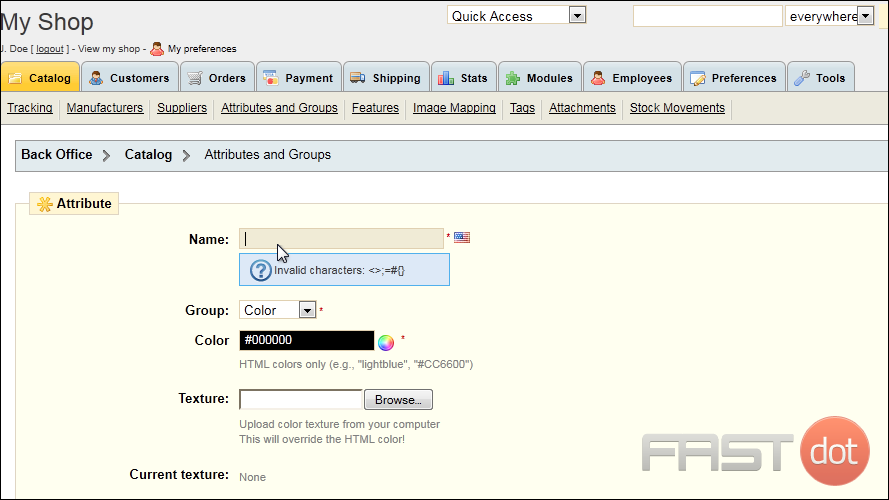
7) Click Add attribute.
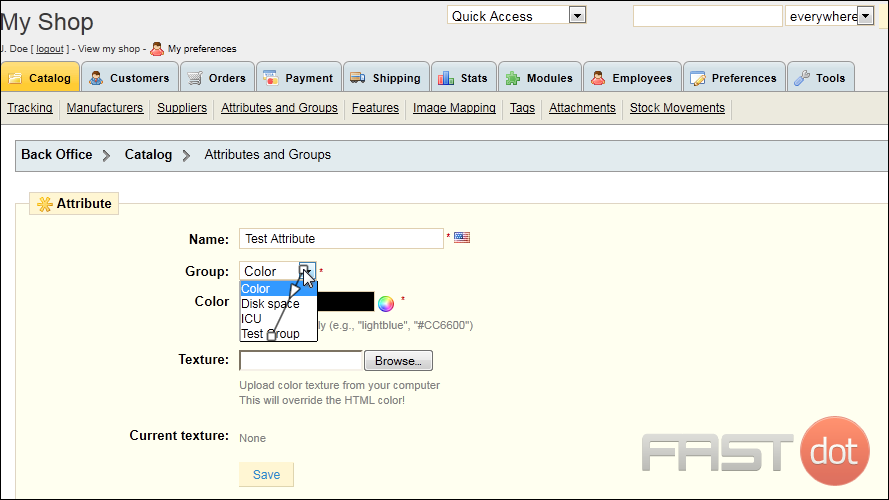
8) Type the attribute’s Name.
9) For the Attribute Group, select the new group we created.
10) Click Save.
Setting up product attributes in PrestaShop is essential for offering your customers different variations of a product, such as size, color, material, etc. Attributes can significantly enhance the shopping experience by providing clear options to your customers, potentially increasing sales. Here’s a step-by-step guide on how to set up product attributes in PrestaShop:
Step 1: Access the Back Office
First, log in to your PrestaShop back office by entering your credentials. This is the administrative panel where you manage your store.
- In the left sidebar of your back office, hover over or click on the “Catalog” menu to expand it.
- Click on the “Attributes & Features” option. This will take you to the page where you can manage all attributes and features for your products.
Step 3: Create a New Attribute
- On the “Attributes & Features” page, go to the “Attributes” tab.
- Click on the “Add new attribute” button (it might appear as a plus icon).
- Fill in the Attribute Information:
- Name: Enter a name for the attribute (e.g., Color, Size). This name will be displayed to customers.
- Public Name: Enter a public name for the attribute if it differs from the internal name. This is what your customers will see.
- Attribute Type: Choose the type of attribute you are creating (e.g., dropdown, radio buttons).
- Click “Save” or “Save and stay” to save the attribute. If you choose “Save and stay”, you can immediately start adding attribute values.
Step 4: Add Attribute Values
After creating an attribute, you need to add values to it (e.g., for a “Color” attribute, you might add “Red”, “Blue”, “Green”).
- After saving your attribute, you should be on the “Values” screen for that attribute. If not, click on “Add new value” within the attribute you’ve just created.
- Fill in the Value Information:
- Value: Enter the name of the value (e.g., Red).
- Attribute Group: This should already be set to the attribute you’re adding values to.
- Color or texture: If applicable, you can select a color or upload a texture image for the value. This is particularly useful for visually-oriented attributes like color.
- Click “Save” or “Save and then add another value” to continue adding more values to the attribute.
Step 5: Apply Attributes to Products
Now that you have your attributes and values set up, you need to apply them to your products.
- Navigate to “Catalog” > “Products” in the left sidebar.
- Select a product you want to add attributes to, or create a new product.
- Go to the “Combinations” tab in the product editor. This tab is where you configure the different combinations of attributes for the product.
- Use the “Product Combinations Generator” to quickly create combinations or add combinations manually by selecting attributes and values. You’ll also need to adjust quantities, prices, and other information for each combination.
- Save your product.
Additional Tips
- Organize Attributes: Keep your attributes organized and straightforward. Too many options can confuse customers.
- Attribute Impact: Consider the impact of attributes on your stock management and pricing strategy. Each combination can have its own SKU, price, and stock quantity.
- Images and Combinations: Assign specific images to combinations when relevant (e.g., a picture of the product in each color).
By carefully setting up product attributes in PrestaShop, you can offer a richer and more customized shopping experience for your customers, catering to a wider range of preferences and needs.

