Managing files and folders in WinSCP
This tutorial assumes you already have WinSCP running on your computer, and connected to a remote server.
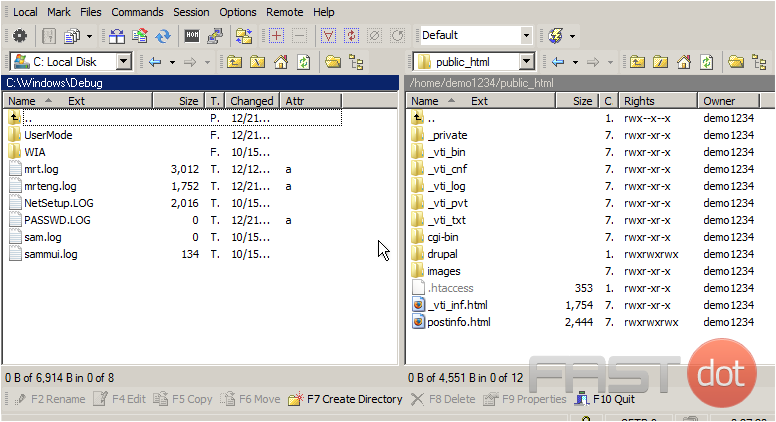
Now let’s learn how to manage our website files. The first thing we’re going to do is create a new folder (or directory) on the remote server.
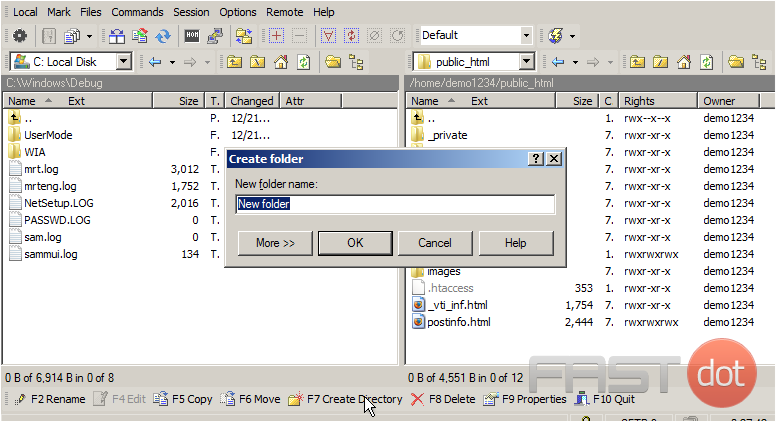
1) Click Create Directory.
2) Type the name of the new folder here, then click OK.
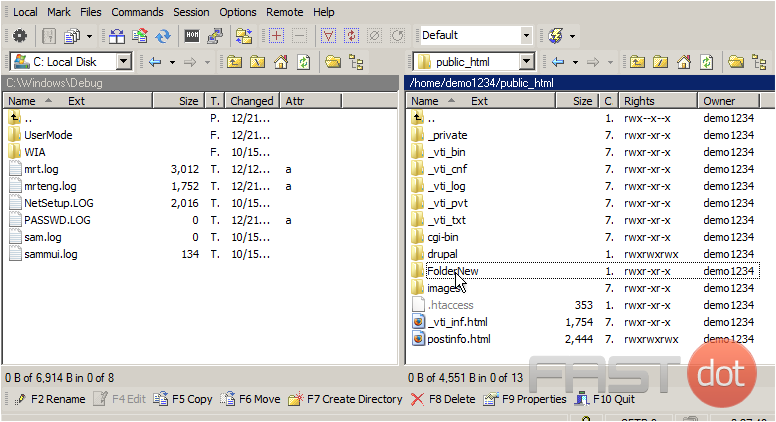
That’s all there is to it. Now let’s rename this new folder…
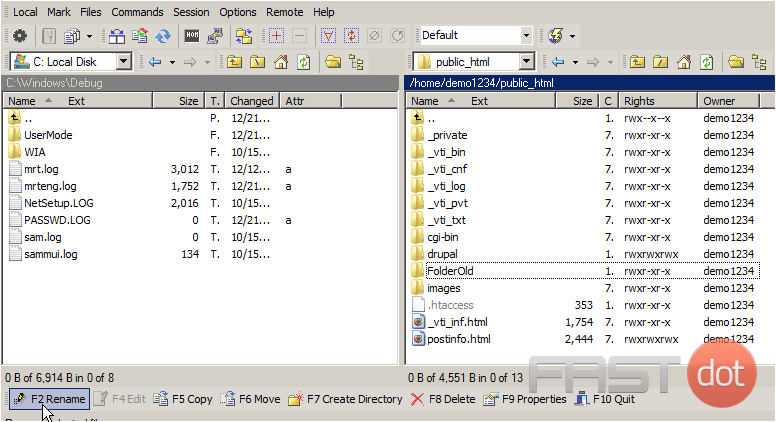
3) Select the folder to be renamed.
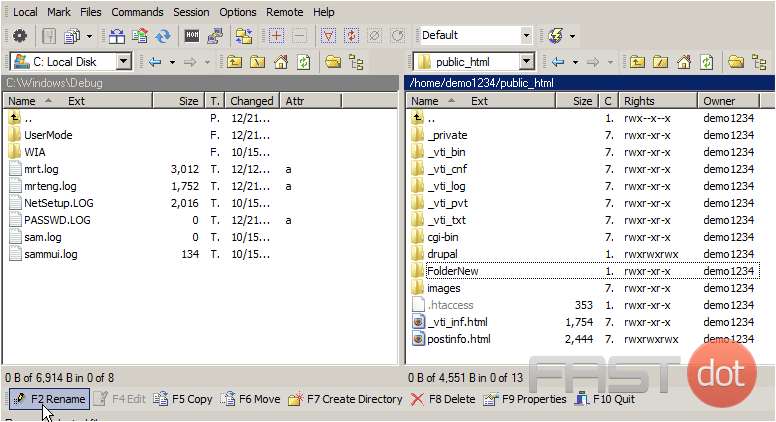
4) Click Rename.
5) Type the new name of the folder.
The new folder has been renamed. You can also rename files the same way as you rename folders.
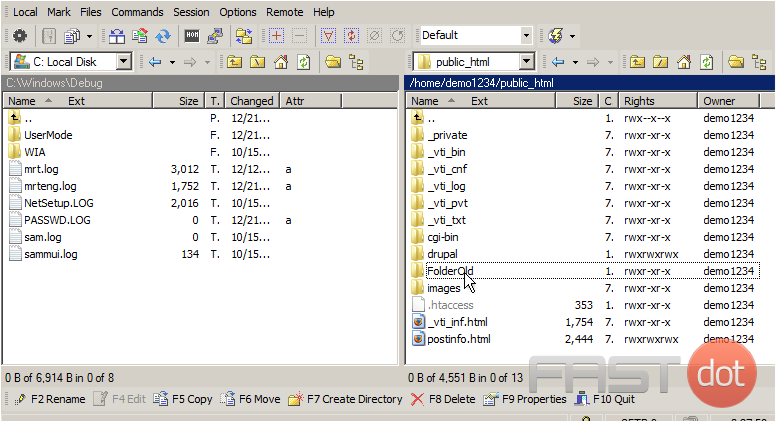
To delete a folder (or file) make sure it’s highlighted…
6) Select FolderOld.
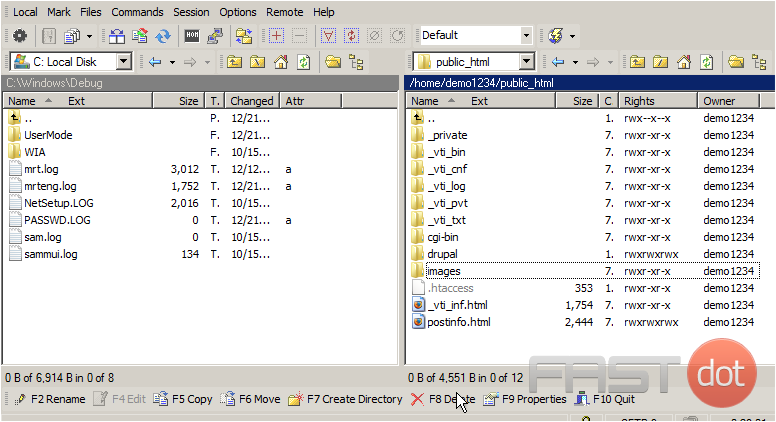
7) Then click Delete.
The folder we just created has been deleted.
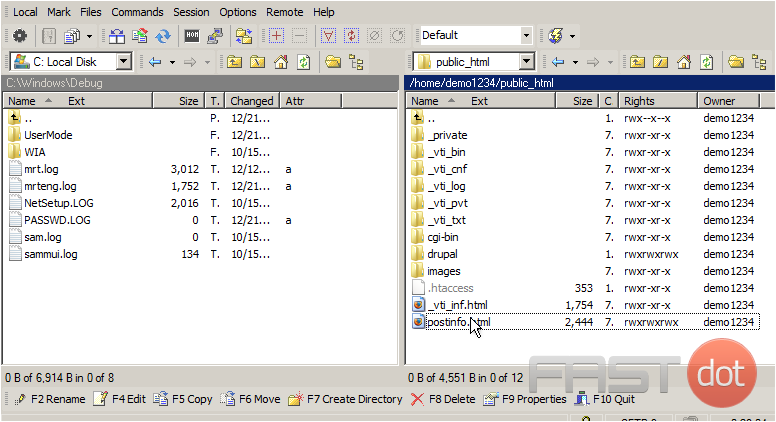
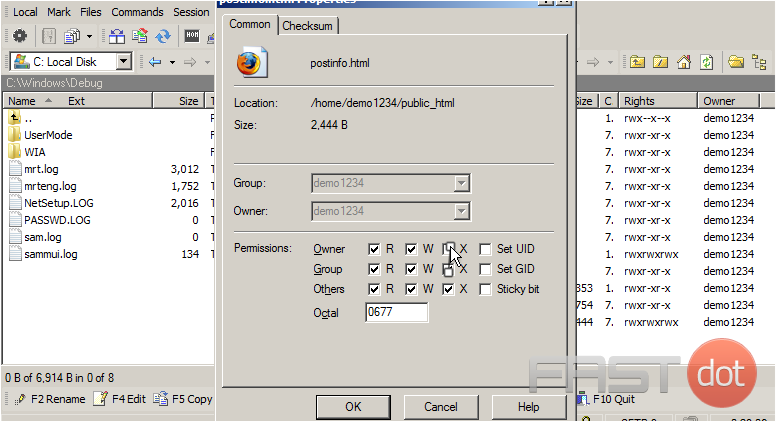
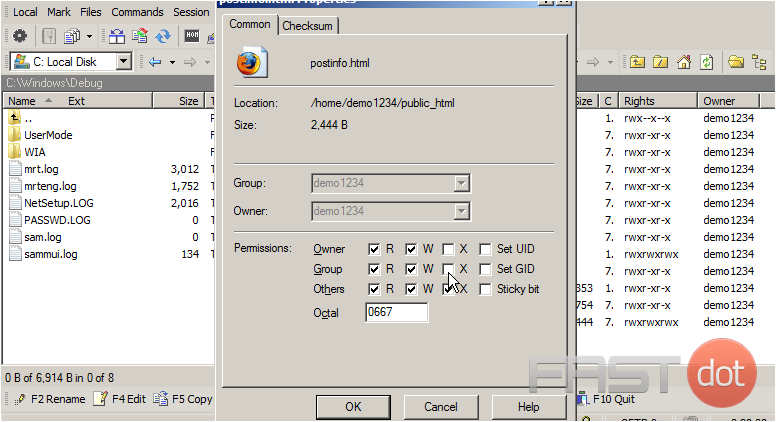
Now let’s learn how to change the permissions of a file.
8) Select postinfo.html. Then click Properties.
9) To change the file permissions, simply enter the new permissions value here by checking off the appropiate boxes below.
10) Click OK.
WinSCP is a popular SFTP (SSH File Transfer Protocol), SCP (Secure Copy Protocol), FTPS (FTP Secure), and FTP client for Windows, offering a graphical user interface to manage files and folders on a remote server. Its dual-pane interface allows users to drag and drop files between their local machine and the server, making file management straightforward and efficient. Here’s how to manage files and folders in WinSCP effectively:
Connecting to a Server
- Launch WinSCP and the Login window will appear.
- New Site: Fill in the connection details:
- File Protocol: Choose your protocol (e.g., SFTP, SCP, FTPS, FTP).
- Host Name: Enter your server’s IP address or domain name.
- Port Number: Enter the port number (default is 22 for SFTP/SCP, 21 for FTP/FTPS).
- User Name and Password: Enter your login credentials.
- Save: Optionally, click Save to save the session for future use, providing a name for the session.
- Login: Click Login to connect. You may receive a prompt to accept the host key; accept it to proceed.
- Navigating Directories: Use the directory tree on the left (local system) and right (remote system) or double-click on folders in the file panes to navigate through directories.
- Transferring Files: To transfer files or folders, you can drag them between the local and remote file panes. Alternatively, use the F5 key to copy files from the source to the target pane or F6 to move them.
- Creating New Folders: Right-click in the remote file pane and select New > Directory to create a new folder on the server. Provide a name for the folder and click OK.
- Renaming Files/Folders: Select a file or folder, right-click, and choose Rename. Enter the new name and press Enter.
- Deleting Files/Folders: Select the items to delete, right-click, and choose Delete. Confirm the deletion in the prompt.
- Editing Files: To edit a file, double-click it. WinSCP will download the file to a temporary location and open it in the default text editor. After saving changes in the editor, WinSCP will automatically upload the file back to the server.
Synchronizing Directories
WinSCP can synchronize contents between your local and remote directories, ensuring both locations have the latest versions of files.
- Navigate to the directories you want to synchronize.
- Go to Commands > Synchronize.
- Configure your synchronization settings (e.g., local to remote, remote to local, or bidirectional) and click OK.
Setting Up Advanced Features
- Automated Scripting: WinSCP supports scripting and command-line operations, allowing for automation of file transfer tasks.
- Session Management: Save frequently accessed servers as sessions with predefined settings for quick access.
- Security: Utilize SSH keys for more secure authentication when connecting via SFTP or SCP protocols.
- Preferences: Customize preferences such as UI themes, default editors, and transfer settings by going to Options > Preferences.
Tips for Efficient Management
- Use Keyboard Shortcuts: Familiarize yourself with WinSCP’s keyboard shortcuts for faster file operations.
- Queue Operations: Take advantage of the transfer queue to manage multiple ongoing operations.
- Background Transfers: Enable background transfers for large files to continue working without interruption.
- Log Files: Enable logging (under Preferences > Logging) to keep track of your file operations for troubleshooting or record-keeping purposes.
WinSCP combines powerful features with an intuitive interface, making it an excellent tool for managing files and folders on remote servers. Whether you’re a web developer, system administrator, or just need to transfer files securely, WinSCP offers a comprehensive set of functionalities to streamline your workflow.

