This tutorial assumes you already have WS_FTP and have it running on your computer, but not connected to another server.
Now let’s learn how to upload or transfer files from our computer to a remote server.
1) Click Open a Remote Connection.
 Click Open a Remote Connection.")
2) Select the site we want to connect to, then click Connect.
 Select the site we want to connect to, then click Connect.")
That’s it! We’ve successfully established an FTP connection with Demo345.com, and now have two windows open…. our local computer files are displayed in the window on the left, and our remote server files in Demo345.com are displayed in the window here on the right.

3) Let’s navigate to the public_html folder. It is in here that we want to upload some files.
 Let's navigate to the public_html folder. It is in here that we want to upload some files.")
4) Select the files we want to upload here in our local computer window. Hold down the CTRL key to select multiple files for uploading.
 Select the files we want to upload here in our local computer window. Hold down the CTRL key to select multiple files for uploading.")
5) When ready, click the Upload icon here to start transferring the files to our remote server.
 When ready, click the Upload icon here to start transferring the files to our remote server.")
WS_FTP (short for Web Secure File Transfer Protocol) is a software program that facilitates the secure transfer of files between your local computer and a server on the internet. It’s a popular choice among website developers, digital agencies, and server administrators for uploading files to web hosting accounts due to its robust security features, including 256-bit AES encryption, SSH transfers, and SSL/TLS connections. Here’s a detailed guide on how to upload files using WS_FTP, ensuring that your data is securely transferred to your server.
Getting Started with WS_FTP
Before you begin, ensure you have the WS_FTP client installed on your computer. If not, download it from the official website and follow the installation instructions. You will also need the following details from your hosting provider:
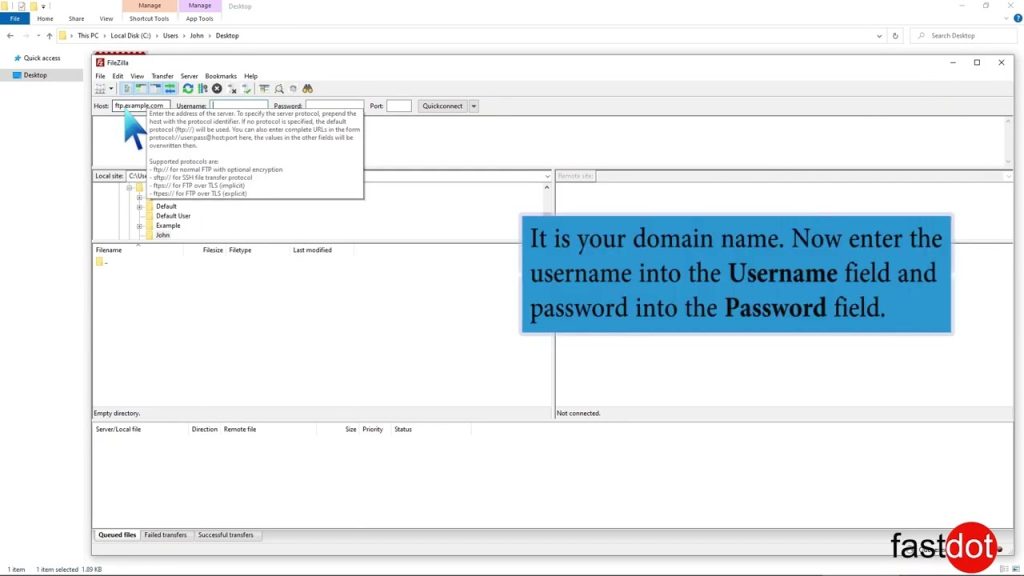
- FTP server address (e.g., ftp.yourdomain.com)
- Username
- Password
- Port (typically 21 for FTP and 22 for SFTP)
Step 1: Launch WS_FTP and Create a New Connection
- Open WS_FTP: Start the WS_FTP program on your computer.
- Create a New Site: Upon launching WS_FTP, you’ll see the Site Manager. Click on the “Create Site” button to set up a new connection to your server.
- Enter Connection Details: In the new site wizard, you’ll be prompted to enter the details of your FTP account.
- Site Name: Give your site a name. This is just for reference within WS_FTP.
- Server Address: Enter the FTP server address provided by your hosting company.
- Logon Type: Choose “Normal” which will prompt you to enter your username and password.
- User Name: Enter your FTP username.
- Password: Enter your FTP password.
- Advanced Options (if necessary): Click on the “Advanced” button to configure additional settings like the port number (if it’s not the default FTP port 21 or SFTP port 22), transfer mode (Active or Passive), and encryption type. Passive mode is recommended for most users behind a router or firewall.
- Save and Connect: After entering your details, click “OK” or “Connect” to save your site configuration and establish the connection to your server.
Once connected, you will see two panes in the WS_FTP window:
- The left pane represents your local computer. Navigate to the folder where your files are stored.
- The right pane represents your remote server. Navigate to the directory where you want to upload your files.
Step 3: Uploading Files
- Select Files/Folders to Upload: In the left pane, browse to the location on your local computer where your files are located. Select the files or folders you wish to upload.
- Upload the Files: You can upload the files in several ways:
- Drag and drop the selected files from the left pane (local) to the right pane (remote).
- Right-click on the selected files and choose “Upload.”
- Use the transfer arrow buttons located between the two panes.
- Monitor the Transfer: The bottom section of the WS_FTP window will show the progress of your file transfers. Wait for the transfer to complete. The duration will depend on the size of your files and your internet connection speed.
Step 4: Verify Upload
Once the upload process is complete, you can verify that your files have been successfully transferred by browsing the remote directory in the right pane of WS_FTP. Ensure all files and directories have been uploaded as intended.
Troubleshooting Common Issues
- Connection Failures: If you encounter issues connecting to your server, verify your FTP details, check your internet connection, and ensure your server is not experiencing downtime.
- Transfer Failures: In case of transfer failures, check for sufficient storage space on your server and ensure you have permissions to upload to the specified directory. Switching between Active and Passive modes can also resolve transfer issues.
Conclusion
WS_FTP provides a secure and reliable means to upload files to your server, making it an essential tool for website development and management. By following this guide, you can ensure that your files are securely uploaded to your server, providing the foundation for your online presence. Always ensure that your WS_FTP and server credentials are kept secure to prevent unauthorized access to your data.