Learning about the skeleton directory in WHM
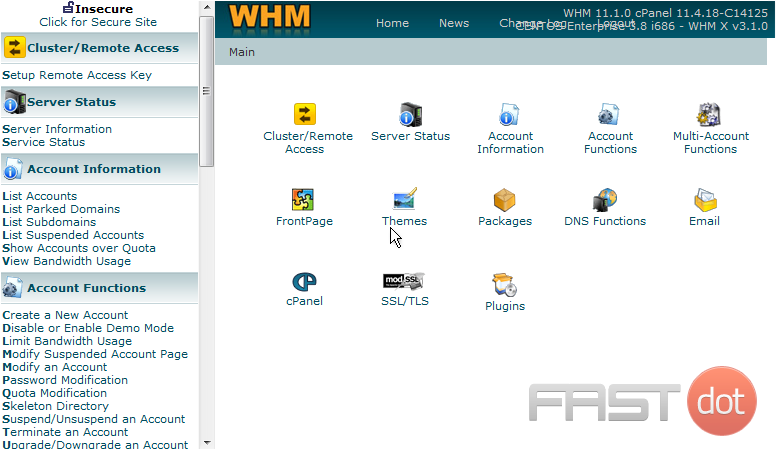
This demo assumes you’ve already logged in to WebHost Manager (WHM)
Now let’s learn about the Skeleton Directory
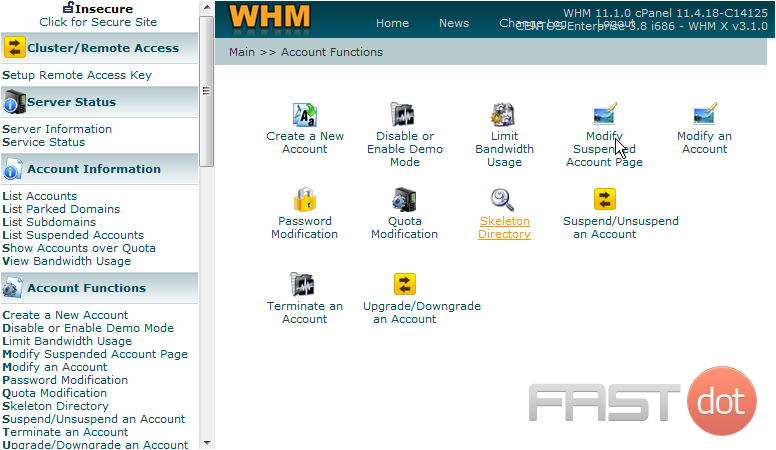
1) Click the Account Functions link
2) Then click the Skeleton Directory link
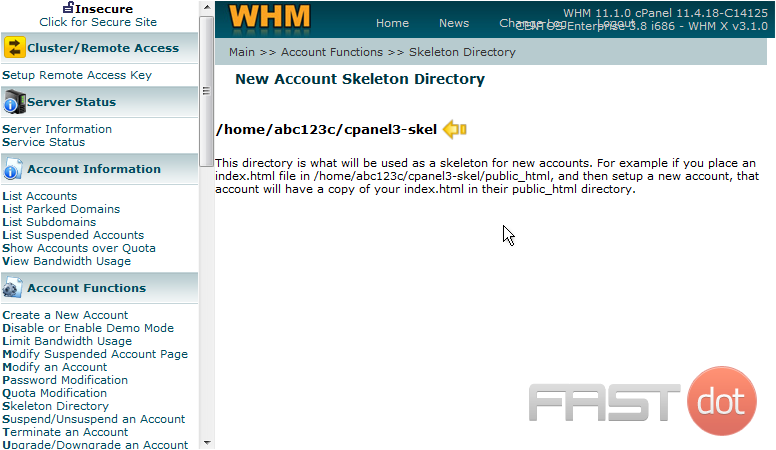
The skeleton directory is where you put a temporary home page for all accounts you create in WHM. The temporary home page is what visitors will see in their browsers, until a new home page is uploaded to the account. In this tutorial, the reseller’s account’s main username is abc123c, so that’s where the skeleton directory is located (see here)
3) To change the temporary (or default) home page, simply upload a new page to the cpanel3-skel directory in the location shown above, using either an FTP program or the File Manager tool in your main account’s CPanel
The skeleton directory in WHM (WebHost Manager) is a powerful feature used by web hosting providers and resellers to create a default structure and content for new cPanel accounts. This directory acts as a template for the home directories of all new accounts created under a WHM reseller or root account. The content placed within the skeleton directory is automatically copied to each new cPanel account’s home directory at the time of account creation. This feature is particularly useful for deploying a consistent set of files, such as a default index page, custom error pages, or predefined scripts, across all hosted websites.
Understanding the Skeleton Directory
When you create a new cPanel account through WHM, the system copies the contents of the skeleton directory into the new account’s home directory. This means any files or folders you’ve placed in the skeleton directory will appear in the home directory of every new cPanel account you create.
The path to the skeleton directory depends on the type of WHM account you have:
- For Root Users: The path is typically
/root/cpanel3-skel. - For Reseller Accounts: The path is
/home/resellerusername/cpanel3-skel, whereresellerusernameis your reseller account username.
How to Use the Skeleton Directory
- Access the Server via SSH or File Manager: To add content to the skeleton directory, you can either connect to your server using SSH (Secure Shell) or use the File Manager in WHM if available. Using SSH often provides more flexibility for file management tasks.
- Navigate to the Skeleton Directory: Once connected, navigate to the appropriate skeleton directory based on your account type (root or reseller).
- Add or Modify Content: Place any files or folders you want to be present in the home directories of new accounts. This could include:
- A custom
index.htmlorindex.phpfile to replace the default cPanel index page. - Custom error documents (e.g.,
404.htmlfor “Page Not Found” errors). - Predefined scripts or configuration files that you want available to all users by default.
- A custom
- Create New cPanel Accounts: After setting up the skeleton directory, any new cPanel accounts created through WHM will include the files and folders you’ve placed in the skeleton directory. Existing accounts are not affected by changes to the skeleton directory.
Best Practices for Using the Skeleton Directory
- Keep It Light: Avoid placing large files or a significant number of files in the skeleton directory, as this can increase the time required to create new accounts and consume unnecessary disk space.
- Security: Ensure that any scripts or applications included in the skeleton directory are secure and up to date to prevent potential vulnerabilities.
- Customization: Use the skeleton directory to enhance the onboarding experience for your users. A custom welcome message or instructions for getting started can make a big difference.
- Testing: Regularly test the creation of new cPanel accounts to ensure that the contents of the skeleton directory are correctly copied and function as intended.
The skeleton directory in WHM is a feature that, when used effectively, can significantly streamline the process of setting up new cPanel accounts, ensuring a consistent and customized experience for end-users right from the start. Whether you’re deploying a custom landing page or setting up essential scripts for all users, the skeleton directory is an essential tool in the arsenal of any web hosting provider or reseller.


