How to modify an account’s quota in WHM
This demo assumes you’ve already logged in to WebHost Manager (WHM)
Now let’s learn how to change the amount of storage space allowed (quota) in a specific hosting account
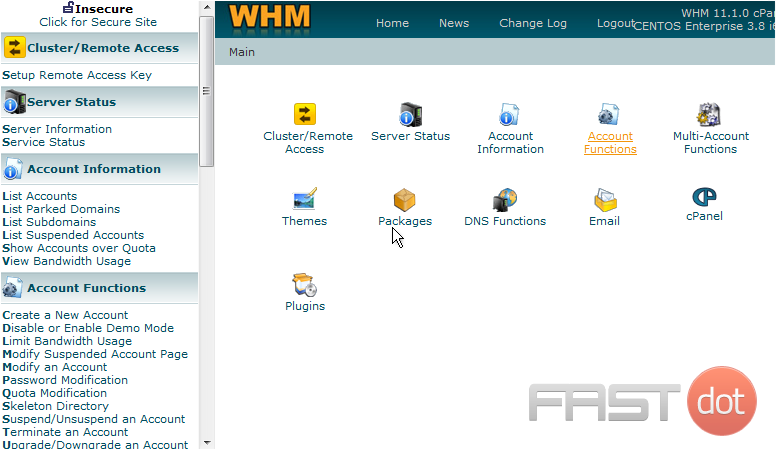
1) Click the Account Functions link
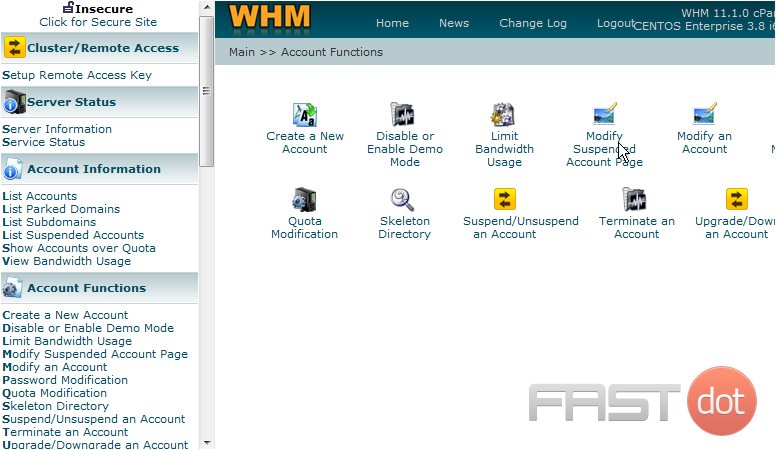
2) Then click the Quota Modification link
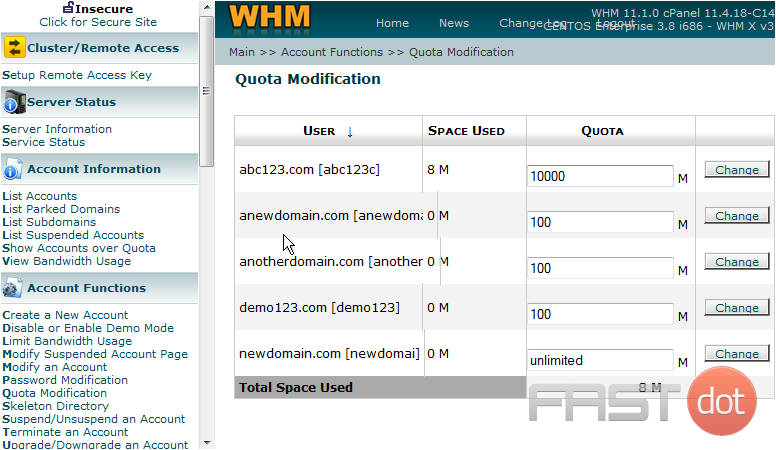
This page lists all the accounts in your WHM, and the total amount of storage space used by each one, and the total
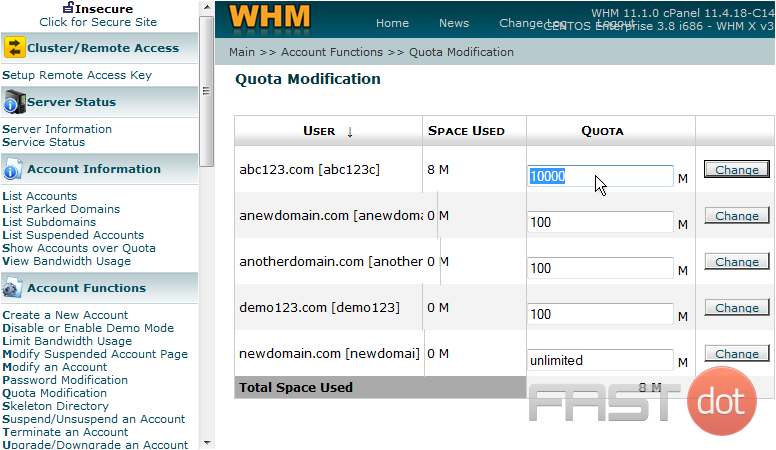
3) Let’s go ahead and change the quota for the abc123.com hosting account
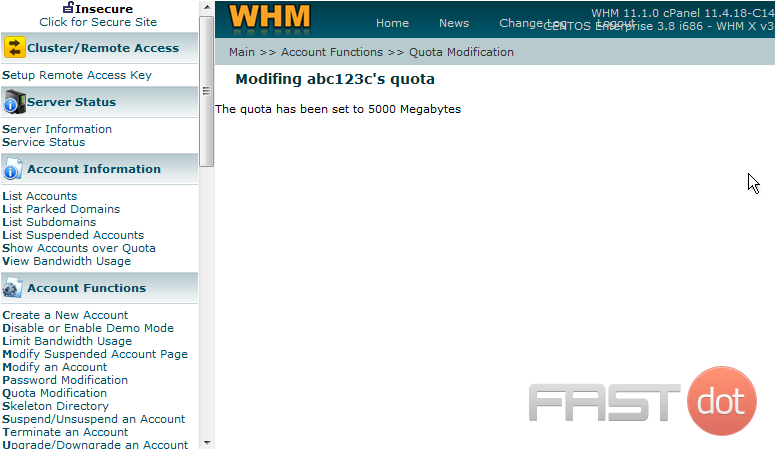
4) Then click the Change button
That’s it! We’ve just modified the account abc123.com so it can now use up to 5000 Megabytes of storage space. You may want to use this feature if customers upgrade their accounts or if they’re running low on available storage space
Modifying an account’s disk space quota in WHM (WebHost Manager) is an essential task for web hosting providers and server administrators. It allows you to manage how much disk space each hosting account on your server can use, ensuring that no single account consumes more resources than allocated. This can help maintain server performance and prevent a single account from using all available disk space. Here’s a step-by-step guide on how to modify an account’s quota in WHM:
Step 1: Log into WHM
- Access WHM: Open your web browser and navigate to your WHM login page. This is typically accessed through a URL like
https://yourserverIP:2087orhttps://yourdomain.com/whm. - Enter Credentials: Log in with your root or reseller credentials.
Step 2: Locate the Modify an Account Option
- Search for the Option: Once logged in, use the search bar located at the top left of the WHM interface and start typing “Modify an Account.” Click on the “Modify an Account” option when it appears in the search results.
Step 3: Select the Account
- Choose the Account: You will see a list of all cPanel accounts on your server. Find the account whose disk space quota you wish to modify. You can use the search function to quickly locate the account by domain name or username.
- Modify the Account: Click the “Modify” button next to the account you want to edit.
Step 4: Modify the Disk Space Quota
- Find the Quota Setting: On the account modification page, scroll down until you find the “Disk Space Quota” or simply “Quota” field.
- Set the New Quota: Enter the new disk space limit for the account in megabytes (MB). If you want to provide unlimited disk space for this account, you can enter “unlimited” or select the unlimited option if available.
- Review Other Settings: While you’re here, this is a good opportunity to review and adjust any other settings as needed for the account.
Step 5: Save Changes
- Save: After setting the new quota, scroll down to the bottom of the page and click “Save” or “Modify.” WHM will process the change, and a confirmation message will appear indicating that the account’s quota has been updated.
Important Considerations
- Account Performance: Be mindful of how quota changes might affect the performance and reliability of the account’s websites. Running out of disk space can lead to website errors and email delivery issues.
- Server Resources: Ensure that your server has enough disk space to accommodate the increased quotas for all accounts. Regularly monitor server disk usage to prevent issues.
- Communicate Changes: If you’re managing accounts for clients, inform them of any quota changes, especially if their account is nearing its limit. This can help prevent service interruptions.
Modifying an account’s disk space quota in WHM allows for flexible management of server resources, ensuring that all accounts have access to the disk space they need while preventing any single account from monopolizing disk resources. Regularly reviewing and adjusting account quotas as necessary can help maintain optimal server performance and customer satisfaction.

