How to setup a cron job in cPanel
This demo assumes you’ve already logged in to cPanel
Now let’s learn how to setup a cron job
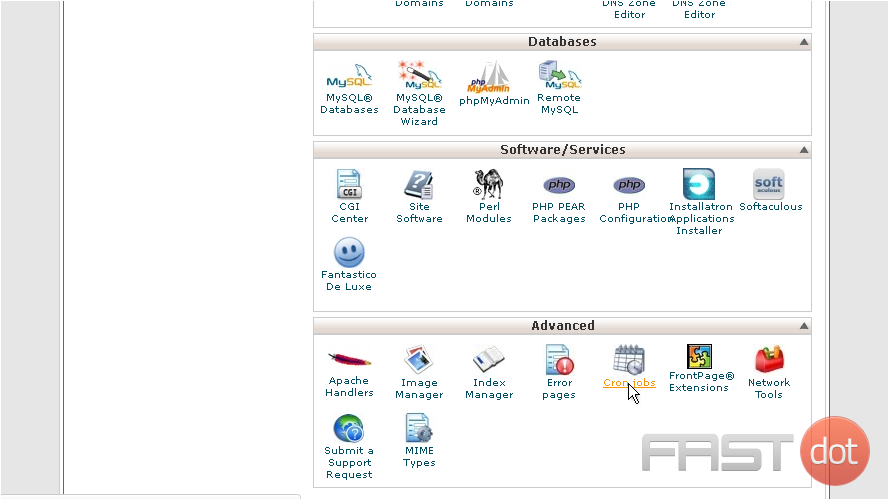
1) Click the Cron Jobs icon
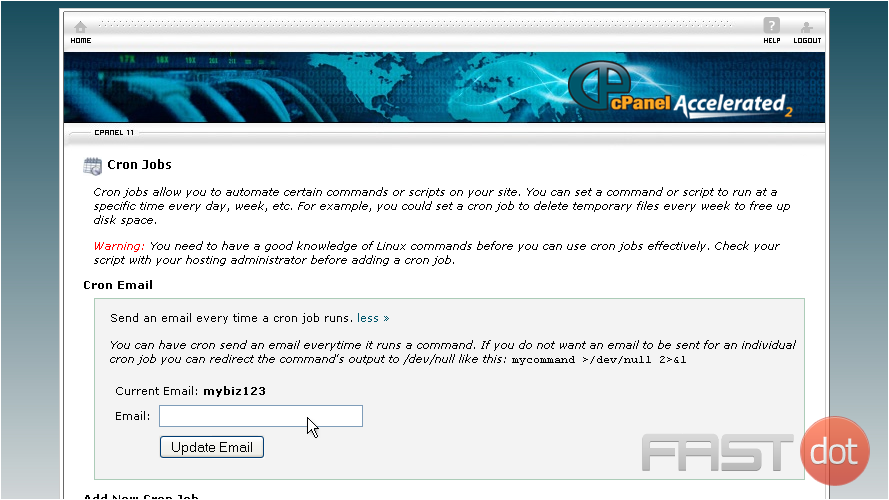
2) Enter the email address where you want the cron job results sent after each time it runs
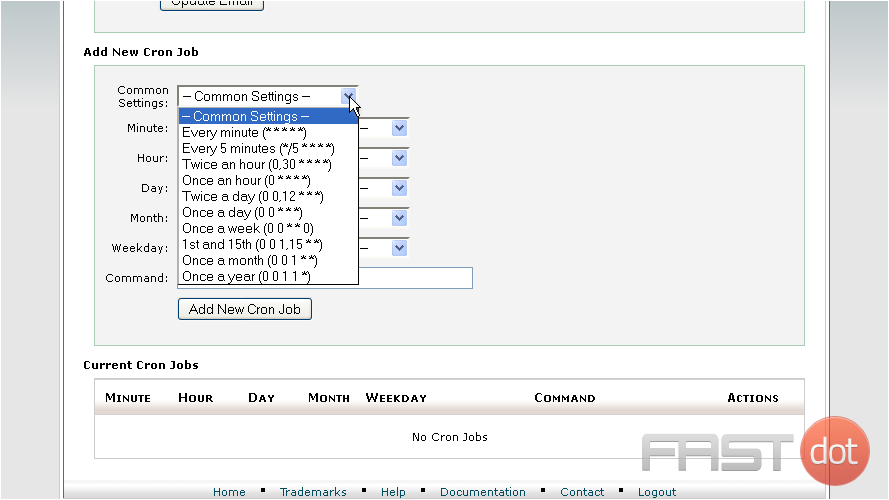
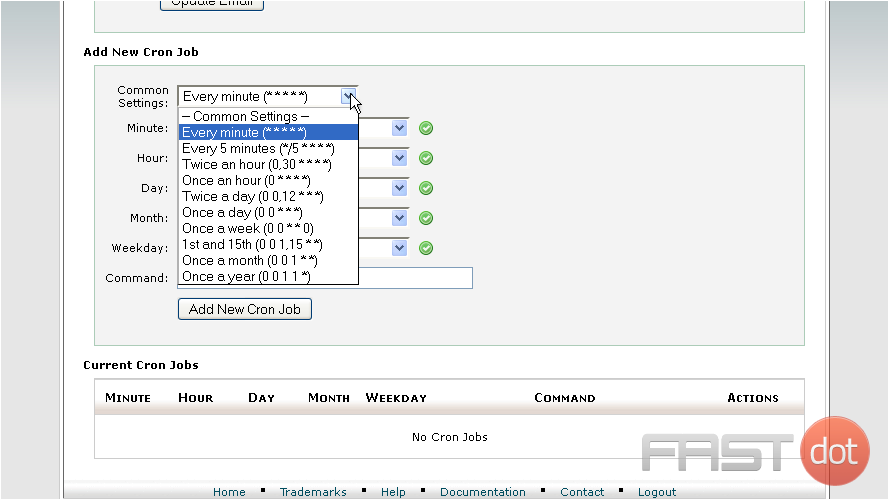
3) Now you have to define exactly when and how often you want the cron job to run. This is made easier by using one of the pre-defined or common settings
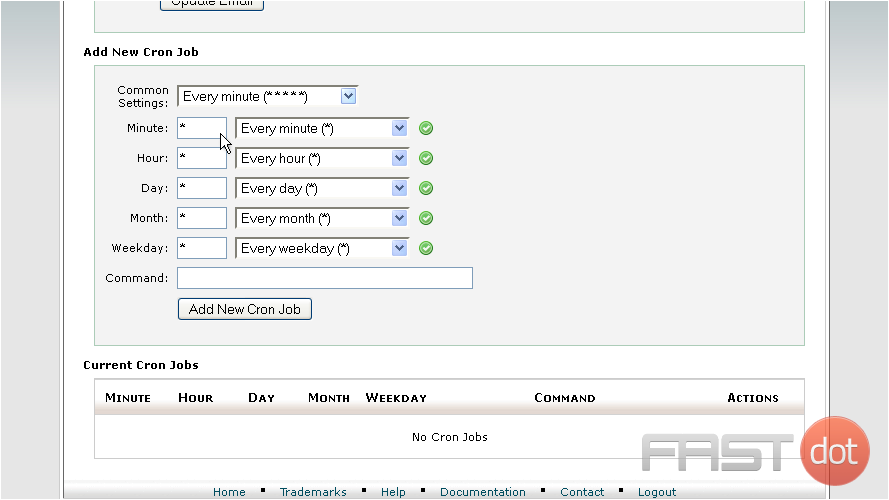
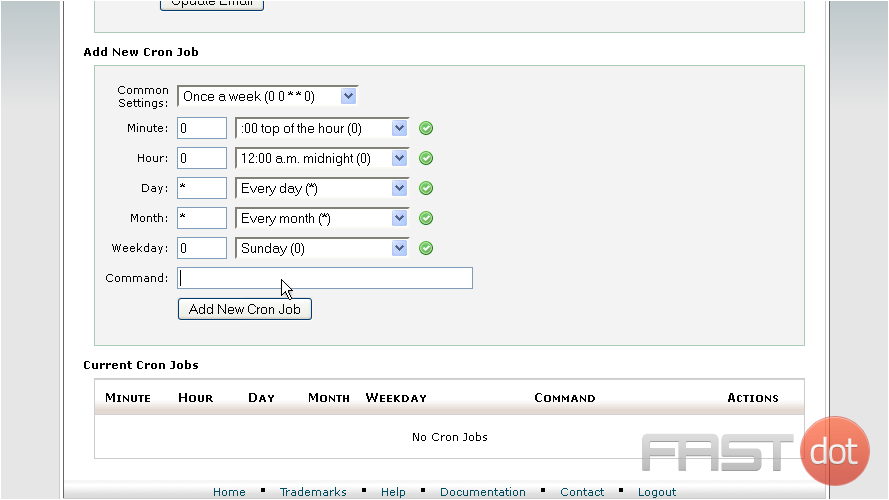
Notice that by choosing a common setting, all fields are filled in automatically. This also helps you understand what each field means
4) Let’s choose Once a week
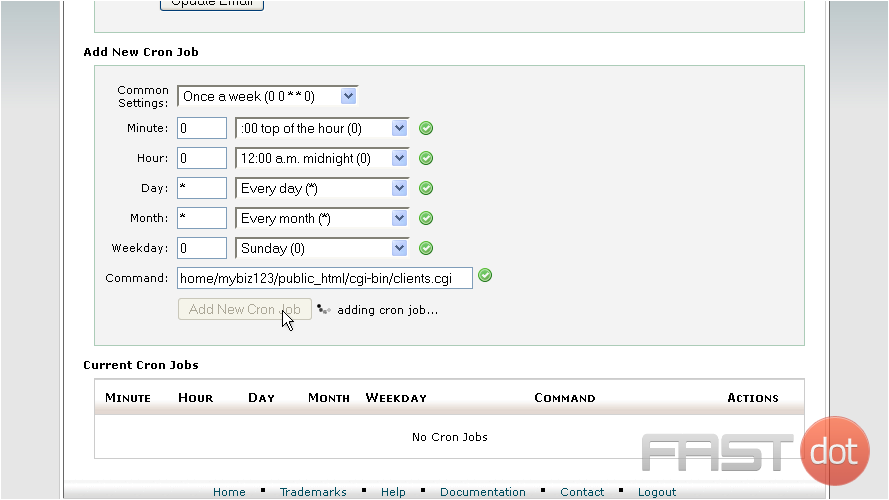
5) Next, enter the command of the script you want to run, including the path (from root)
6) When ready, click Add New Cron Job
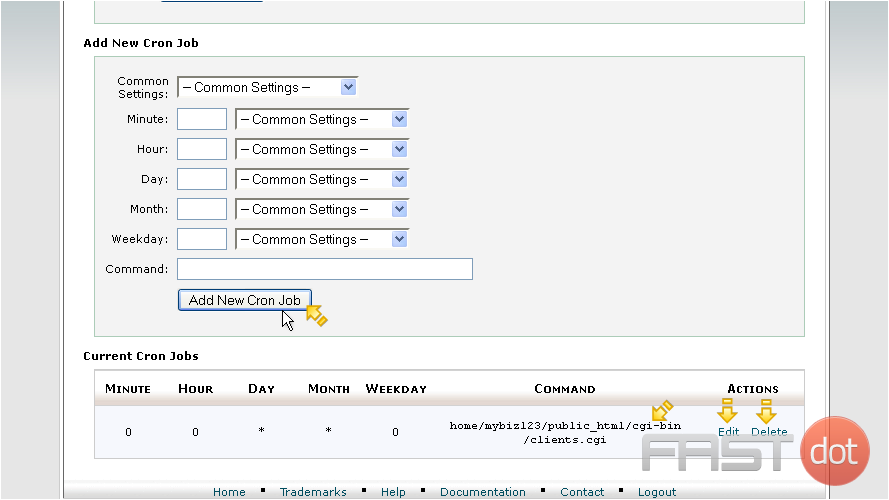
That’s it! The cron job has been set as you can see here. You can create additional cron jobs, and edit or delete existing ones
Setting up a cron job in cPanel allows you to automate repetitive tasks on your hosting account, ensuring they run at intervals you specify without manual intervention. Cron jobs can be used for a wide range of purposes, from sending out email reminders to backing up databases. Here’s a step-by-step guide on how to set up a cron job in cPanel:
Step 1: Log into cPanel
Access your cPanel account by navigating to your website’s cPanel login URL, which typically looks like http://yourdomain.com/cpanel or https://yourdomain.com:2083. Enter your username and password to log in.
Step 2: Find the Cron Jobs Section
Once logged in, look for the “Cron Jobs” section. You can find it by either scrolling through the cPanel dashboard or using the search bar at the top of the page.
Step 3: Enter the Email Address (Optional)
Before setting up a cron job, you can specify an email address where you want the output of the cron job to be sent. This is useful for monitoring your cron jobs or debugging them if they’re not working as expected. In the “Cron Email” section, enter the email address where you want to receive notifications, then click the “Update Email” button.
Step 4: Add a New Cron Job
Scroll to the “Add New Cron Job” section. Here, you will specify how often you want the cron job to run and what command you want it to execute.
Common Settings
For the timing of the cron job, cPanel provides several common settings (like once per hour or once per day) in a dropdown menu for ease of use. You can select one of these presets if it matches your needs.
Custom Timing
If you need a specific timing, use the individual time interval fields provided:
- Minute: Enter the minute of the hour (0-59) you want the job to run.
- Hour: Enter the hour of the day (0-23) you want the job to run.
- Day: Enter the day of the month (1-31) you want the job to run.
- Month: Enter the month of the year (1-12) you want the job to run.
- Weekday: Enter the day of the week (0-6) you want the job to run, where 0 is Sunday.
Step 5: Specify the Command
In the “Command” field, enter the command you want the cron job to execute. This command should be the exact command you would run in the terminal to perform the task you’re automating. For example, to run a PHP script located in your root directory, the command might look like this:
/usr/local/bin/php /home/yourusername/public_html/yourscript.php
Replace /home/yourusername/public_html/yourscript.php with the actual path to your script. The path to PHP (/usr/local/bin/php) might vary based on server configuration, so check with your hosting provider if you’re not sure.
Step 6: Add the Cron Job
Once you’ve set your timing and entered the command, click the “Add New Cron Job” button. Your cron job is now scheduled and will run at the intervals you specified.
Step 7: Manage Cron Jobs
After adding a cron job, you can view, edit, or delete it in the “Current Cron Jobs” section. Here, all active cron jobs are listed along with their timing and commands. Use the “Edit” or “Delete” options as needed to manage your jobs.
Conclusion
Setting up a cron job in cPanel is a straightforward process that can greatly enhance the automation and management of your website or application. By following these steps, you can ensure your scheduled tasks run efficiently and reliably, without needing to manually kick them off each time.

