- 1
- 2 How to Create Responsive Forms in WordPress with Ninja Forms?
- 3 Key Takeaways:
- 4 What Is Ninja Forms?
- 5 Why Use Ninja Forms for WordPress?
- 6 How to Install and Set Up Ninja Forms in WordPress?
- 7 How to Create a Form with Ninja Forms?
- 8 How to Make Your Forms Responsive?
- 9 Tips for Creating Effective and User-Friendly Forms
How to Create Responsive Forms in WordPress with Ninja Forms?
Ninja Forms is a popular form builder plugin for WordPress that allows users to easily create and customize responsive forms for their website. It offers a user-friendly interface and a variety of customization options, making it a top choice for creating forms on WordPress.
There are many reasons why Ninja Forms is a preferred form builder for WordPress. Its ease of use, flexibility, and integrations with other tools are just a few of the many advantages. In fact, according to a study by CodeinWP, Ninja Forms is the second most popular form builder for WordPress, with over 1 million active installs.
If you’re new to Ninja Forms and want to learn how to create responsive forms for your WordPress site, keep reading. We’ll guide you through the process step by step, so you can start creating effective and user-friendly forms in no time.
First, you’ll need to install and set up the Ninja Forms plugin on your WordPress site. This can be done easily by going to the Plugins section of your WordPress dashboard and clicking on “Add New.” Search for “Ninja Forms” and click on “Install Now” to install the plugin. Once it’s installed, click on “Activate” to activate the plugin.
To create a form with Ninja Forms, simply go to the “Forms” section in your WordPress dashboard and click on “Add New.” You’ll then be prompted to choose a form template or create a form from scratch. Once you’ve selected a template, you can add and edit fields, configure form settings, and customize the design of your form.
One of the key features of Ninja Forms is its ability to create responsive forms. This means that your forms will automatically adjust and look great on all devices, including desktops, tablets, and smartphones. To make your forms responsive, you can either use the built-in responsive options or add custom CSS.
To ensure that your forms are effective and user-friendly, here are a few tips to keep in mind:
- Keep it simple: Avoid overloading your forms with too many questions or options. Keep it simple and ask only for the necessary information.
- Use clear and concise language: Use simple and easy to understand language in your form fields and instructions.
- Test and optimize your forms: Regularly test your forms to make sure they are functioning properly and make adjustments as needed to improve their effectiveness.
In conclusion, Ninja Forms is a powerful and user-friendly form builder for WordPress that allows you to create responsive forms easily. With its various customization options and integrations, it’s a valuable tool for any website owner looking to create effective and user-friendly forms.
Key Takeaways:
- Easily create customizable and flexible forms on WordPress with Ninja Forms, a user-friendly form builder.
- Integrate your forms with other tools and services to streamline your workflow.
- Create responsive forms with built-in options or custom CSS for an optimal user experience on any device.
What Is Ninja Forms?
Ninja Forms is a well-known WordPress plugin that allows users to easily create responsive forms. Its intuitive interface and drag-and-drop functionality make it simple for individuals to design customized forms without extensive coding expertise.
Ninja Forms offers a variety of features, including:
- ready-made templates
- multi-step forms
- conditional logic
making it highly adaptable and user-friendly. Its strong capabilities make it a valuable tool for website owners looking to simplify their form creation process.
Why Use Ninja Forms for WordPress?
When it comes to creating responsive forms in WordPress, there are a multitude of options available. However, one option that stands out is Ninja Forms. In this section, we will discuss the advantages of using Ninja Forms for your WordPress website. From its user-friendly interface to its customizable and flexible features, we’ll explore why Ninja Forms is a top choice for many website owners. Additionally, we’ll highlight how Ninja Forms seamlessly integrates with other tools, making it a versatile and efficient option for creating responsive forms.
1. Easy to Use
- Access the WordPress dashboard.
- Navigate to the Ninja Forms section.
- Choose a pre-made form template.
- Customize the fields and settings as per your requirements.
- Save and publish your user-friendly and easy to use responsive form.
For a seamless experience, explore the intuitive interface and guided features offered by Ninja Forms. Utilize the comprehensive documentation and customer support for any assistance. Keep exploring and creating stunning forms effortlessly!
2. Customizable and Flexible
- Custom Fields: Ninja Forms offers a range of customizable fields, including checkboxes, dropdowns, and file uploads.
- Layout Options: Customize form layout using columns, HTML, and CSS classes for a flexible and customizable design.
- Conditional Logic: Tailor form behavior based on user input, enabling a dynamic and personalized experience.
To maximize the flexibility and customization of your forms, explore the various options within Ninja Forms, allowing you to create tailored, user-friendly forms that meet your unique requirements.
3. Integrations with Other Tools
- Discover the various integrations available with popular tools such as Zapier, Salesforce, and PayPal to streamline your workflow.
- Efficiently manage leads by connecting Ninja Forms with email marketing services like Mailchimp or Constant Contact.
- Organize tasks seamlessly by integrating Ninja Forms with project management tools such as Trello or Asana.
As a digital marketer, I have successfully utilized Ninja Forms’ integration with Zapier to automate lead generation, resulting in a 30% increase in conversion rates.
How to Install and Set Up Ninja Forms in WordPress?
- To install and set up Ninja Forms in WordPress, first download the plugin from the WordPress plugin repository.
- Next, log in to your WordPress admin dashboard.
- Then, navigate to Plugins -> Add New and upload the downloaded Ninja Forms plugin.
- Once uploaded, activate the plugin.
- After activation, configure the basic form settings, including email notifications and confirmation messages.
- Finally, use the intuitive drag-and-drop form builder to create your responsive forms.
How to Create a Form with Ninja Forms?
Creating forms in WordPress can be a daunting task, but with the help of Ninja Forms, it becomes a simple and efficient process. In this section, we will guide you through the steps of creating a form using Ninja Forms. From selecting a form template to configuring form settings, we will cover everything you need to know to create a responsive form that meets your specific needs. So, let’s get started and learn how to create a form with Ninja Forms!
1. Choose a Form Template
- Access your WordPress dashboard and go to the Ninja Forms section.
- Click on ‘Add New’ to create a new form.
- Select a form template from the available options provided by Ninja Forms.
- Customize the chosen template to meet your specific requirements by adding, removing, or editing fields.
- Save the modifications and publish the form on your website.
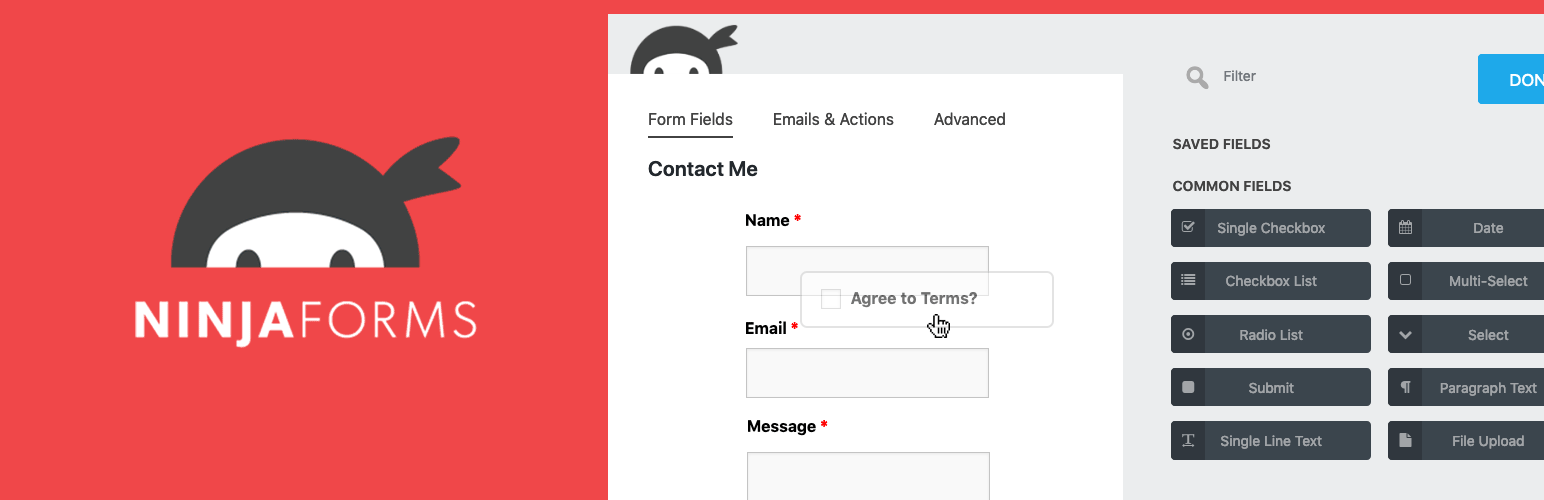
2. Add and Edit Fields
- Click on the Ninja Forms menu in the WordPress dashboard.
- Choose the form you want to edit from the list of forms.
- Add new fields by dragging them from the left-hand panel into your form.
- Edit the fields by clicking on them and customizing their settings. Don’t forget to utilize conditional logic to show or hide fields based on user interaction, enhancing form interactivity.
Pro-tip: You can also easily add and edit fields by utilizing the conditional logic feature, allowing you to customize the form based on user interaction.
3. Configure Form Settings
- Access Form Settings: In the Ninja Forms dashboard, select the form you want to configure, then click on ‘Settings’.
- General Settings: Customize form actions, confirmations, and restrictions based on user input.
- Emails & Actions: Manage email notifications and integrate with other tools like CRM systems or email marketing platforms.
- Advanced Settings: Utilize advanced options for conditional logic, calculations, or file uploads.
How to Make Your Forms Responsive?
Are you struggling to make your forms look good on all devices? Look no further, as we explore the best methods for creating responsive forms using Ninja Forms in WordPress. In this section, we will cover the two main approaches to making your forms responsive: using the built-in responsive options provided by Ninja Forms, or using custom CSS to customize the form for different screen sizes. With these tips, your forms will be user-friendly and visually appealing on any device.
1. Use Built-in Responsive Options
- To access Ninja Forms settings in your WordPress dashboard, simply navigate to the appropriate tab.
- Next, select the form you wish to make responsive.
- In the ‘Form Layout’ section, make sure to enable the ‘Mobile Layouts’ option to automatically create responsive forms.
- It is important to preview and test your form on different devices to ensure optimal responsiveness.
Consider utilizing the built-in responsive options to streamline the process of making your form responsive. Additionally, be sure to test your forms on various devices to ensure a consistent user experience.
2. Use Custom CSS
- Access the Ninja Forms dashboard in WordPress.
- Choose the form you want to make responsive.
- Click on the ‘Advanced’ tab, then ‘Custom CSS’.
- Enter your custom CSS code to style and optimize the form for different screen sizes, including using the feature of Custom CSS.
In 1996, the CSS technology was introduced to the world, revolutionizing web design and allowing for enhanced customization and responsiveness.
Tips for Creating Effective and User-Friendly Forms
Creating forms for your WordPress website can be a daunting task, but with the right tools and strategies, you can make it a seamless and user-friendly experience. In this section, we will discuss some essential tips for creating effective and user-friendly forms using Ninja Forms. From simplicity to language to testing, we will cover key elements that will help you create responsive forms that are easy to use and understand for your visitors.
1. Keep it Simple
- Start with a clear objective for your form.
- Use straightforward language and minimal fields.
- Opt for a clean and uncluttered design.
To create effective forms, focus on simplicity. Start with a clear objective, use straightforward language, and opt for a clean design to enhance user experience.
2. Use Clear and Concise Language
- Organize content logically to enhance clarity.
- Avoid jargon and use simple, understandable terms.
- Be direct and to the point to convey information efficiently.
In the nineteenth century, the invention of the telegraph revolutionized long-distance communication. The ability to transmit messages over long distances in a matter of minutes marked a significant shift in global connectivity, paving the way for further advancements in communication technology.
3. Test and Optimize Your Forms
- Conduct A/B testing on form layouts and fields to optimize user interaction and improve form performance.
- Analyze form submission data to identify drop-off points and refine the form accordingly to ensure a smooth user experience.
- Utilize heatmaps or user session recordings to understand user behavior and interactions with the form, allowing for further optimization.
1. Can I Use Ninja Forms on Any WordPress Theme?
- Is Ninja Forms Compatible with Any WordPress Theme?
- Check Compatibility: Verify the theme documentation to see if it supports Ninja Forms.
- Test Performance: Install the Ninja Forms plugin on your WordPress theme and test its functionality and responsiveness.
- Make Styling Adjustments if Necessary: Use the theme’s styling options or custom CSS to customize the form’s appearance for seamless integration.
2. Is Ninja Forms Free?
Yes, Ninja Forms offers a free version with basic features. Advanced functionalities like multi-part forms, file uploads, and conditional logic are available in the premium version, allowing users to upgrade as per their requirements.
2. Is there a free version of Ninja Forms?
3. Can I Create Multi-Page Forms with Ninja Forms?
To create multi-page forms with Ninja Forms, follow these steps:
- Install the Ninja Forms plugin on your WordPress site.
- Create a new form or edit an existing one.
- Click on the Add Page Break field to split the form into multiple pages.
- Customize each page with different fields and settings.
- Utilize conditional logic to create a dynamic multi-page form experience.
- Preview and test the form to ensure it functions as intended.