Follow these steps to rename your Joomla installation directory using cPanel:
Steps
- Log into cPanel:
- Open your web browser and navigate to your cPanel login page.
- Enter your username and password to access the cPanel dashboard.
- Navigate to File Manager:
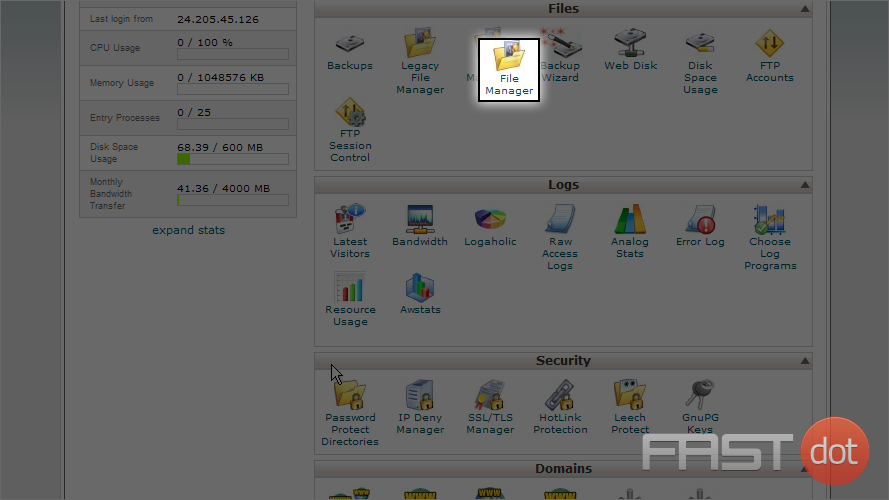
- In the cPanel dashboard, locate and click on the File Manager icon.
- Open the public_html directory or the directory where Joomla is installed.
- Rename the Directory:
- Find the Joomla installation directory in the file list.
- Right-click on the directory name and select Rename.
- Enter the new name for the directory and click Rename File to confirm.
- Update Configuration:
- After renaming the directory, you need to update the Joomla configuration file:
- Navigate to the renamed directory and locate the
configuration.phpfile. - Right-click on
configuration.phpand select Edit. - In the editor, find and update the paths for
$log_pathand$tmp_pathto reflect the new directory name. For example:public $log_path = '/path/to/new_directory/logs'; public $tmp_path = '/path/to/new_directory/tmp'; - Save the changes and close the editor.
- Test the Site:
- Visit your Joomla site in a web browser to ensure that it is working correctly after the directory rename.
Important Notes
- Always backup your website and database before making changes.
- Renaming the directory might affect any custom paths or configurations that rely on the original directory name.
- Ensure that you update any relevant configurations to avoid issues with your Joomla site.
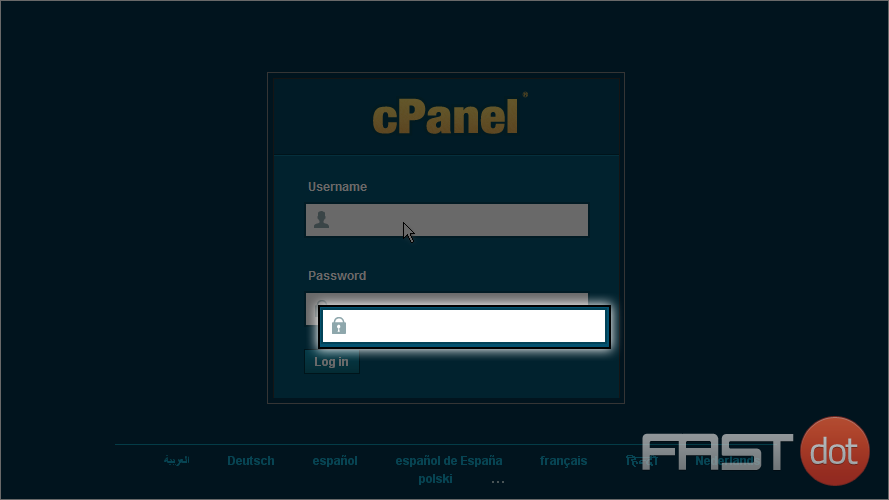
You will need to log into cPanel with your supplied username and password. Normally this URL is:
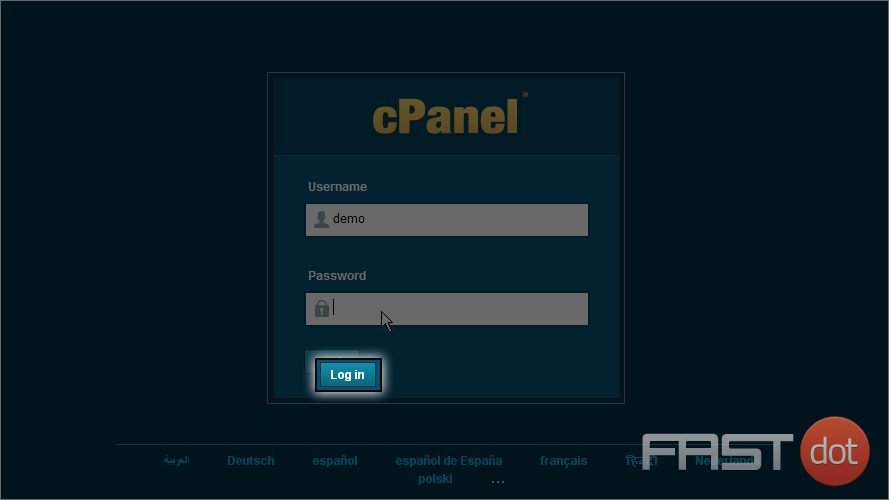
1) Select the Username field and enter your username

2) Next select the Password field and enter your password
3) Now select the Log in button
4) From the Files section, click on the File Manager icon
5) When prompted select to open the Web Root and click the Go button

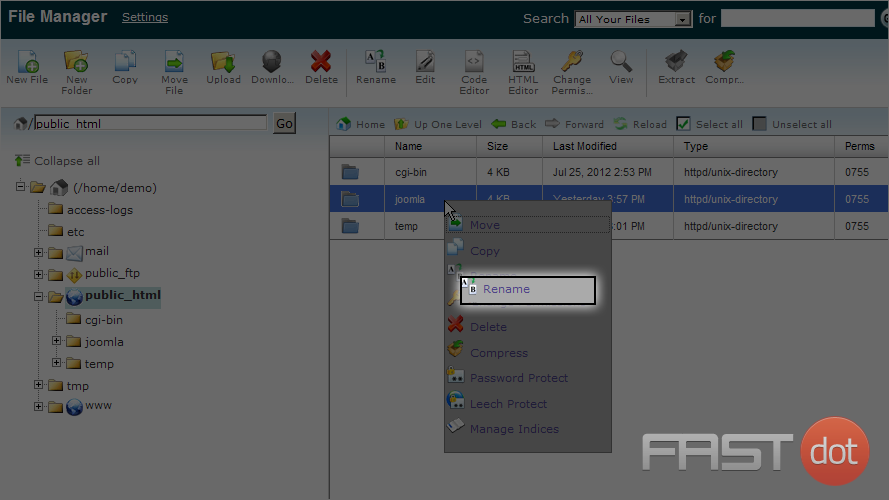
6) Select the directory named ‘joomla’ by clicking on it
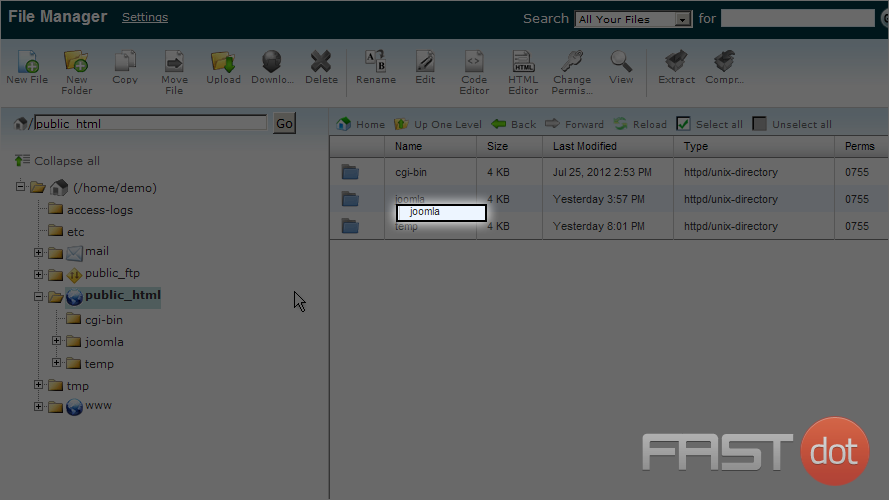
7) Next right click the folder name and select the Rename option
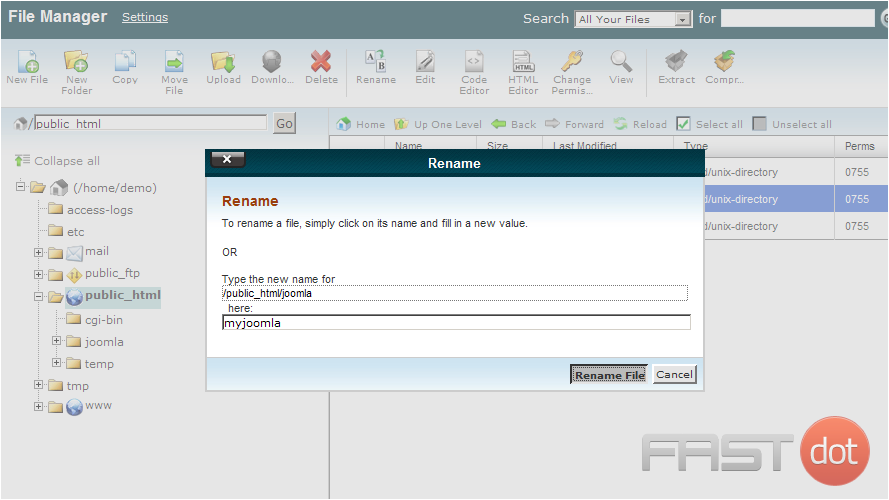
8) Add the letters ‘my’ to the directory name and click the Rename File button
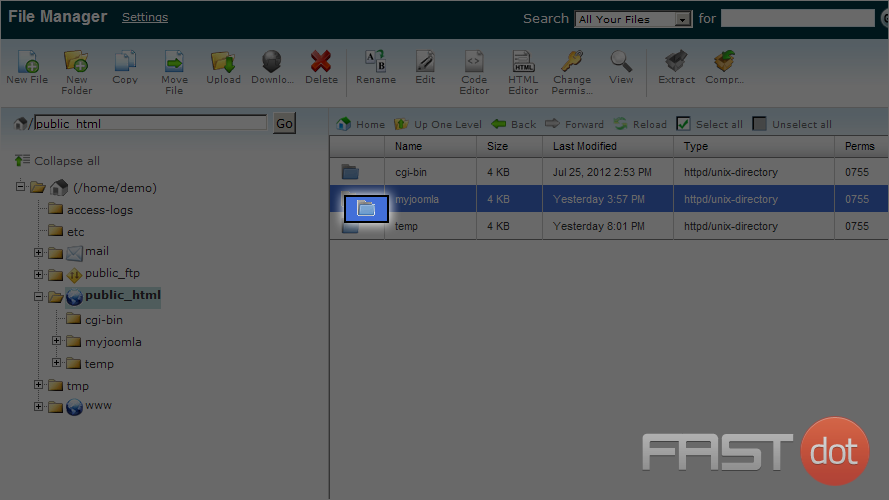
9) Now double click the ‘myjoomla’ folder
10) Select the ‘configuration.php’ file and right click. Then select the Edit option
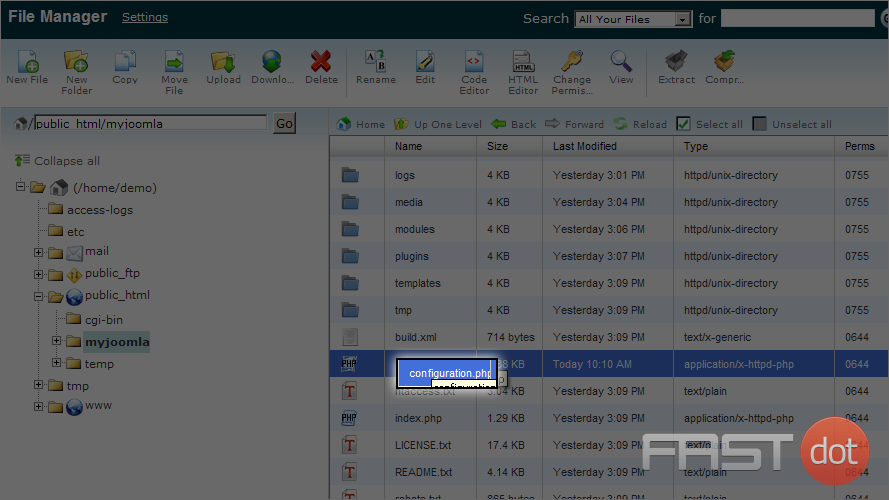
11) Select the Edit button
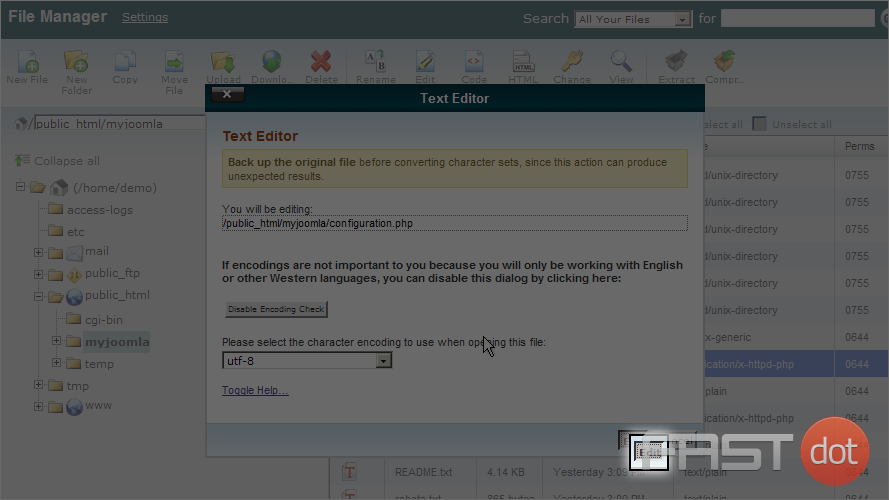
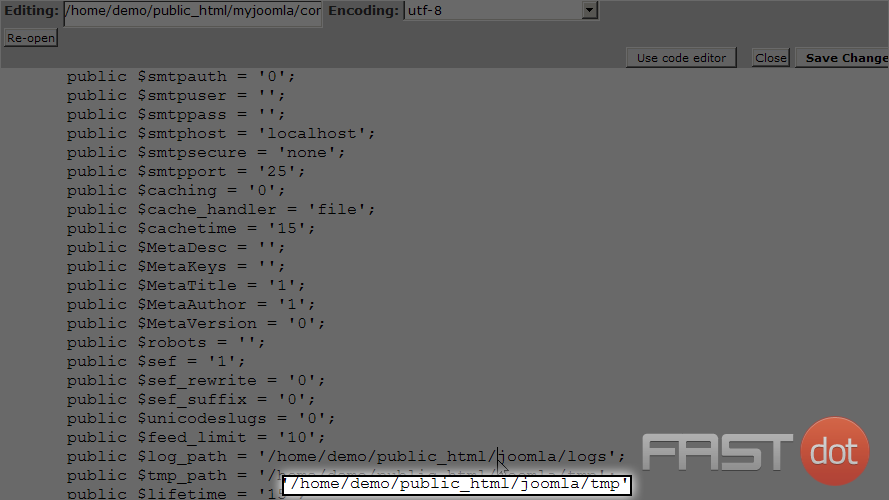
Scroll down to the bottom of the editor window
12) Select the place in the $log_path where we will edit it to match our new directory name

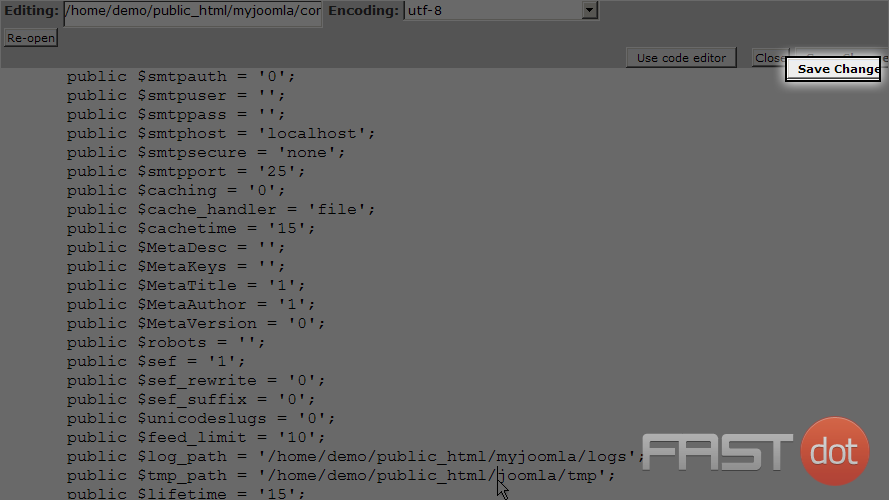
13) Change the path to read ‘myjoomla’ from just ‘joomla’
14) Do the same for the $tmp_path value
15) Next click the Save Changes button
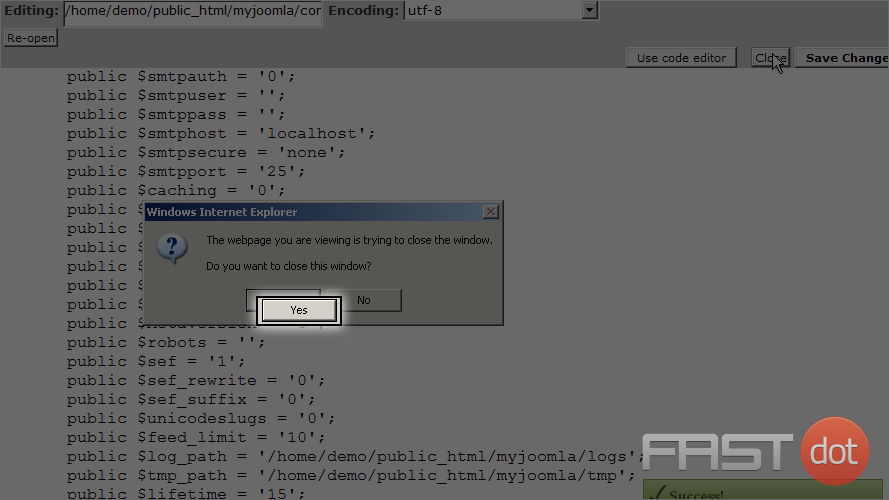
16) Now select the Close button
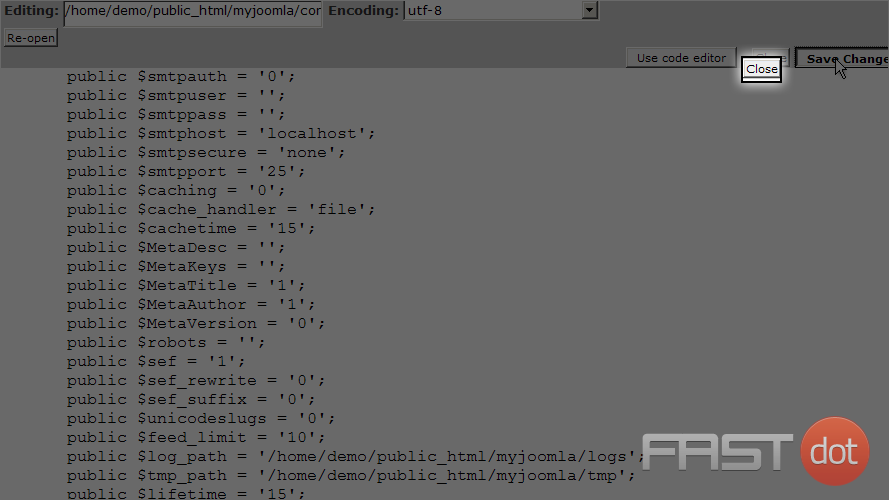
17) Select Yes to close the window
You now know how to rename your Joomla directory from cPanel