Rules in Apple Mail are filters that you can use to sort incoming mail into folders.
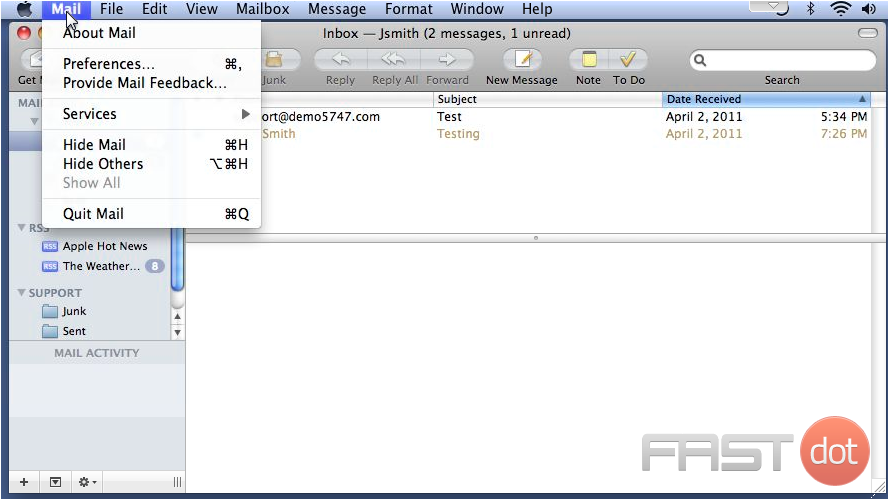
1) Go to Mail… then click Preferences.
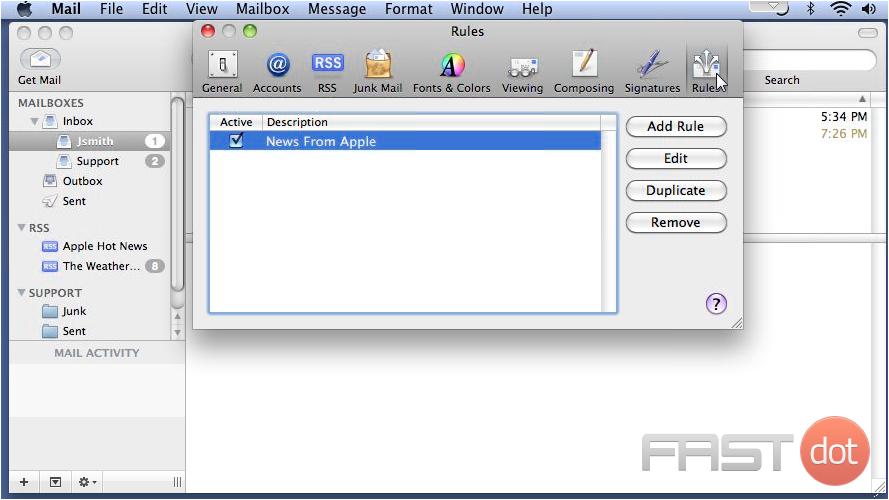
2) Select Rules… then click Add Rule.
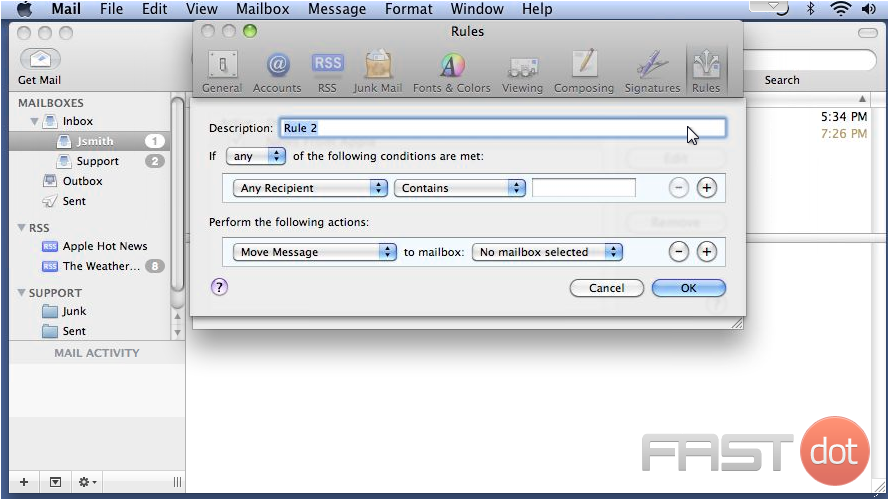
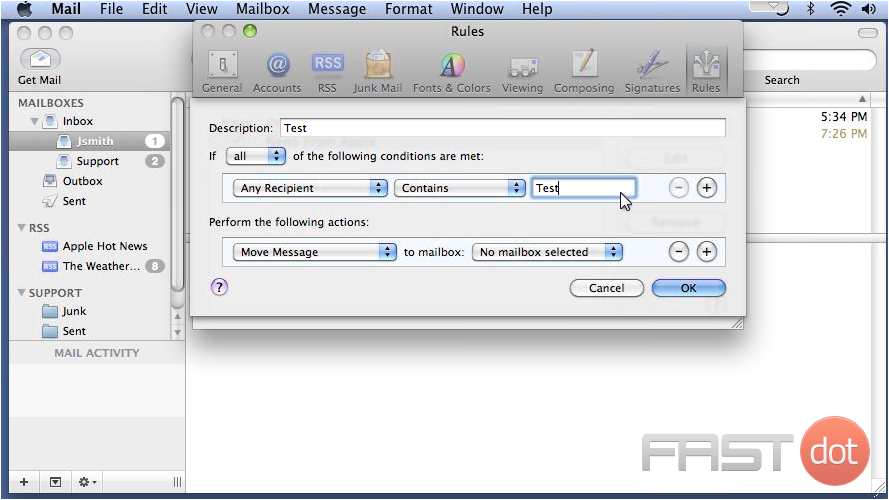
3) Enter a description.
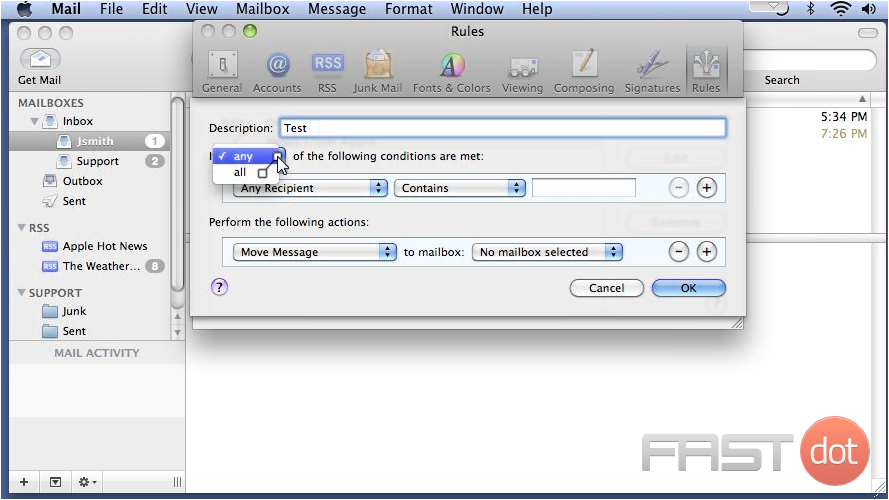
4) Choose to sort if any or all the following conditions are met.
5) Select a condition. This condition will sort any mail that contains the word “Test”.
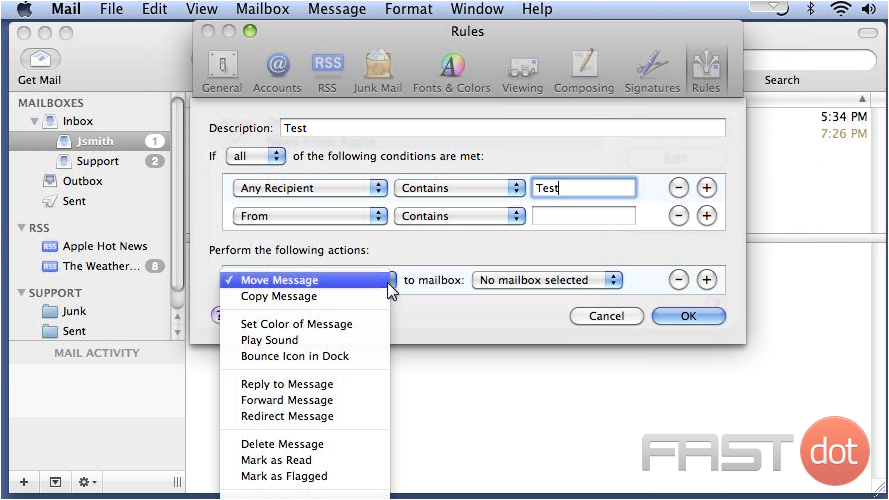
6) Click plus to add another condition… and set the action to be taken when the conditions are met.
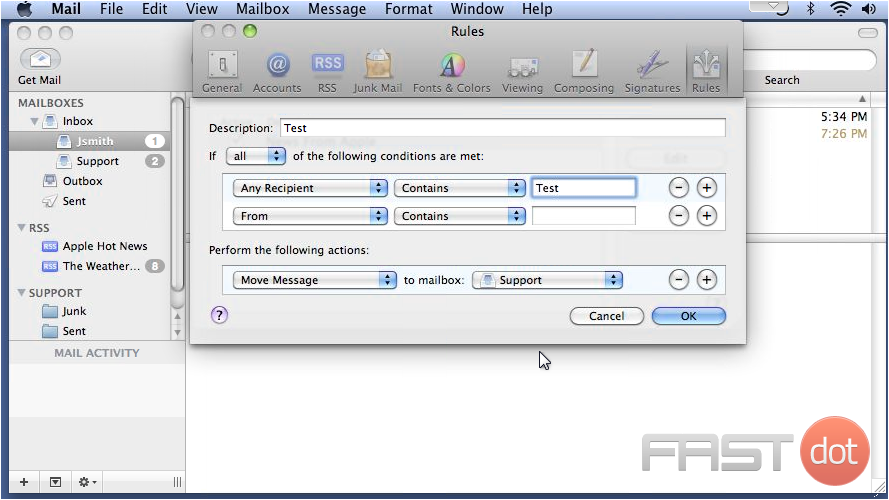
7) Now when the condition is met, the message will be moved to the Support mailbox. Click OK.
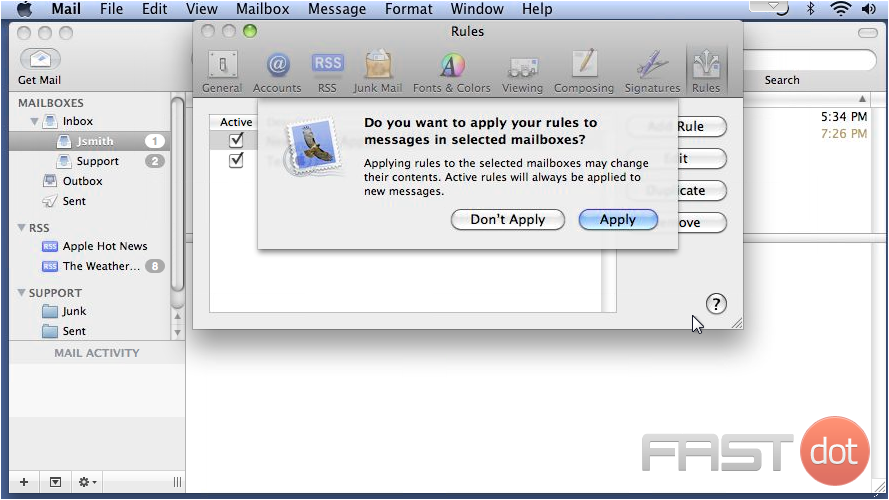
8) Click Apply to apply the rule to messages in your mailbox.
Setting up rules (also known as filters) in Apple Mail can help you manage your inbox more efficiently by automatically performing actions on incoming emails based on criteria you define. This feature is useful for organizing emails, dealing with spam, or ensuring important messages stand out. Here’s how to set up rules in Apple Mail on a Mac:
Step 1: Open Mail Preferences
- Launch the Mail application on your Mac.
- In the menu bar at the top of the screen, click on Mail and select Preferences from the dropdown menu.
- In the Preferences window, click on the Rules tab to access the rules settings.
Step 3: Add a New Rule
- Click the Add Rule button to create a new rule.
- You will be prompted to define the conditions and actions for your new rule.
Step 4: Define the Rule
- Description: Enter a descriptive name for your rule in the Description field. This name should help you remember the purpose of the rule.
- Conditions: Set the conditions that an email must meet for the rule to be applied. You can add multiple conditions by clicking the plus (+) button next to a condition. Conditions can be based on various email elements such as the sender’s address, the subject line, or the email content.
- Choose whether any or all conditions must be met for the rule to apply by selecting the appropriate option from the dropdown menu at the top.
- Actions: Specify the action(s) Mail should take when an email meets the defined conditions. Actions can include moving the email to a specific folder, marking it as read, forwarding it, and more. You can add multiple actions by clicking the plus (+) button next to an action.
- Exceptions: You can also specify exceptions to the rule. If an email meets any of the exceptions, the rule won’t be applied even if it matches the initial conditions.
Step 5: Save the Rule
- Once you’ve configured the conditions, actions, and exceptions for your rule, click OK to save it.
- You’ll be asked whether you want to apply the rule to existing messages in your mailbox. Choose Apply if you want to do so, or select Don’t Apply if you prefer the rule to affect only future incoming messages.
Step 6: Managing Rules
- After creating rules, you can always go back to the Rules tab in Mail Preferences to edit or delete them. Simply select a rule from the list and use the Edit or Remove buttons as needed.
Additional Tips
- Order of Rules: Rules in Apple Mail are processed in the order they appear in the list. You can change the order by dragging rules up or down. This is important because once an email matches a rule and is processed, it may not be evaluated against subsequent rules unless you specifically configure the rules to continue processing.
- Testing Rules: After setting up rules, it’s a good idea to send yourself test emails to ensure the rules work as expected.
- Use with Caution: Be cautious when creating rules that delete emails or forward them to other addresses to avoid losing important messages.
Setting up rules in Apple Mail can significantly enhance your email management and productivity. By automatically sorting, flagging, or responding to incoming messages, you can keep your inbox organized and focus on the emails that matter most.

