How to setup POP emails on your iPhone
This tutorial will show you how to setup a POP email account on your iPhone.
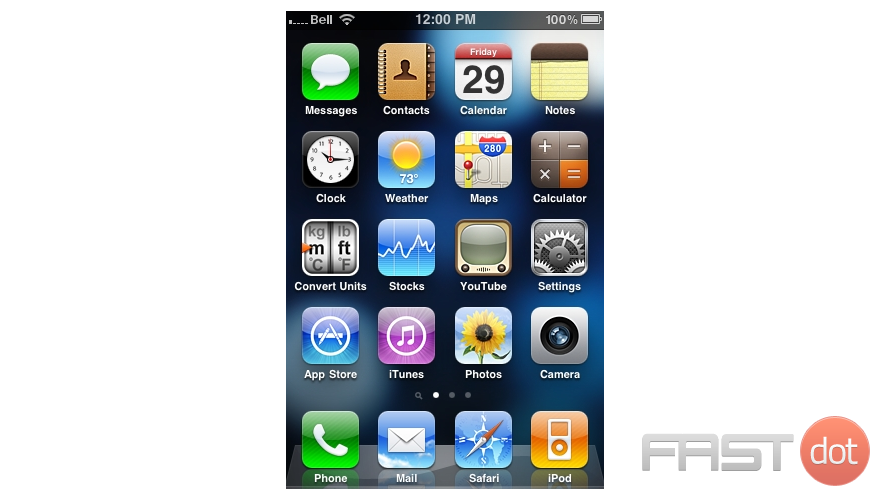
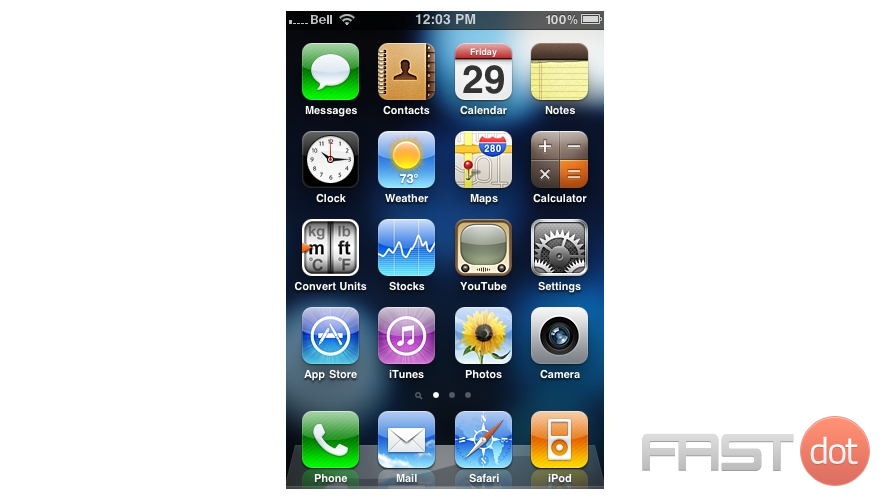
1) First, locate and press the “Settings” icon. It may be on a different screen or in a different location than shown here.
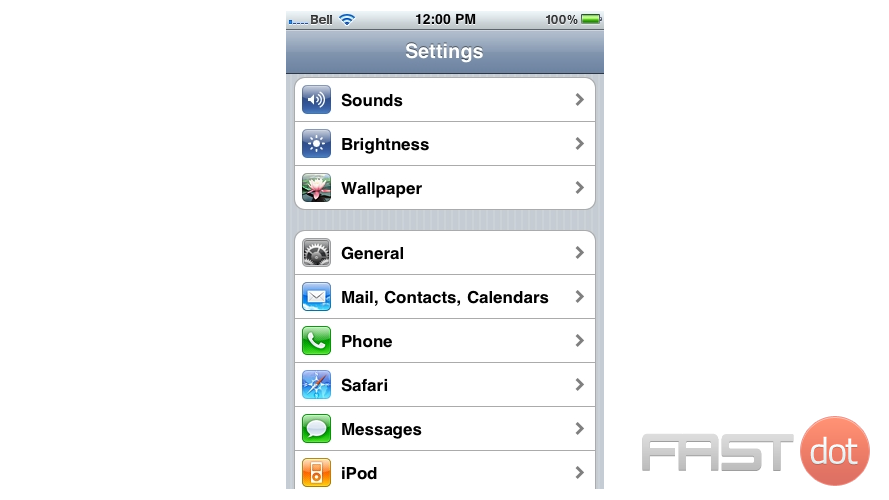
2) Then select “Mail, Contacts, Calendars”.
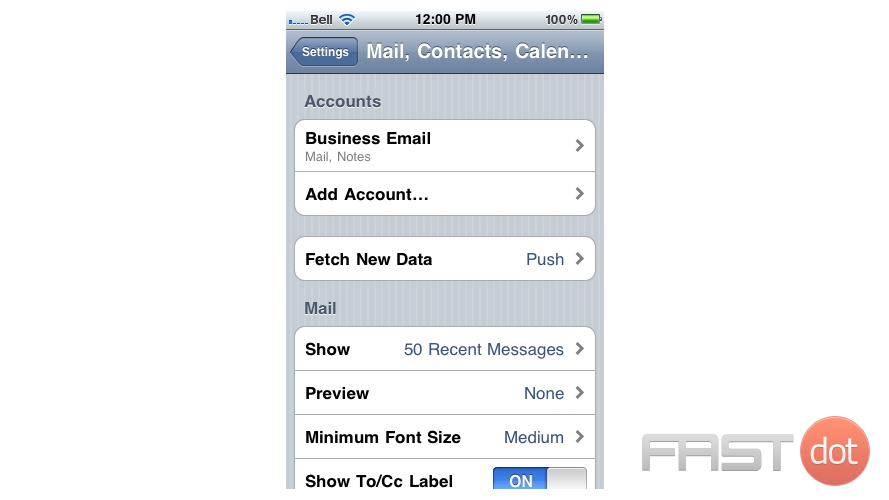
3) Select “Add Account”.
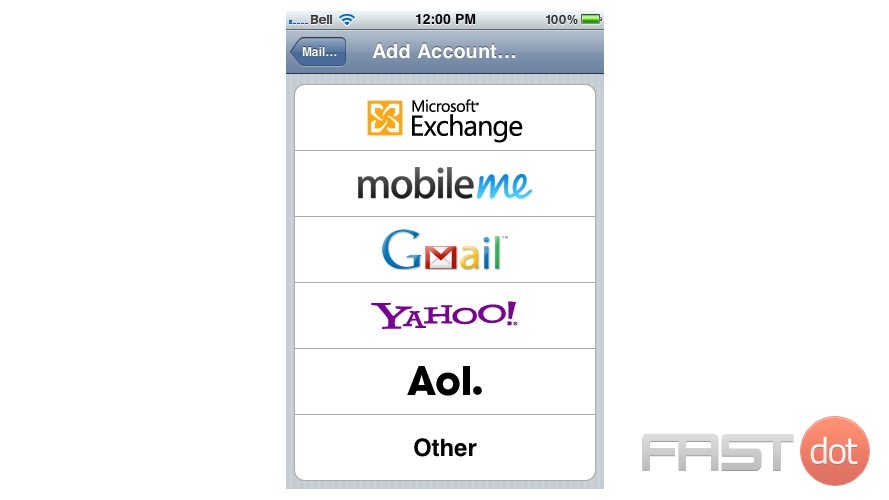
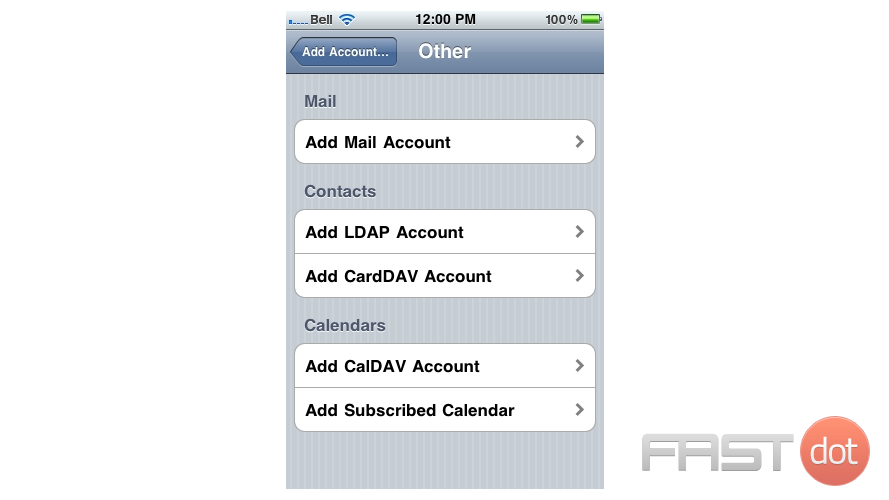
4) Then choose “Other”.
5) Press “Add Mail Account”.
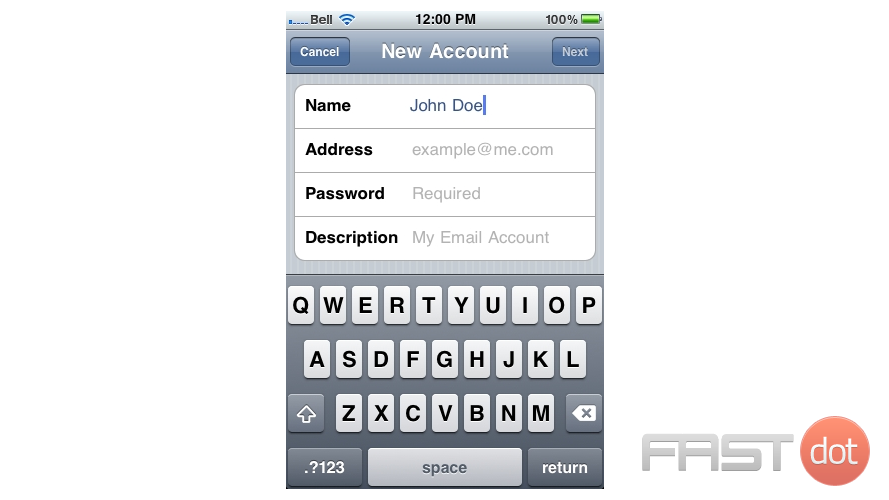
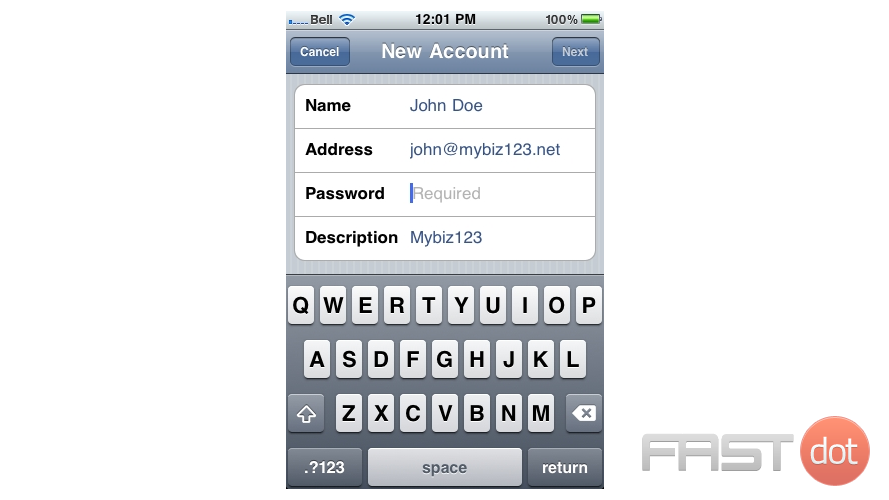
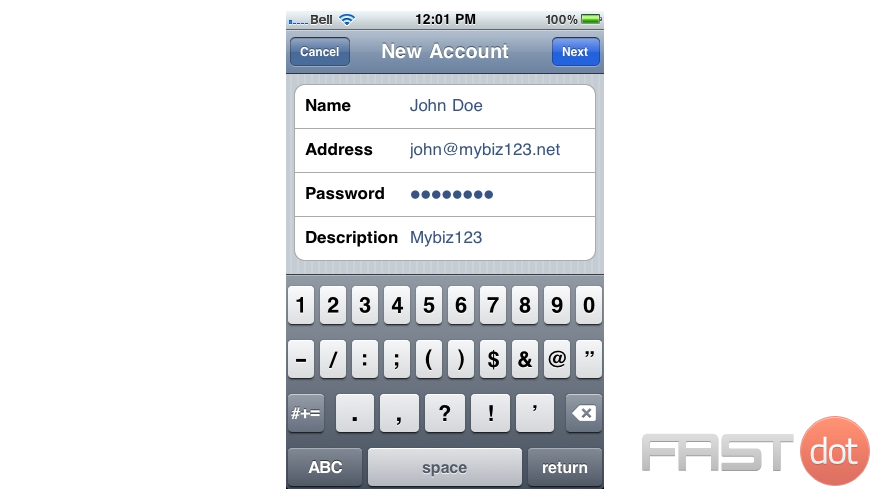
6) Enter the Name, Email address, and Email password of the email account you’re adding.
A “Description” will automatically appear, but you can change it if you like.
7) When finished, press “Next”.
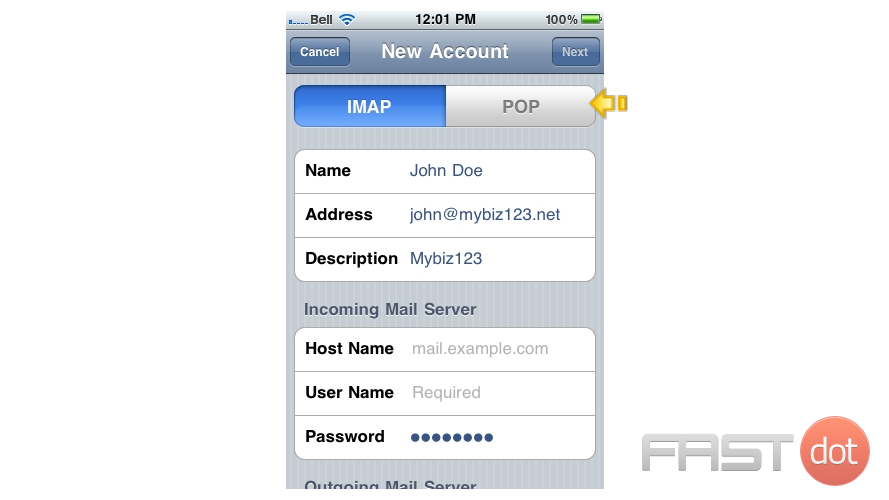
8) In this tutorial we are creating a POP account… therefore, ensure the POP option is selected here.
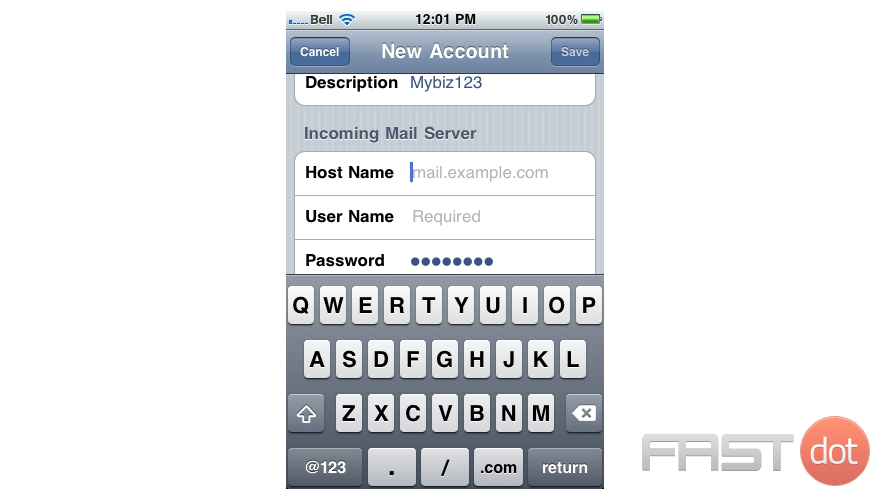
9) Next you have to enter your Incoming Mail Server settings. Enter the Host Name, User Name and Password for the Incoming Mail Server.
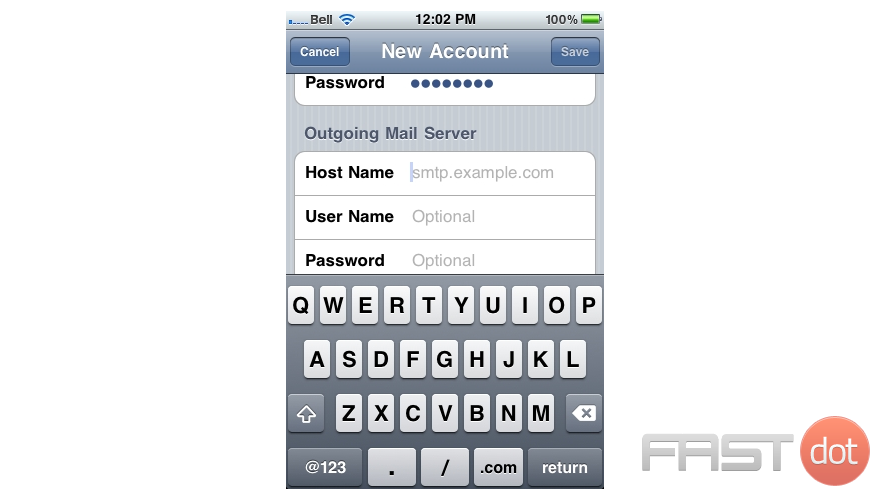
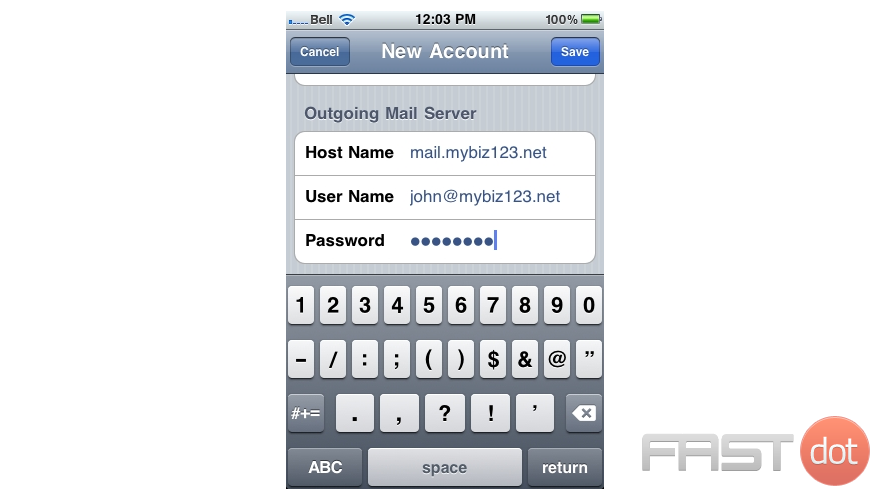
10) Next, enter the Host Name, User Name and Password for the “Outgoing” Mail Server.
11) When finished, press “Save”.
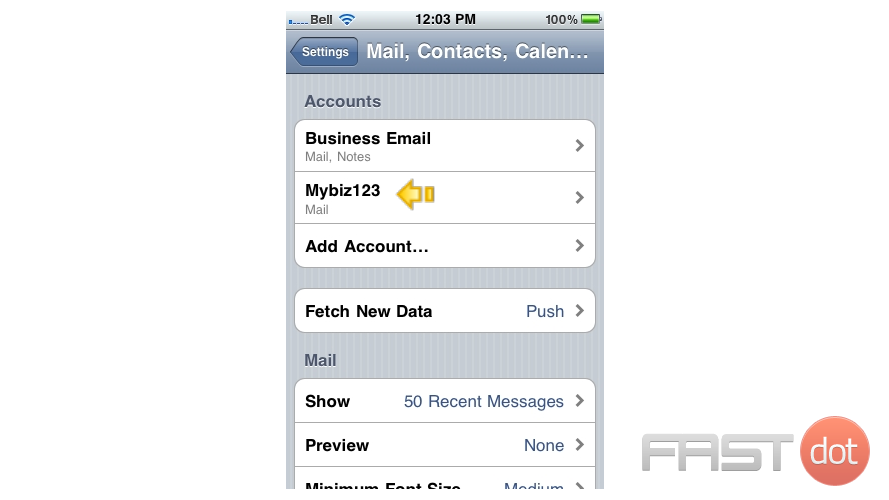
Success! The POP email account has been setup on the iPhone, and you can see it here listed under “Accounts”.
12) Let’s return to the home screen by pressing the Home button on the iPhone.
13) To check your email, press the “Mail” icon here (Note: the icon may be in a different location on your iPhone).
14) If you have multiple email accounts setup in your iPhone, they’ll all be listed here. Select the email account we just setup…
15) … and any emails in your inbox will be displayed here. Click an email header to see the email.
Setting up POP (Post Office Protocol) email accounts on your iPhone allows you to download emails from your mail server to your phone. Unlike IMAP, POP downloads emails and usually deletes them from the server, meaning emails are stored locally on your device. This setup is useful if you prefer to keep your emails on your iPhone or if your email provider only supports POP. Here’s how to set up POP emails on your iPhone:
Step 1: Gather Your Email Account Details
Before you start, ensure you have the following details:
- Email address
- Password
- POP server name (incoming mail server)
- SMTP server name (outgoing mail server)
- POP server port
- SMTP server port
- Any specific authentication or SSL requirements
You can usually find this information on your email provider’s help pages or by contacting their support team.
Step 2: Add a New Email Account to Your iPhone
- Open Settings: On your iPhone, open the Settings app.
- Go to Mail: Scroll down and tap on Mail.
- Accounts: Tap on Accounts.
- Add Account: Select Add Account.
- Choose Your Email Provider or Other: If you see your email provider, select it; otherwise, tap Other to manually set up your email account.
- Add Mail Account: Tap on Add Mail Account.
Step 3: Enter Your Email Account Information
- Fill in Your Details: Enter your name, email address, password, and a description for your email account. The description will be the name of your email account on your iPhone.
- Tap Next: Once you’ve entered your information, tap Next.
Step 4: Configure Incoming and Outgoing Mail Server
- Select POP: At the top, ensure POP is selected.
- Incoming Mail Server:
- Host Name: Enter your POP server name.
- Username: This is usually your full email address.
- Password: Enter your email account password.
- Outgoing Mail Server (SMTP):
- Host Name: Enter your SMTP server name.
- Username: This is usually your full email address.
- Password: Enter your email account password.
- Tap Next: The Mail app will verify your email settings. This process may take a few moments.
Step 5: Finalize Setup
- Select Data to Sync: If given the option, select the data you want to sync with your iPhone, such as contacts or calendars. By default, Mail will be toggled on.
- Save: Tap Save to complete the setup.
Step 6: Check Advanced Settings (Optional)
- Go Back to Accounts: In the Settings > Mail > Accounts, select your newly added email account.
- Tap Account: Then tap on your account again.
- Advanced Settings: Scroll down and tap Advanced to review additional settings like mail deletion from the server and SSL usage. Adjust these settings as per your preference and your email provider’s recommendations.
- Done: After making any necessary adjustments, tap Done.
Note on POP vs. IMAP
While POP can be suitable for users who access their email from a single device, IMAP offers a more flexible approach by keeping emails on the server, allowing you to access and sync your messages across multiple devices. Consider using IMAP if your email provider supports it and you use your email on more than one device.
By following these steps, you should now have your POP email account set up on your iPhone, allowing you to send and receive emails directly from your device.

