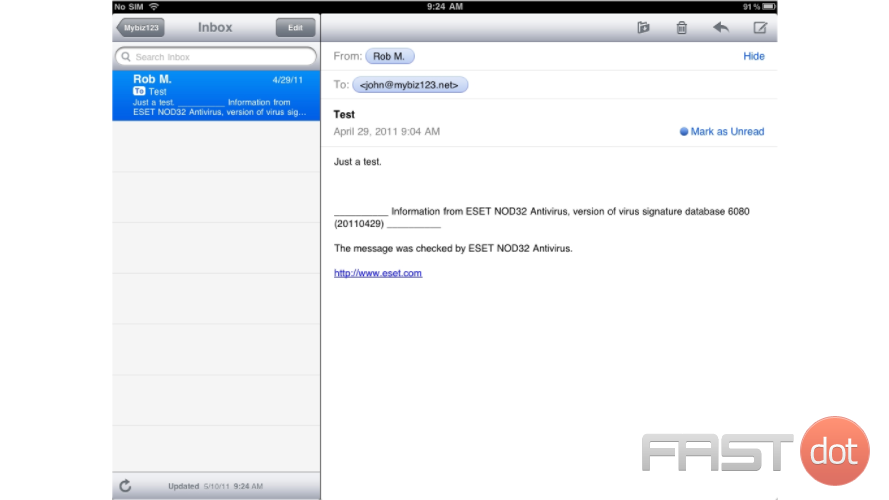
This tutorial will show you how to setup a POP email account on your iPad.
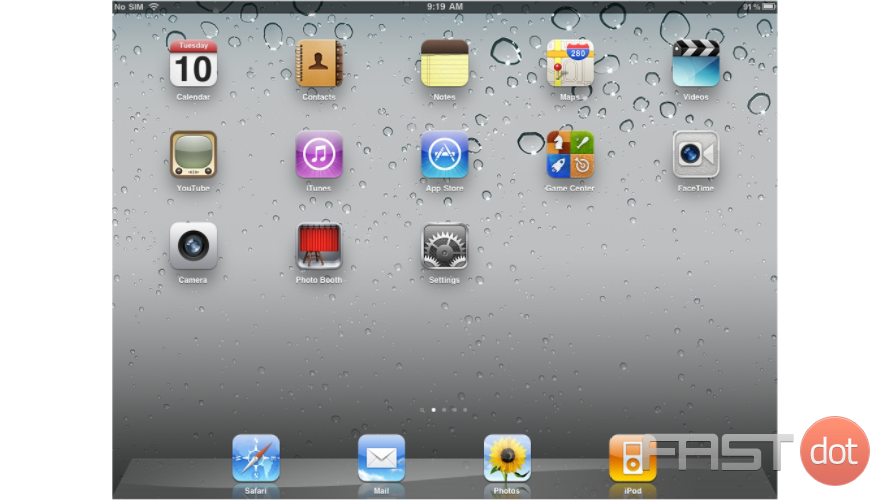
1) First, locate and press the “Settings” icon. It may be on a different screen or in a different location than shown here.
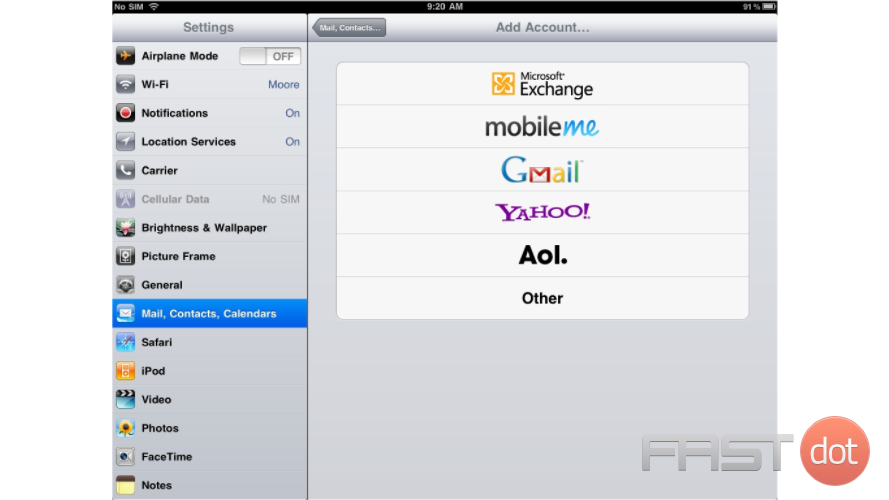
2) Then select “Mail, Contacts, Calendars”… and then “Add Account”.
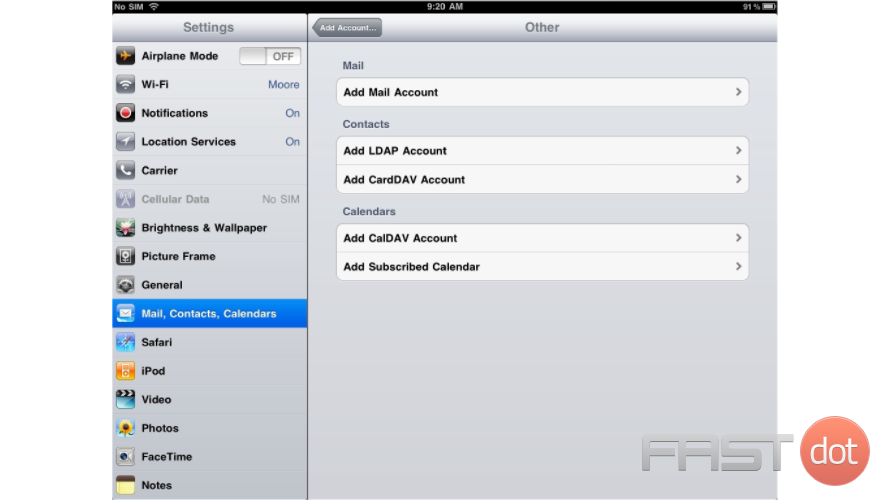
3) Then choose “Other”.
4) Press “Add Mail Account”
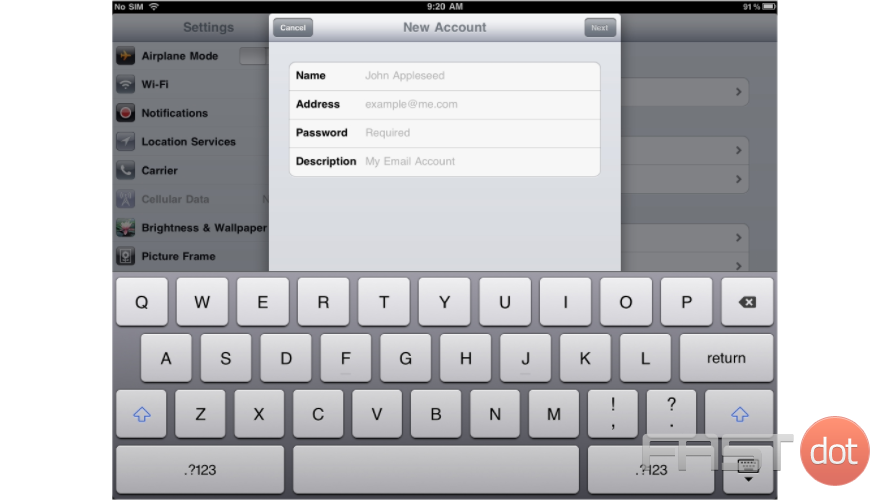
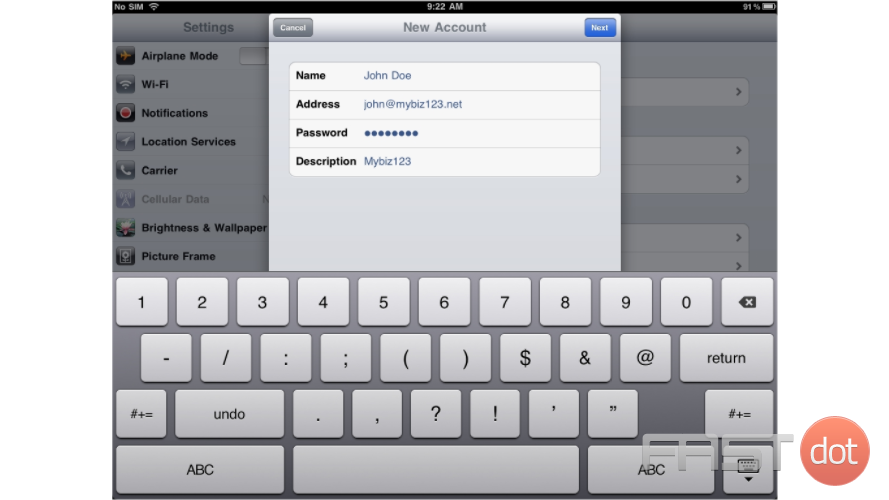
5) Enter the Name, Email address, and Email password of the email account you’re adding.
6) A “Description” will automatically appear, but you can change it if you like. When finished, press “Next”.
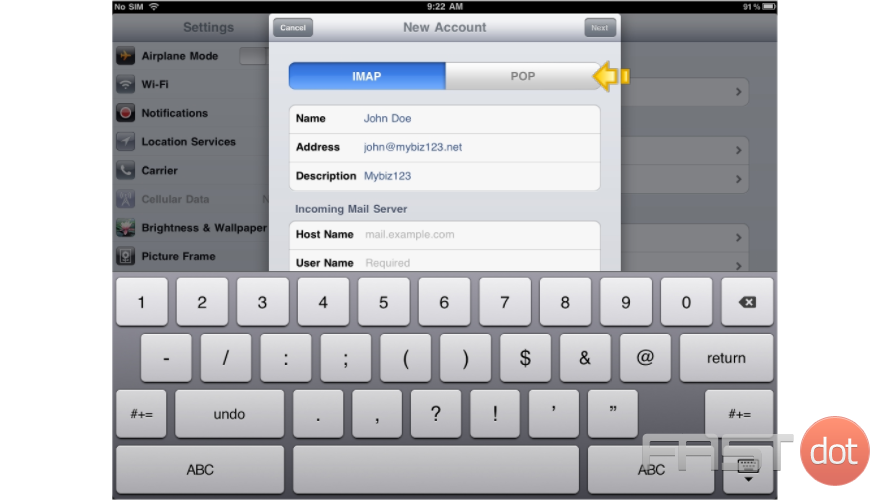
7) In this tutorial we are creating a POP account… therefore, ensure the POP option is selected here.
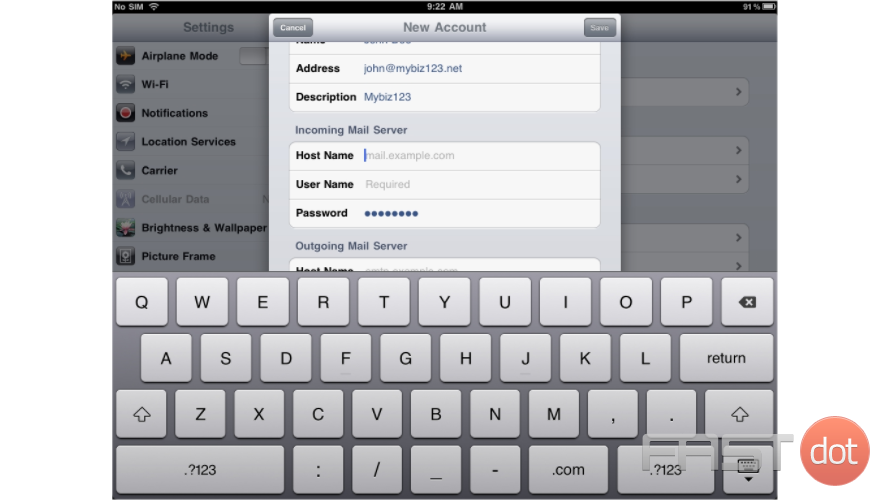
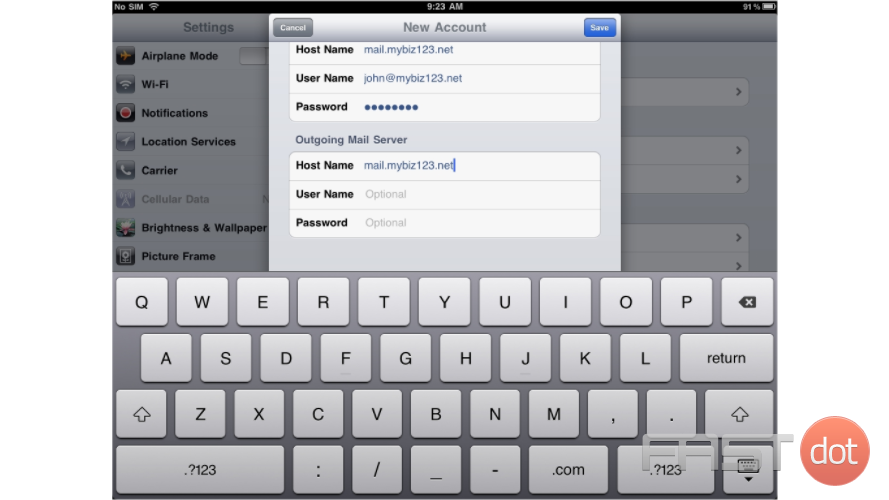
8) Next you have to enter your Incoming Mail Server settings… Enter the Host Name, User Name and Password for the Incoming Mail Server.
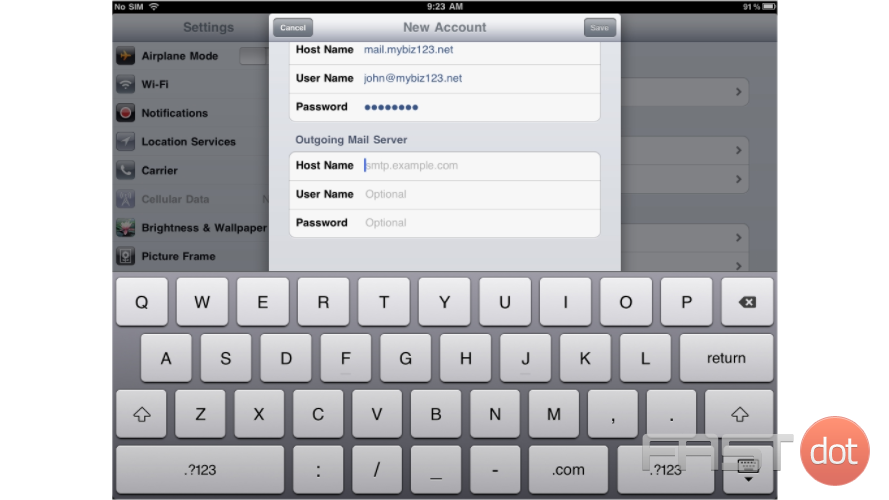
9) Next, enter the Host Name, User Name and Password for the “Outgoing” Mail Server.
10) When finished, press “Save”.
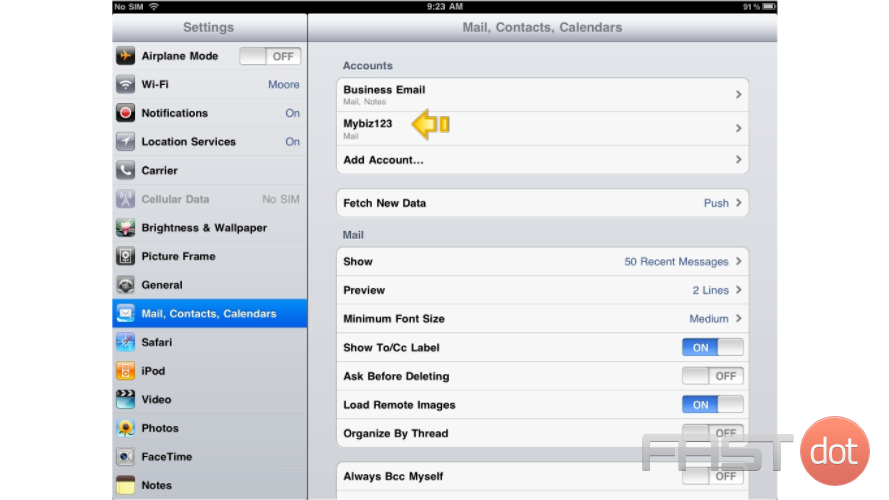
11) Success! The POP email account has been setup on the iPhone, and you can see it here listed under “Accounts”
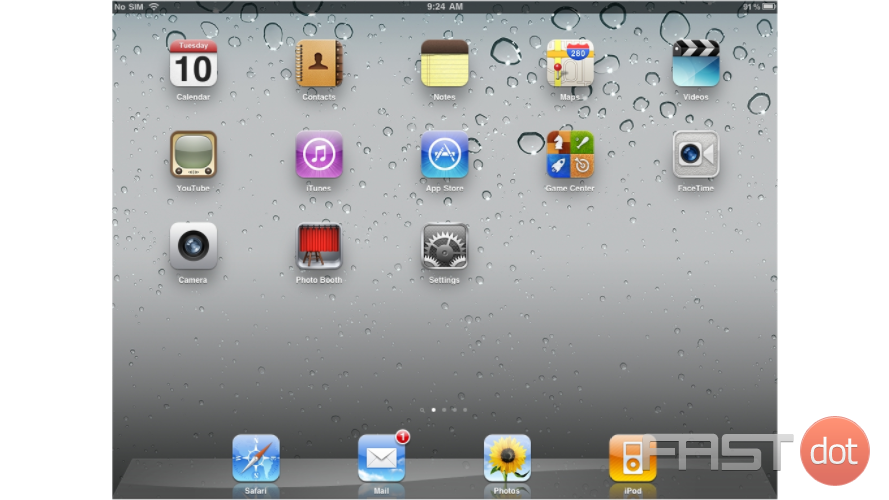
12) Let’s return to the home screen by pressing the Home button on the iPad. To check your email, press the “Mail” icon here (Note: the icon may be in a different location on your iPad)
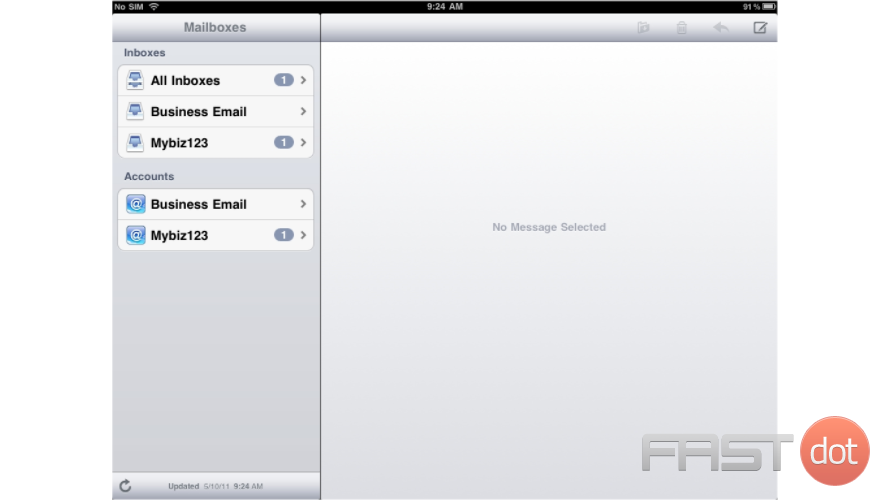
13) If you have multiple email accounts setup in your iPad, they’ll all be listed here.
14) Select the email account we just setup… and any emails in your inbox will be displayed here.
Setting up POP (Post Office Protocol) email accounts on your iPad allows you to manage your emails directly from your device, offering a convenient way to read, send, and organize your messages on the go. POP email setup downloads emails from your mail server to your iPad, making it ideal for users who prefer to access their emails from a single device. Here’s a step-by-step guide to setting up POP emails on your iPad, ensuring you stay connected with your email communication effortlessly.
Step 1: Gather Your Email Account Details
Before starting the setup process on your iPad, ensure you have the following information on hand from your email provider:
- Email address
- Password
- POP server name (incoming server)
- SMTP server name (outgoing server)
- POP server port
- SMTP server port
These details are often found in the support or FAQ sections of your email service provider’s website. If you’re unsure, contact your provider’s customer service for assistance.
Step 2: Add a New Email Account to Your iPad
- Open Settings: From your iPad’s home screen, tap on the “Settings” icon to open the iPad’s settings menu.
- Go to Mail: Scroll down and tap on “Mail,” then select “Accounts.”
- Add Account: Tap on “Add Account.” You’ll see a list of popular email service providers. If your provider is listed, select it; otherwise, tap “Other” to manually set up the account.
- Tap Add Mail Account: Under the “Mail” section, choose “Add Mail Account.” This will take you to a new screen where you can enter your account details.
Step 3: Enter Your Account Details
- Fill in the Basic Information: On the “New Account” screen, enter your name, email address, password, and a description for the account (e.g., Personal or Work Email). Tap “Next” to proceed.
- Select POP: Make sure the “POP” option is selected at the top of the screen.
- Incoming Mail Server Configuration:
- In the “Host Name” field under “Incoming Mail Server,” enter your POP server name.
- Enter your full email address in the “User Name” field.
- Enter your email account’s password in the “Password” field.
- Outgoing Mail Server Configuration:
- In the “Host Name” field under “Outgoing Mail Server,” enter your SMTP server name.
- Enter your full email address in the “User Name” field.
- Enter your email account’s password in the “Password” field.
- Note: The outgoing mail server may also require authentication, so ensure these details are entered correctly.
- Save and Verify: Once all details are correctly filled in, tap “Save.” Your iPad will attempt to verify the settings. If everything is correct, the verification will succeed.
Step 4: Finalizing the Setup
After verification, you may be asked to select the apps you wish to use with this account (Mail, Notes, etc.). Choose your preferences and tap “Save.”
Step 5: Adjusting Your POP Settings (Optional)
Once your account is added, you might want to adjust settings like how often your iPad fetches new emails or whether it should remove emails from the server after downloading them. These settings can be adjusted in the “Mail” settings under “Accounts” by selecting your newly added email account.
Troubleshooting Tips
- If your iPad cannot verify your account details, double-check the information you entered, especially the server names, port numbers, and your password.
- Ensure that you have an active internet connection during the setup process.
- If problems persist, contact your email service provider to verify the POP and SMTP settings and confirm that your account is enabled for POP access.
Setting up a POP email account on your iPad can significantly enhance your productivity by allowing you to manage your emails directly from your device, wherever you are. By following these straightforward steps, you can ensure a seamless email experience on your iPad.

