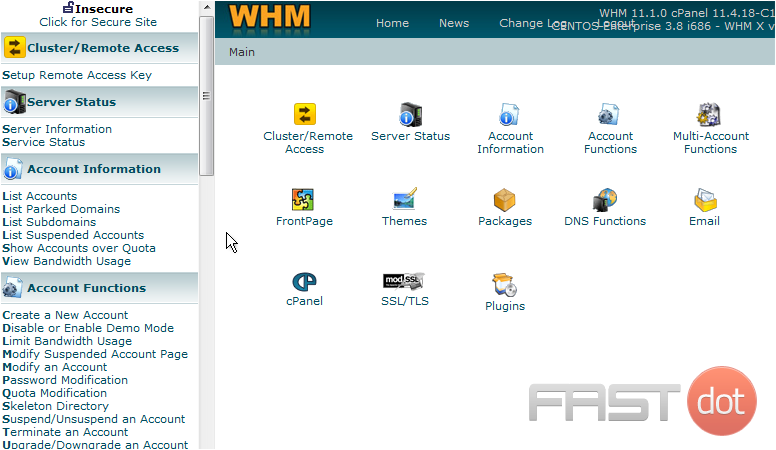
This demo assumes you’ve already logged in to WebHost Manager (WHM)
Let’s learn about cPanel branding and how to display a custom logo in cPanel
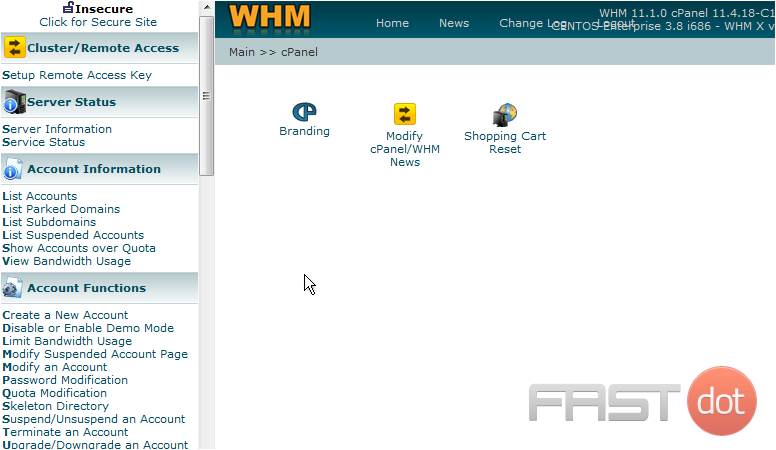
1) Click the cPanel link here
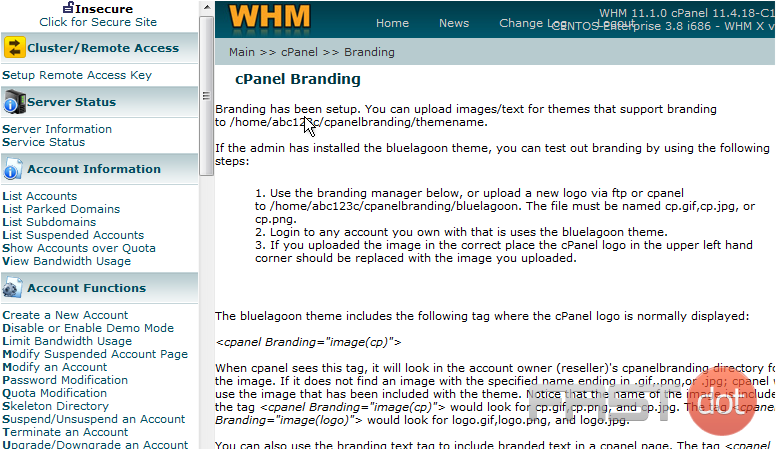
2) Then click the Branding link here
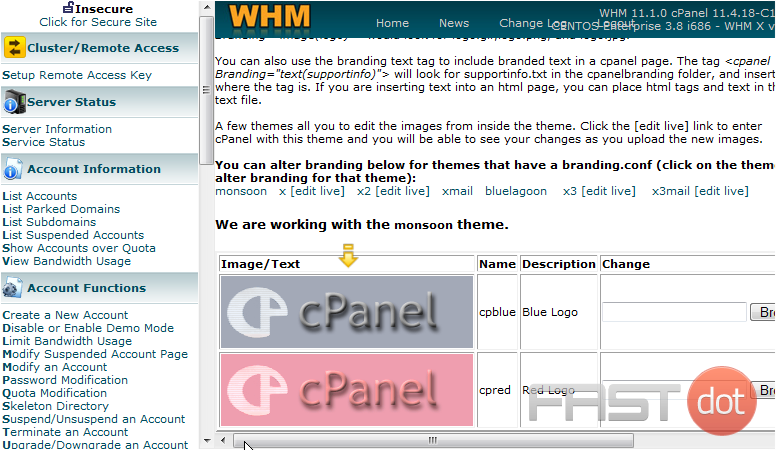
This is the main cPanel branding page. It has lots of information on how to incorporate branding into your customer’s cPanel so that it will be your logo they see instead of a cPanel logo
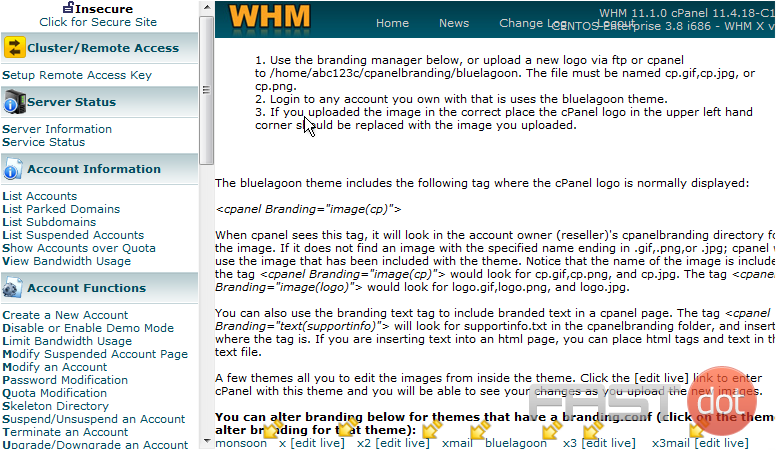
We can brand any of the following cPanel themes with our own logo
3) Select the monsoon theme
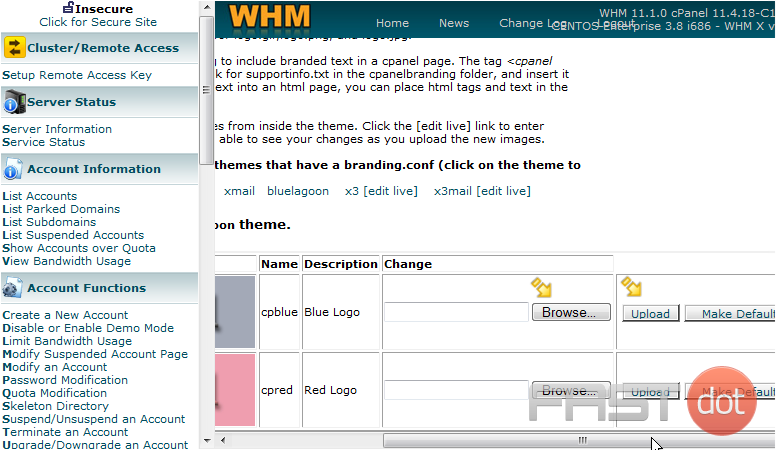
Here you can see the two logos that you can replace with your own logos in the monsoon theme
From here, you can upload new logos to replace the existing red and blue monsoon logos. Browse to the location of the new logo. Then click upload. The new logo will replace the old one, and you will have successfully branded cPanel so your customers see your logo instead of the standard cPanel logo
cPanel branding refers to the customization of the cPanel interface to reflect your own branding or your company’s identity. This can be particularly beneficial for web hosting providers, digital agencies, or businesses that offer web hosting or managed services to clients. Custom branding enhances the professional appearance of the service and can provide a more seamless experience for users. Here’s how to use cPanel branding effectively.
Accessing the Branding Editor in WHM
cPanel branding is managed through WebHost Manager (WHM), the administrative interface that controls the backend of cPanel accounts on a server. To begin, you need access to WHM:
- Log into WHM: Navigate to your WHM login page, which typically follows the format of
https://yourdomain.com:2087. Enter your WHM username and password to access the dashboard. - Find the Branding Feature: Once logged in, use the search feature located on the left side of the WHM dashboard to search for “cPanel Branding” or “Customization.” Click on the relevant link that appears in the search results.
Customizing the cPanel Interface
Within the cPanel Branding or Customization section of WHM, you’ll find various options for customizing the cPanel interface:
- Company Logo: Upload your company logo, which will replace the default cPanel logo in the top left corner of the user’s cPanel dashboard. Ensure your logo meets the recommended size and format guidelines.
- Webmail Logo: Similar to the company logo, you can also customize the logo that appears within the webmail interface, ensuring a consistent brand experience for users accessing their email through cPanel.
- Favicon: The favicon is the small icon that appears in the browser tab when users are logged into their cPanel or webmail. Uploading a custom favicon can further enhance your brand’s presence.
- Footer Copyright Text: Customize the text that appears in the footer of the cPanel interface. This can be used to display copyright information, support contact details, or any other relevant information.
- Theme Customization: Some versions of WHM allow for deeper customization of the cPanel theme, including colors and styles. This enables you to match the cPanel interface with your brand’s color scheme and design language.
- Style Editor: For advanced customization, you can use the Style Editor to create a completely custom cPanel style. This requires knowledge of CSS and may involve editing theme files directly.
Applying the Branding
After you’ve made your customizations:
- Save Your Changes: Make sure to save your changes after each customization. WHM will typically provide a preview or a confirmation that your changes have been applied.
- Apply to Existing Accounts: If you want your custom branding to apply to existing cPanel accounts, you may need to apply the changes explicitly to those accounts. This can usually be done within the same customization interface by selecting the accounts and applying your branding theme.
- Test the Branding: Log into a cPanel account to ensure that all branding elements appear as expected. It’s a good idea to check across multiple browsers and devices to ensure compatibility.
Tips for Effective cPanel Branding
- Consistency: Ensure your branding is consistent with your overall brand identity, including logos, color schemes, and messaging.
- Clarity: Avoid cluttering the cPanel interface with too much branding or overly complex designs. The primary goal is to enhance usability, not to detract from it.
- Support and Documentation: Consider customizing the support links and documentation within cPanel to direct users to your own support channels and resources.
cPanel branding is a powerful way to personalize the hosting experience for your users, reinforcing your brand identity and differentiating your services in a competitive market. By following these steps and best practices, you can create a branded cPanel experience that adds value to your hosting services and supports your business objectives.

