How to terminate an account in WHM
This demo assumes you’ve already logged in to WebHost Manager (WHM)
Let’s learn how to terminate (or delete) a hosting account from WHM
Keep in mind that terminating an account in WHM also permanetly deletes it off the server so be very sure you ant to do this before proceeding
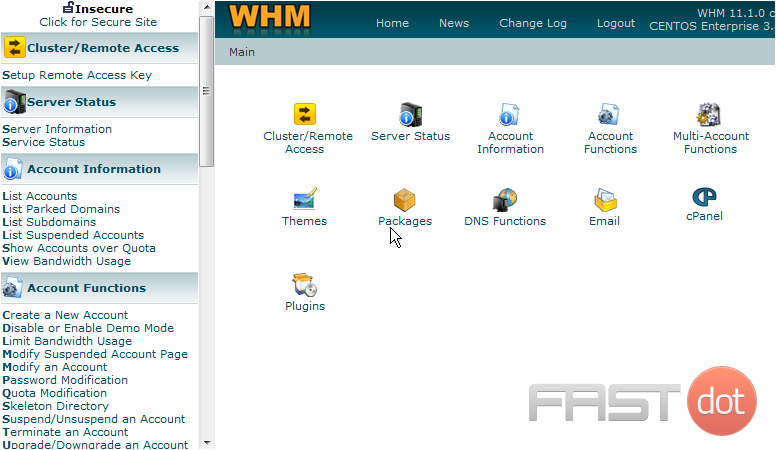
1) Click the Account Functions link
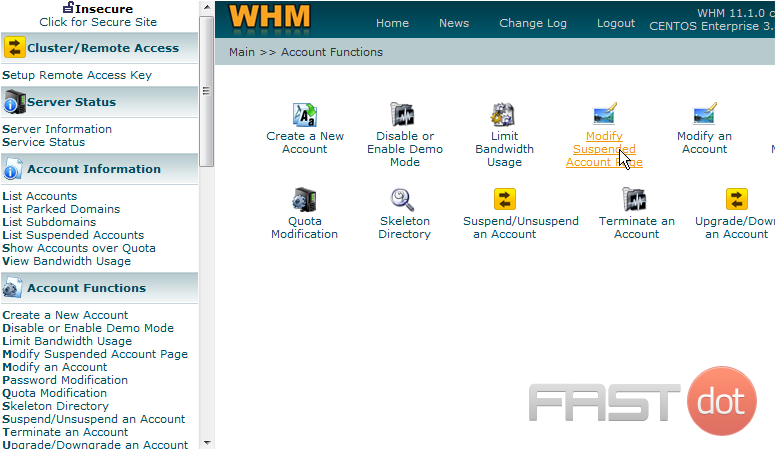
2) Click the Terminate an Account link
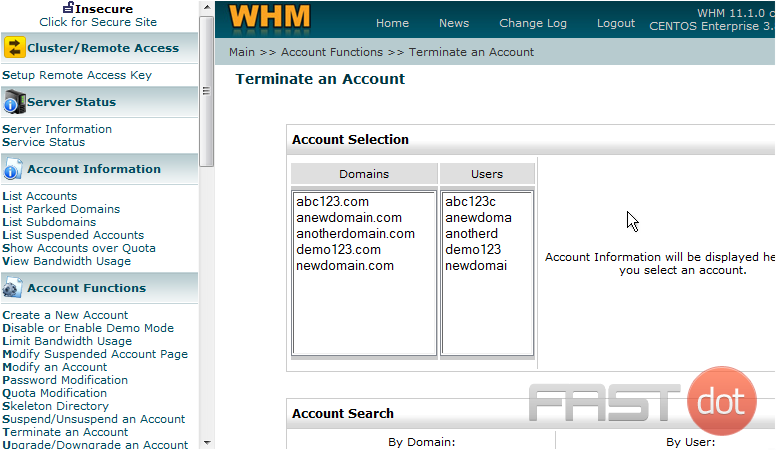
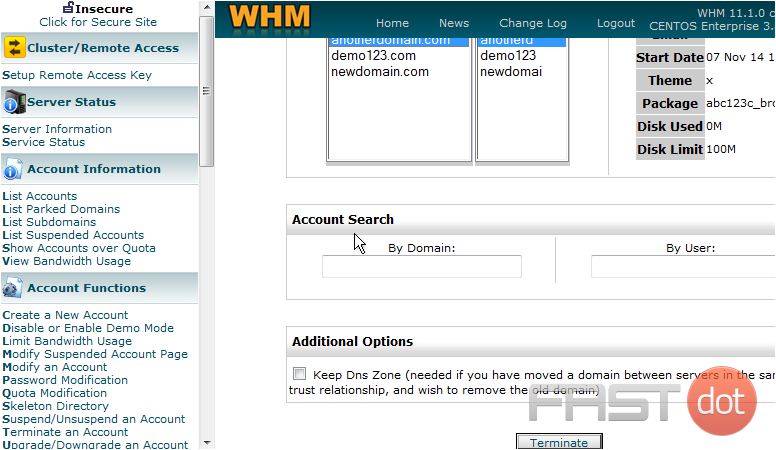
For the purposes of this tutorial, we’re going to delete a dummy account we created called anotherdomain.com
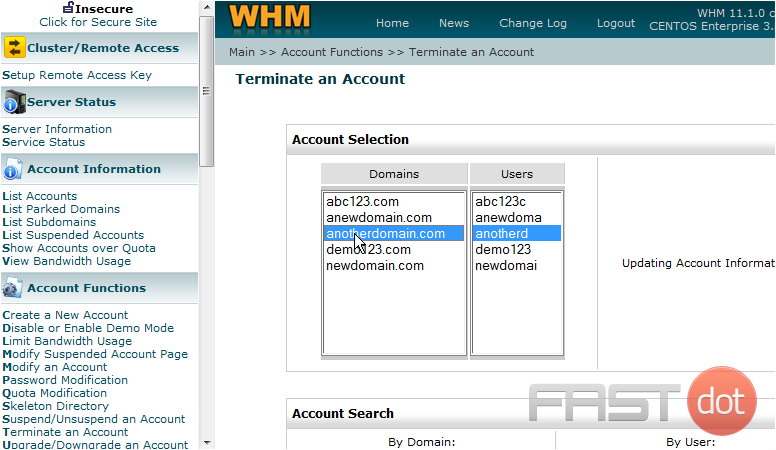
3) Select anotherdomain.com
Remember, clicking the Terminate button here is permanent. You will only be able to get this account afterwards, if there is a backup of it on the server, or if you’ve backed it up yourself somewhere else
4) Click the Terminate button
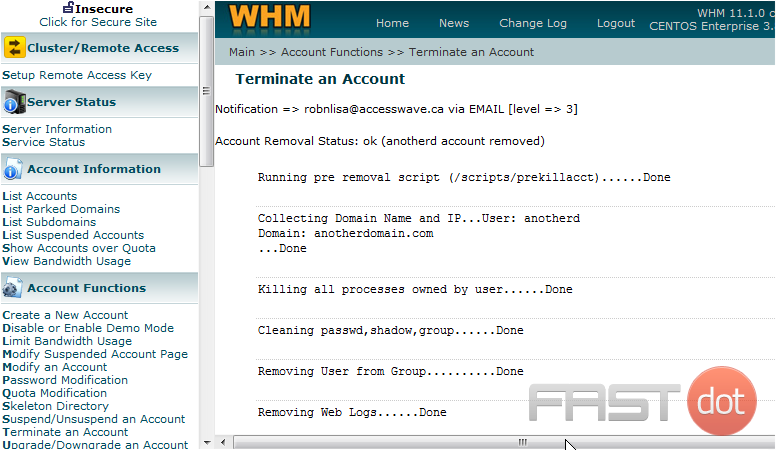
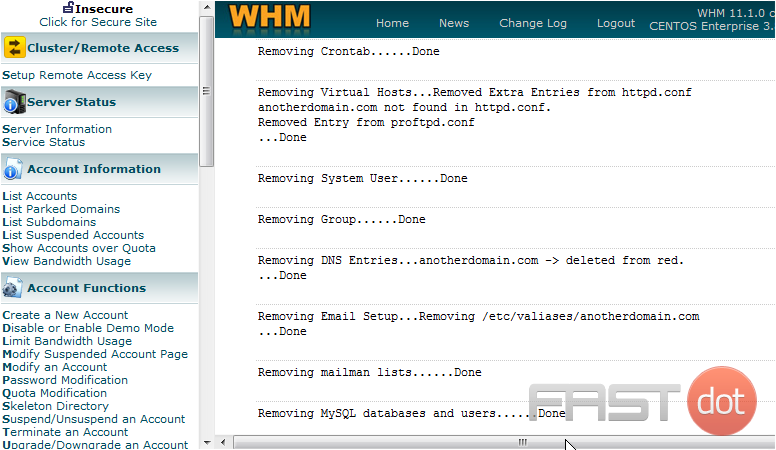
That’s it! The account has been deleted from WHM and the server
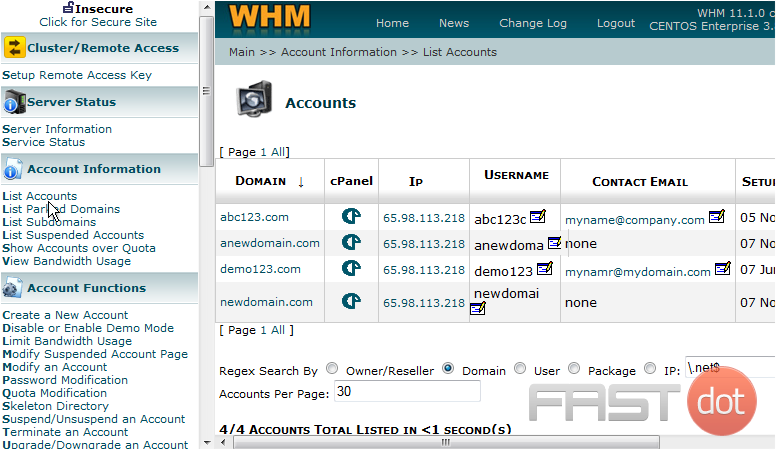
5) Click the List Accounts link
The anotherdomain.com account is no longer listed here in the list of accounts
Terminating an account in WHM (WebHost Manager) is a significant action that permanently removes the account and all of its data from the server. This process is typically used when a client cancels their hosting service or when you need to remove a test account. Given the irreversible nature of account termination, it’s crucial to ensure that you have a valid reason and, if necessary, a backup of any important data before proceeding. Here is a step-by-step guide on how to terminate an account in WHM:
Step 1: Log into WHM
- Access WHM: Open your web browser and navigate to your WHM login page, which is usually accessed via
https://yourserverip:2087orhttps://yourdomain.com/whm. Replaceyourserveriporyourdomain.comwith your actual server IP address or domain name. - Enter Credentials: Input your WHM username and password. Generally, you will need root access to perform account terminations, so make sure you are logging in with the root user or an equivalent account with termination privileges.
- Find the Account Functions: Once logged in, look for the “Account Functions” section in the WHM sidebar. This section contains various options for managing hosting accounts.
- Select Terminate Accounts: Within the “Account Functions” section, click on “Terminate Accounts”. This action will take you to the page where you can select the account(s) you wish to terminate.
Step 3: Select the Account to Terminate
- Identify the Account: On the “Terminate Accounts” page, you will see a list of all the cPanel accounts hosted on your server. Locate the account you want to terminate. You can use the search function to find the account by domain name or username if you manage many accounts.
- Review Account Details: Before proceeding, ensure that you have selected the correct account. Terminating the wrong account can lead to data loss and significant inconvenience.
Step 4: Terminate the Account
- Initiate Termination: Next to the account you wish to terminate, you’ll typically see a checkbox or a button. Select the account by clicking on the checkbox or directly on the “Terminate” button.
- Confirm Termination: WHM will ask you to confirm that you wish to terminate the selected account. This step is your final opportunity to cancel the process. Ensure you have backed up any necessary data before confirming.
- Complete the Termination: After confirmation, WHM will begin the termination process. This may take a few moments, depending on the size of the account being terminated. You will see a notification or a progress page indicating that the process is underway.
- Verify Termination: Once the process is complete, WHM will display a message confirming the account’s termination. You can verify this by going back to the account list and ensuring the account is no longer present.
Important Considerations
- Backup Data: Always ensure you have a current backup of any important data before terminating an account. Once an account is terminated, its data cannot be recovered.
- Inform the Account Holder: If the account belongs to a client or another user, make sure they are informed about the termination in advance.
- Check for Dependencies: Ensure that terminating the account does not affect other services or domains that might rely on it.
Terminating an account in WHM is a straightforward process, but it requires careful consideration due to its irreversible nature. Always double-check the details before proceeding to ensure that you’re terminating the correct account and that all necessary data has been backed up.

