What are MX Entries?
MX entries are DNS records that specify the mail servers responsible for receiving email on behalf of a domain. These records include the server’s priority and the domain name of the mail server. The priority determines the order in which mail servers are used.
Accessing MX Entry Management in WHM
To manage MX entries in WHM, follow these steps:
- Log in to WHM: Access your WHM account by entering your username and password.
- Navigate to DNS Functions:
- On the left-hand sidebar, scroll down to the DNS Functions section.
- Click on Edit MX Entry.
Editing MX Entries
Once you are in the Edit MX Entry section, follow these steps to manage the MX entries for a domain:
- Select a Domain:
- A list of domains will be displayed. Select the domain for which you want to edit MX entries.
- Click on the Edit button next to the chosen domain.
- Configure MX Entries:
- You will see the current MX entries for the selected domain.
- To add a new MX entry, enter the priority and the mail server in the respective fields.
- Click on Add New Record to add the entry.
- To delete an existing MX entry, click the Delete button next to the entry you want to remove.
- To modify an existing MX entry, edit the priority or the mail server and click on Save.
- Set Email Routing:
- Below the MX entries, you can set the email routing option.
- Choose one of the following options:
- Automatically Detect Configuration: WHM will automatically determine the best email routing option.
- Local Mail Exchanger: Select this if the mail server is hosted on the same server.
- Backup Mail Exchanger: Select this if the server should act as a backup mail exchanger.
- Remote Mail Exchanger: Select this if the mail server is hosted on a different server.
- Save Changes:
- After making the necessary changes, click on the Save button to apply the new MX entries and email routing settings.
Example Configuration
Here’s an example configuration for MX entries:
- Priority: 10
- Mail Server: mail.example.com
If you have a secondary mail server for redundancy, you might add:
- Priority: 20
- Mail Server: backupmail.example.com
Testing MX Entries
After configuring MX entries, it’s essential to test them to ensure they are functioning correctly. You can use online tools like MXToolbox to verify the MX records and check for any issues.
Troubleshooting MX Entries
If you encounter issues with email delivery, consider the following troubleshooting steps:
- Check DNS Propagation:
- DNS changes, including MX entries, can take up to 48 hours to propagate. Use tools like WhatsMyDNS to check the propagation status.
- Verify MX Entry Syntax:
- Ensure there are no typos in the mail server domain names.
- Check that the priority values are correctly configured.
- Review Email Routing Settings:
- Ensure the correct email routing option is selected in WHM based on your server configuration.
- Check Server Logs:
- Review the mail server logs for any error messages or issues related to email delivery.
Conclusion
Managing MX entries in WHM is a straightforward process that ensures your domain’s email is routed correctly. By following the steps outlined in this guide, you can efficiently configure and manage MX entries to ensure reliable email delivery. Regularly review and test your MX entries to maintain optimal email performance.
If you need further assistance or detailed guidance on any specific aspect of managing MX entries in WHM, feel free to ask!
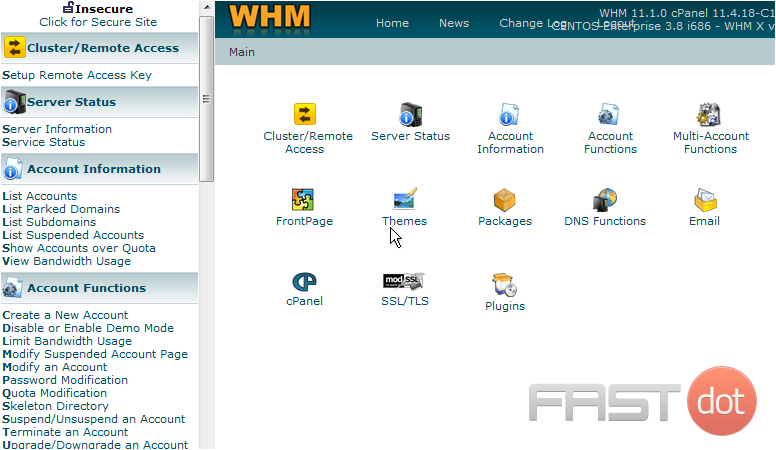
This demo assumes you’ve already logged in to WebHost Manager (WHM)
Now let’s learn how to manage our MX entries
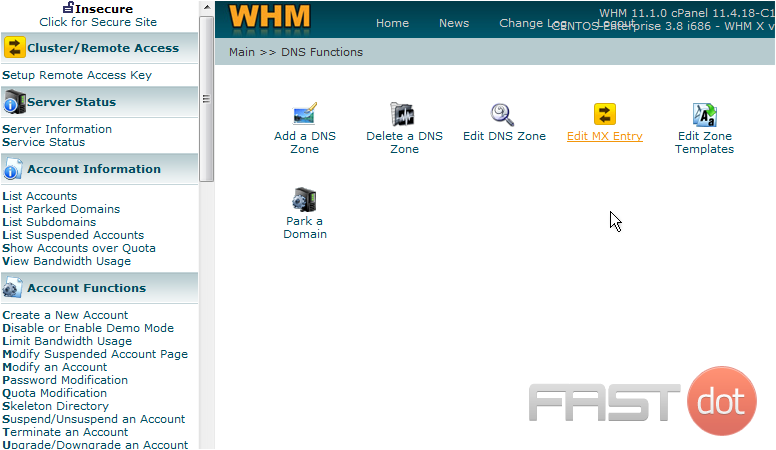
1) Click the DNS Functions link
2) Now click the Edit MX Entry link
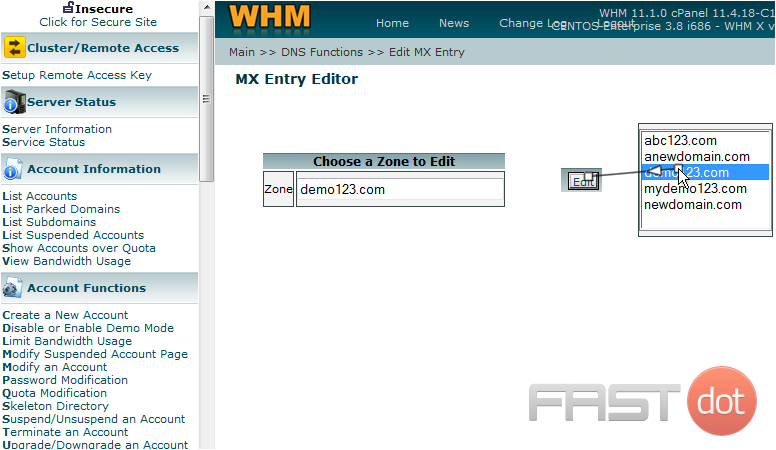
Now select the account for which you want a customized MX entry
3) Select demo123.com, then click Edit
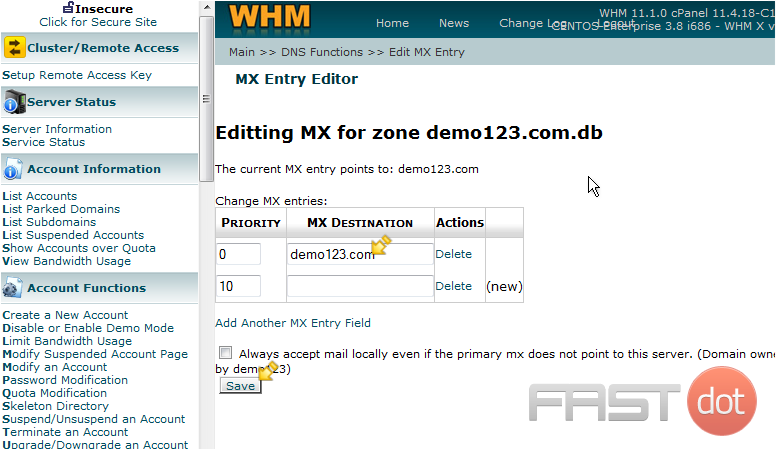
This is where you can specify a custom MX entry. You may want to do this for customers who want their email hosted elsewhere on another server. In those cases, you would enter the other server’s IP address here and click save
We’re not going to do this now, because we don’t want to disturb the existing settings
This is the end of the tutorial. You now know how to manage MX entries in WHM. Remember that unless you want to point mail to a different mail server (not in this server), you never have to modify your MX settings


