Accessing WHM
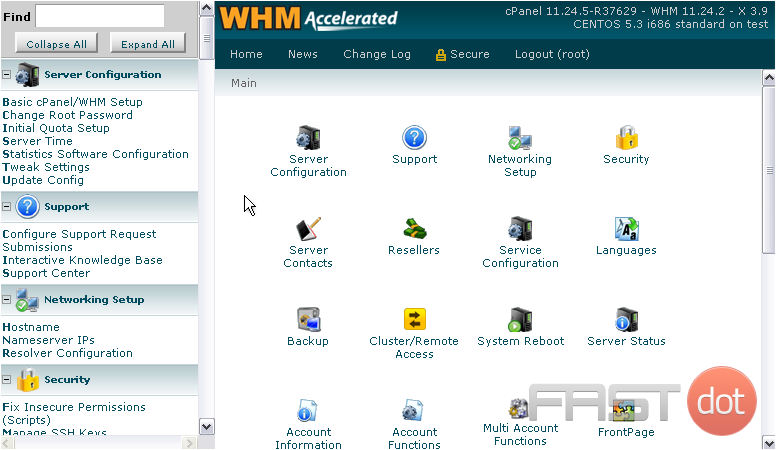
- Log in to WHM: Open your web browser and navigate to your WHM login page. Enter your username and password to access the WHM dashboard.
Viewing the List of Accounts
WHM offers multiple methods to view the list of accounts. Here are the most common methods:
Method 1: List Accounts Feature
- Navigate to the List Accounts Section:
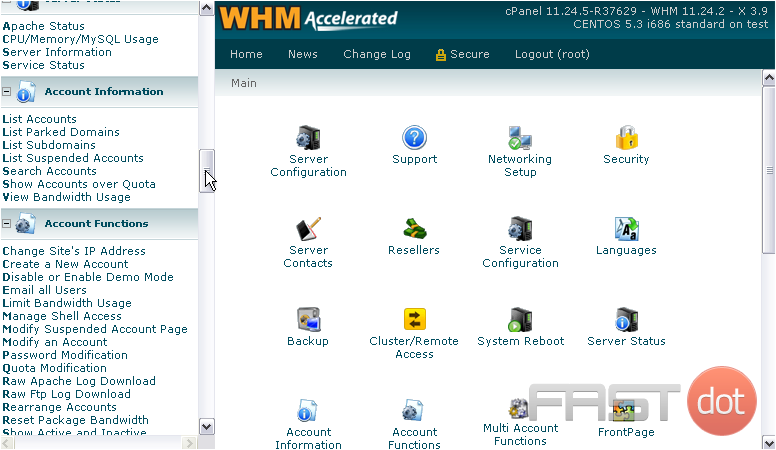
- In the WHM dashboard, scroll down to the Account Information section.
- Click on List Accounts.
- View the Accounts:
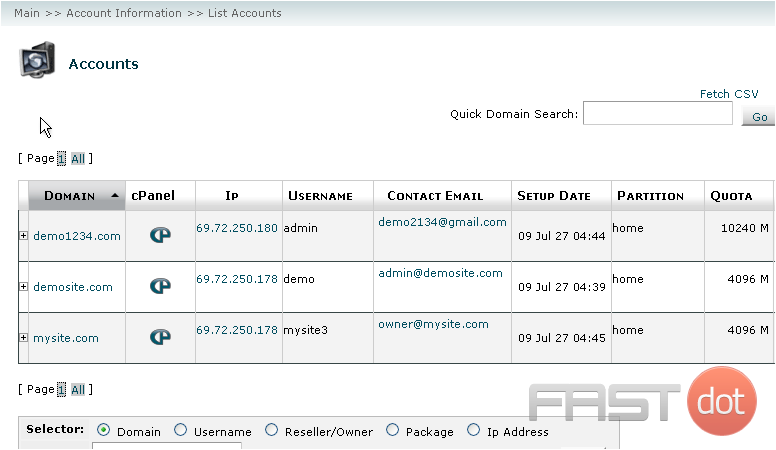
- The List Accounts page displays a table with all the accounts on your server.
- The table includes information such as the domain name, username, contact email, package, and IP address for each account.
- Search and Filter:
- Use the search box at the top to filter accounts by domain, username, or IP address.
- You can also sort the table by clicking on the column headers.
Method 2: Account Summary Feature
- Navigate to the Account Summary Section:
- In the WHM dashboard, scroll down to the Account Information section.
- Click on Account Summary.
- Select an Account:
- Use the dropdown menu to select an account.
- Click on View to see detailed information about the selected account.
Method 3: Using Command Line Interface (CLI)
- Access Your Server via SSH:
- Use an SSH client (like PuTTY) to connect to your server.
- Log in with your root credentials.
- Run the List Accounts Command:
whmapi1 listaccts - Parsing the Output:
- You can use tools like
jqto parse the JSON output for easier reading. For example:whmapi1 listaccts | jq '.data.acct[] | {domain, user, email, ip}'
- You can use tools like
Additional Account Management Features
Modify Account
- Navigate to the Modify Account Section:
- In the WHM dashboard, scroll down to the Account Functions section.
- Click on Modify an Account.
- Select an Account:
- Choose the account you want to modify from the list.
- Click on Modify to view and edit the account’s settings.
View Bandwidth Usage
- Navigate to the View Bandwidth Usage Section:
- In the WHM dashboard, scroll down to the Account Information section.
- Click on View Bandwidth Usage.
- View Bandwidth Information:
- The page will display bandwidth usage for all accounts, helping you monitor resource consumption.
Conclusion
Viewing a list of accounts on your WHM server is straightforward using the built-in features like List Accounts and Account Summary. Additionally, you can use the command line for more detailed and scriptable outputs. Regularly monitoring and managing accounts helps ensure optimal server performance and resource allocation.
If you need further assistance or detailed guidance on any specific aspect of managing accounts in WHM, feel free to ask!
WHM provides you with a tool to list all accounts on your server. If you’ve watched some of the previous tutorials in this series, you’ve probably seen the tool already.
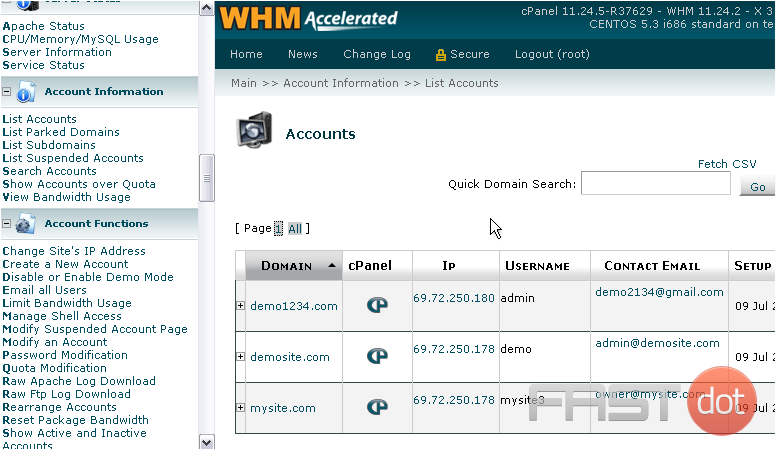
1) Locate the Account Information menu.
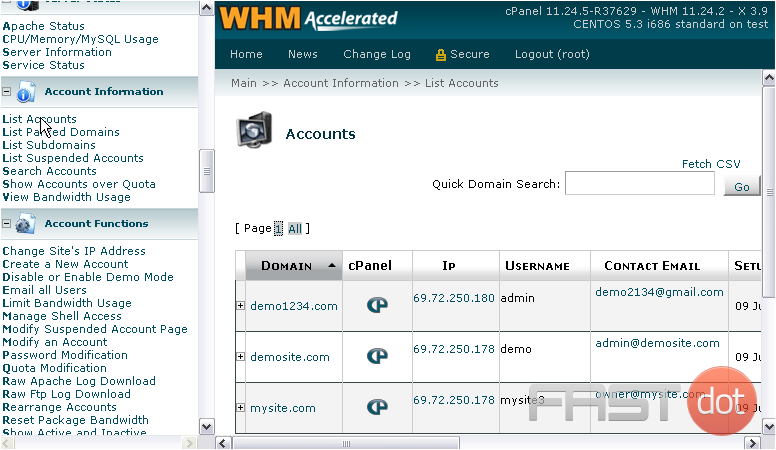
2) Click List Accounts.
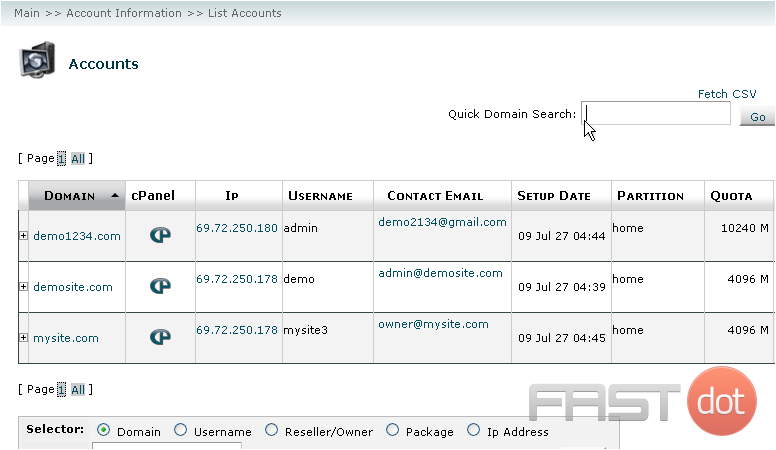
3) Here is the Accounts List. Let’s view this in a full-sized window so it’s not so cramped.
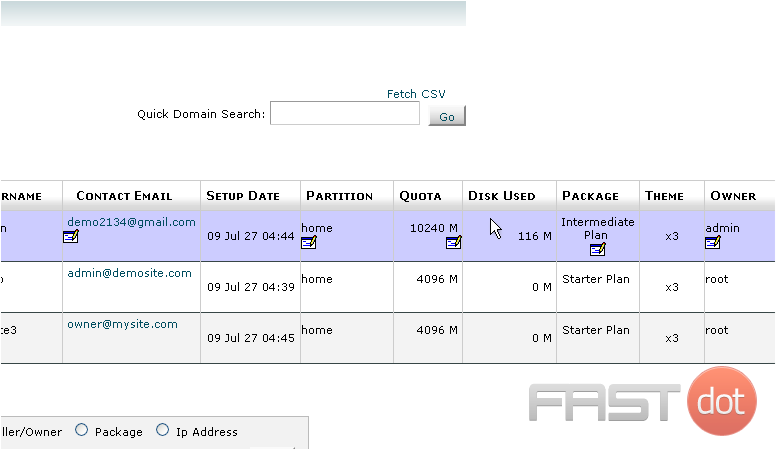
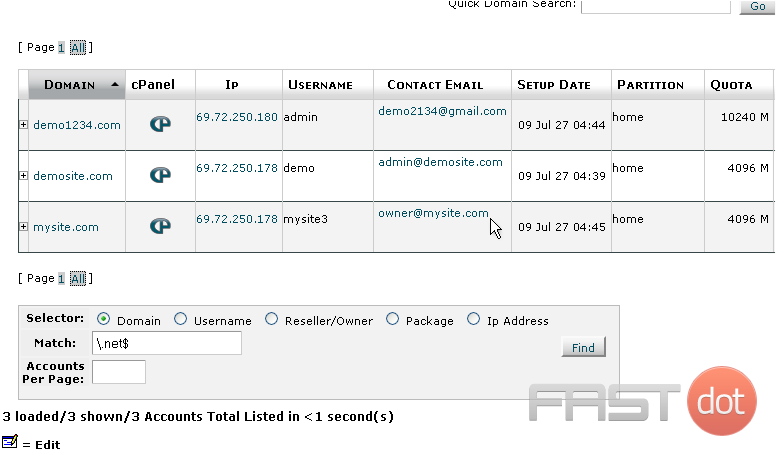
By default, you’ll see a list of every account on your system, which can be split up into pages. Each account has its own row in the table, specifying a variety of useful information about the account.
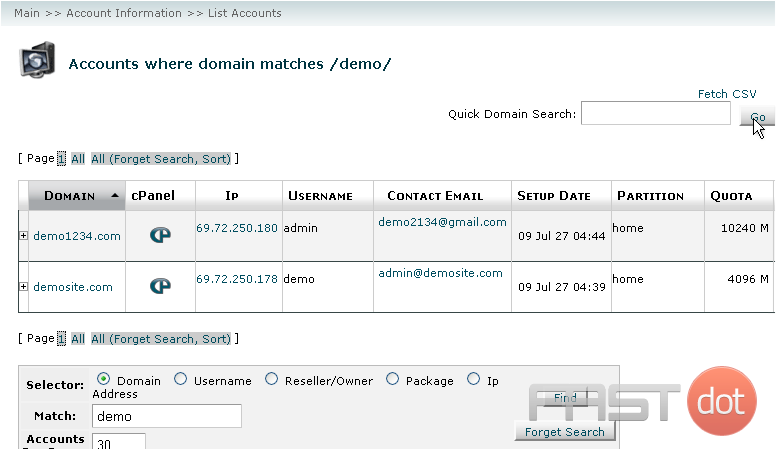
You can perform a Quick Domain Search for accounts using this form, which will show all accounts whose domains match your query.
4) Search by pressing Go.
As you can see, only those accounts whose domains contain the phrase “demo” will be displayed.
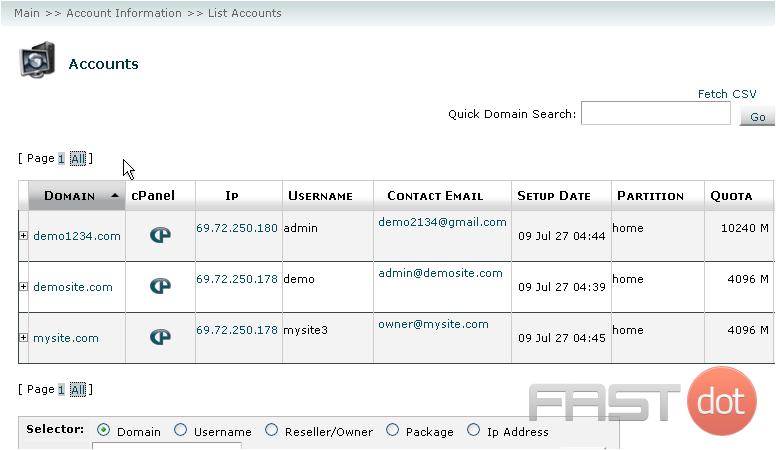
5) Click this link to revert the page to the default list.
6) You can export a comma-delimited CSV file of all your accounts by clicking Fetch CSV.
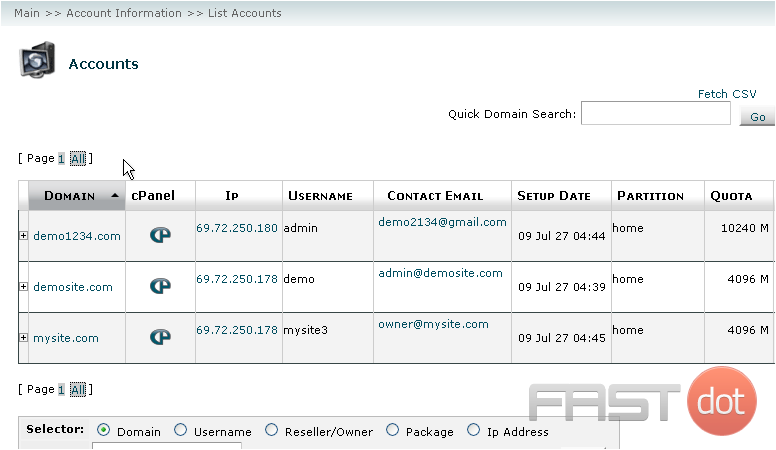
Now, let’s take a closer look at the information contained in the table.
The list can be sorted using the data in a specific column by clicking its header link. As you can see, we’re currently sorted in ascending order by Domain.
Clicking the plus sign + next to an account will give you access to a simple form allowing you to change the account’s password or contact e-mail.
If you click on the cPanel logo next to an account, you will be transferred to the account’s cPanel, without needing to log in.
7) Hovering over an account’s row will show edit links for a number of settings.
8) You can then click on the edit icon to edit that particular setting for the account.
9) At the bottom of the page is a more advanced search box. You’ll see all about using this in the tutorial that follows.
10) Apart from the advanced search feature, that’s all there is to see and do here. Close this window or tab to return to the standard WHM view.
This tutorial is now complete. You now know how to use the Accounts List in WHM.
Do you have any questions? Ask us in the forums →

