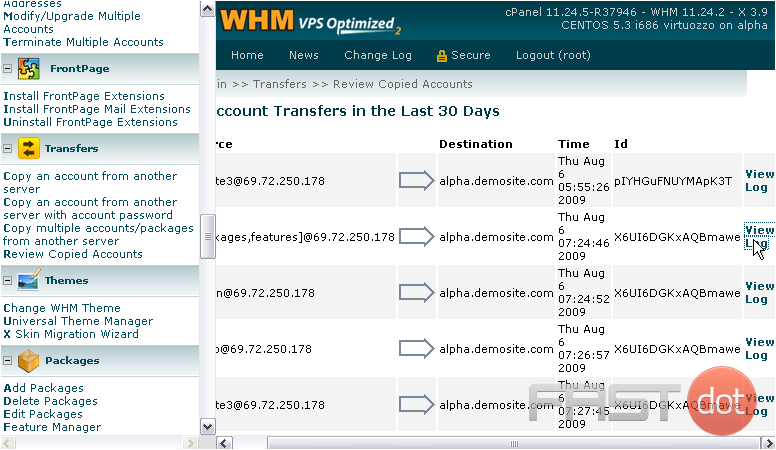
How to view a list of accounts transferred to your server in WHM
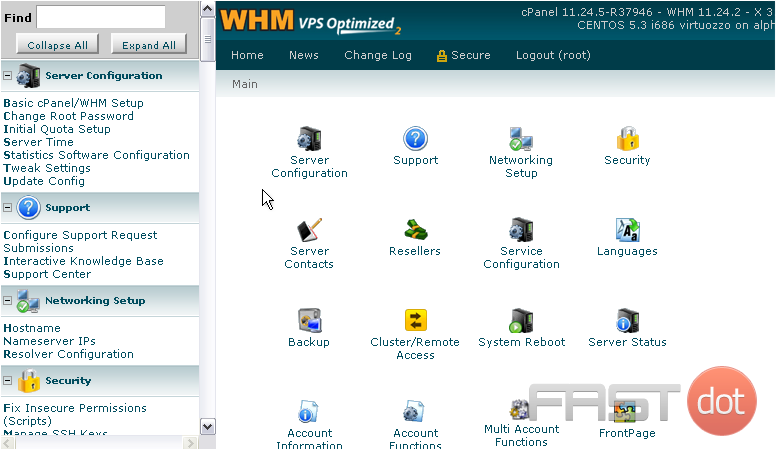
If you’ve transferred an account over to this server in the past thirty days, you can still view the transfer log in WHM.
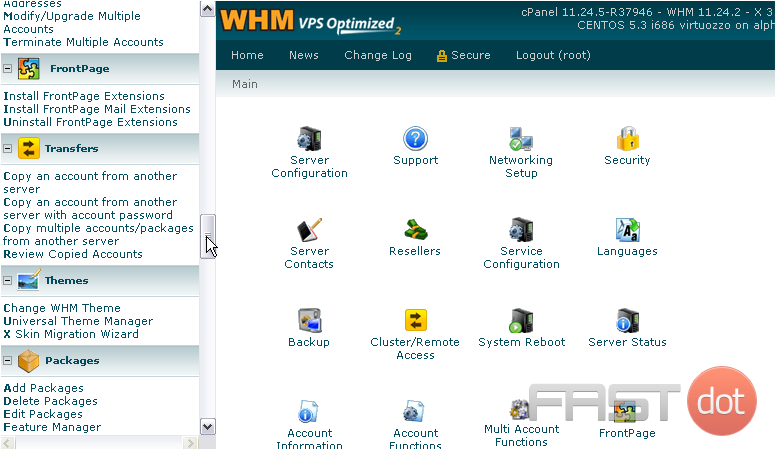
1) Scroll through the menu until you’ve found the Transfers section.
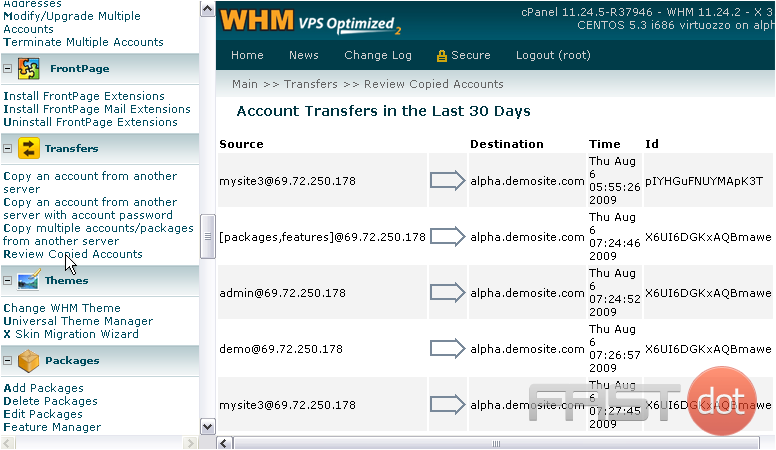
2) Go to Review Copied Accounts.
If you’ve ever performed a multi-account transfer, you should have already seen this page; it shows up at the end of multi transfers.
There’s not much for you to do here, apart from seeing which accounts were transferred to and from the servers listed here at the specified times.
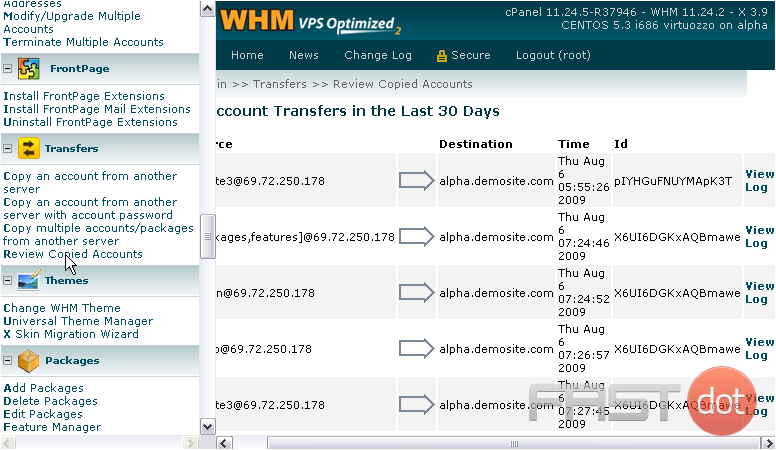
3) If something went wrong with a transfer, you can always view its log file here.
The log will open in a new window or tab.
This is just a log for a Packages & Feature Lists transfer, so it’s not very long. An account’s transfer log will be quite a bit longer.
4) Close this page to return to WHM.
Viewing a list of accounts that have been transferred to your server in WHM (WebHost Manager) is an essential task for server administrators, especially after performing migrations. WHM, the management tool used for cPanel servers, provides an easy way to view these accounts, ensuring that the transfer process has been completed successfully. Here’s how you can view a list of accounts that have been transferred to your server in WHM:
Step 1: Log into WHM
First, access the WHM interface by entering the URL into your browser’s address bar. This URL is usually in the format of https://yourserverIP:2087 or https://yourdomain.com/whm. You will need to use your root username and password to log in.
Step 2: Access the Transfer Tool
Once logged into WHM, locate the search bar typically found at the top left of the WHM dashboard. Type “Transfer” into the search bar, and you should see a list of options related to transferring accounts.
Click on “Transfer Tool” or a similarly named option. The Transfer Tool is used not only for initiating transfers but also for viewing past transfers.
Step 3: View Recent Transfers
Within the Transfer Tool interface, look for a section or a tab that displays recent transfers. In some versions of WHM, this may be directly visible on the main page of the Transfer Tool; in others, you might need to select an option like “Review Transfers and Restores” or “View Transfers.”
Step 4: Analyze the Transfer Session List
You should now see a list of transfer sessions. Each session represents a group of accounts that were transferred to your server at a specific time. These entries typically include:
- The date and time of the transfer.
- The source server from which accounts were transferred.
- The number of accounts transferred in each session.
Click on a specific session to view more details about the accounts transferred during that session. This can include the usernames, domain names, and the status of each transfer (successful, failed, or in progress).
Step 5: Troubleshooting and Details
If there are any issues with specific accounts, you may find additional details or error messages by clicking on the account’s status or details link. This information can be valuable for troubleshooting any problems that occurred during the transfer process.
Additional Tips
- Documenting Transfers: It’s a good practice to document the details of each transfer session, including the date, source server, and any issues encountered. This documentation can be helpful for future reference or audits.
- Post-Transfer Checks: After transferring accounts, perform checks to ensure that websites, email accounts, and other services are functioning correctly on the new server. This may include checking DNS settings, website functionality, and email deliverability.
- Consulting Logs: For more detailed analysis or troubleshooting, consider consulting the transfer logs. WHM stores detailed logs of each transfer, which can be accessed through the Transfer Tool or directly via the command line on the server.
By following these steps, you can easily view a list of accounts that have been transferred to your server in WHM, helping you manage your server’s accounts more effectively and ensure that all transfers have been completed successfully.

