Accessing File Manager in cPanel
- Log in to cPanel: Open your web browser and navigate to your cPanel login page. Enter your username and password to access the cPanel dashboard.
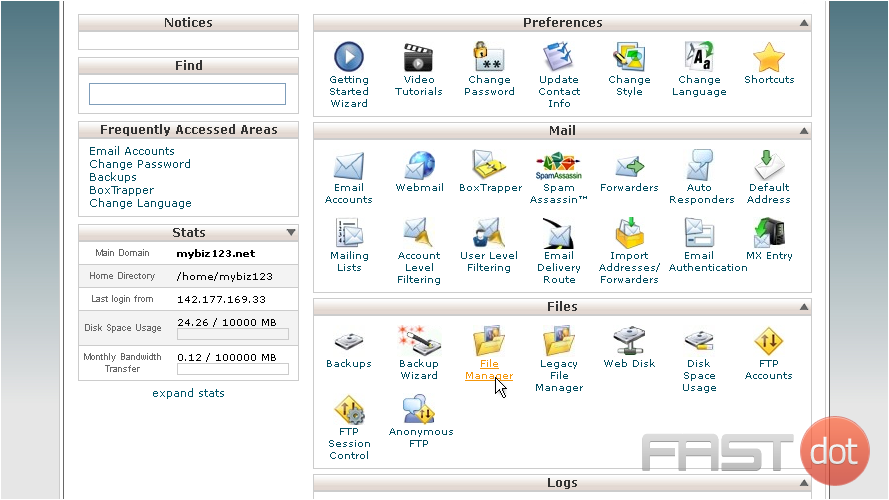
- Open File Manager: In the Files section of the cPanel dashboard, click on the File Manager icon.
Understanding the File Manager Interface
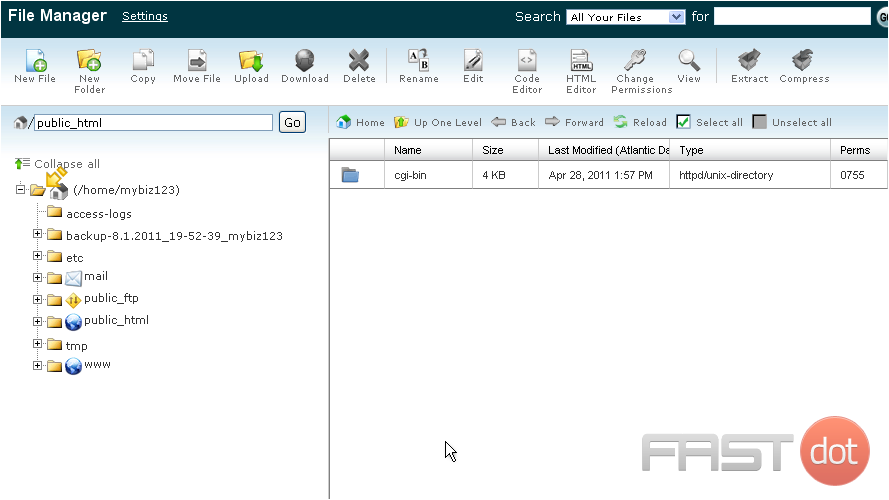
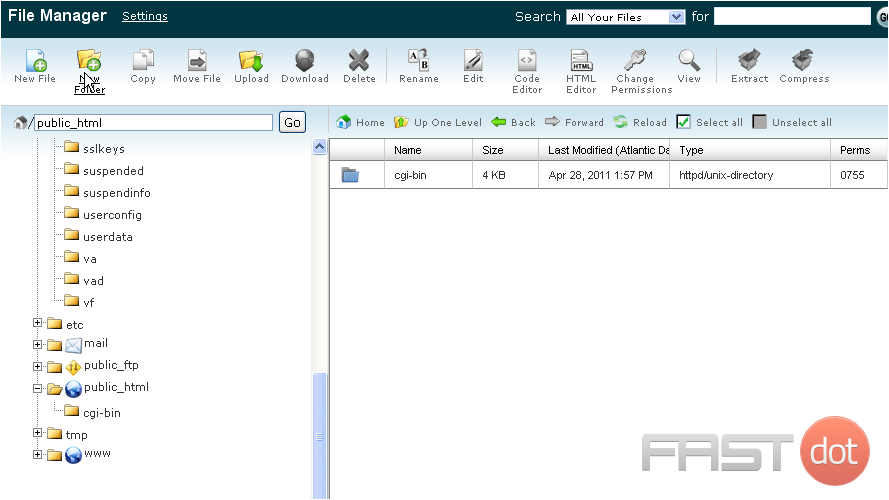
The File Manager interface is divided into several sections:
- Top Toolbar: Contains icons for common file operations such as creating, uploading, deleting, copying, and moving files.
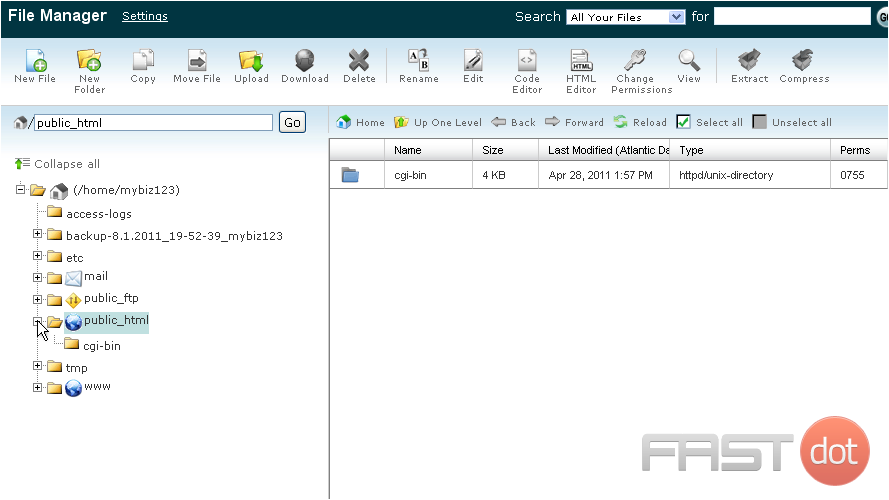
- Left Sidebar: Displays the directory structure of your website. You can navigate through different folders here.
- Main Window: Shows the contents of the selected folder. This is where you can see your files and folders.
- Navigation Bar: Displays the current path of the folder you are in. You can use this to navigate back to previous directories.
Basic File Operations
Creating Files and Folders
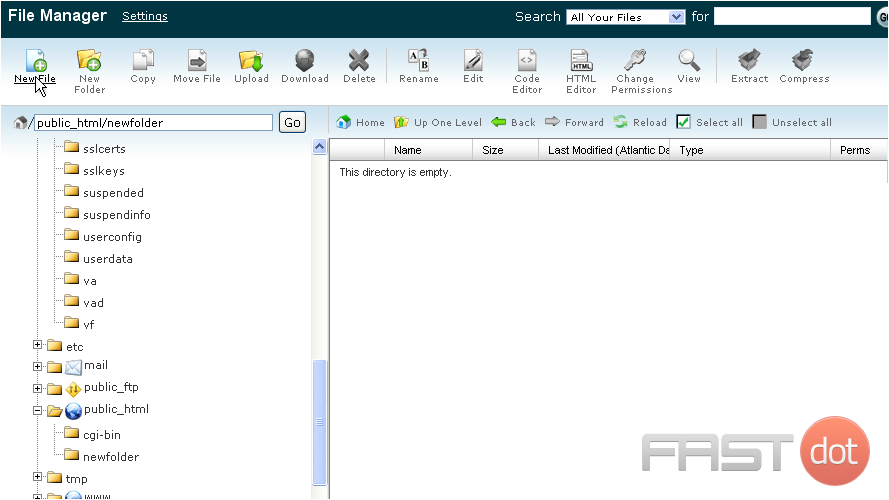
- Create a New File:
- Click on the + File icon in the top toolbar.
- Enter the file name and choose the directory where you want to create the file.
- Click Create New File.
- Create a New Folder:
- Click on the + Folder icon in the top toolbar.
- Enter the folder name and choose the directory where you want to create the folder.
- Click Create New Folder.
Uploading Files
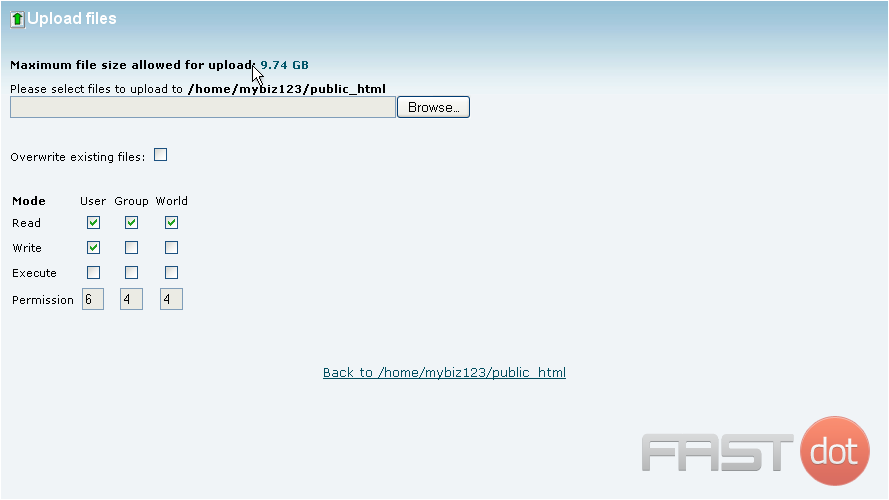
- Upload Files:
- Navigate to the directory where you want to upload the file.
- Click on the Upload icon in the top toolbar.
- Drag and drop your files into the upload window or click on Select File to browse and select files from your computer.
- The upload process will begin automatically.
Editing Files
- Edit Files:
- Select the file you want to edit by clicking on it.
- Click on the Edit icon in the top toolbar.
- A new tab will open with the cPanel code editor.
- Make the necessary changes to the file and click Save Changes.
- Edit Code:
- For advanced editing, you can use the Code Editor.
- Select the file and click on the Code Editor icon in the top toolbar.
- Make your changes and click Save Changes.
Deleting Files and Folders
- Delete Files or Folders:
- Select the files or folders you want to delete.
- Click on the Delete icon in the top toolbar.
- A confirmation window will appear. Click Confirm to move the selected items to the trash.
- To permanently delete the items, go to the Trash folder, select the items, and click Delete Permanently.
Copying and Moving Files
- Copy Files or Folders:
- Select the files or folders you want to copy.
- Click on the Copy icon in the top toolbar.
- Choose the destination directory and click Copy File(s).
- Move Files or Folders:
- Select the files or folders you want to move.
- Click on the Move icon in the top toolbar.
- Choose the destination directory and click Move File(s).
Advanced Features
Compressing and Extracting Files
- Compress Files:
- Select the files or folders you want to compress.
- Click on the Compress icon in the top toolbar.
- Choose the compression type (ZIP, GZIP, BZIP2) and click Compress File(s).
- Extract Files:
- Select the compressed file you want to extract.
- Click on the Extract icon in the top toolbar.
- Choose the destination directory and click Extract File(s).
Changing File Permissions
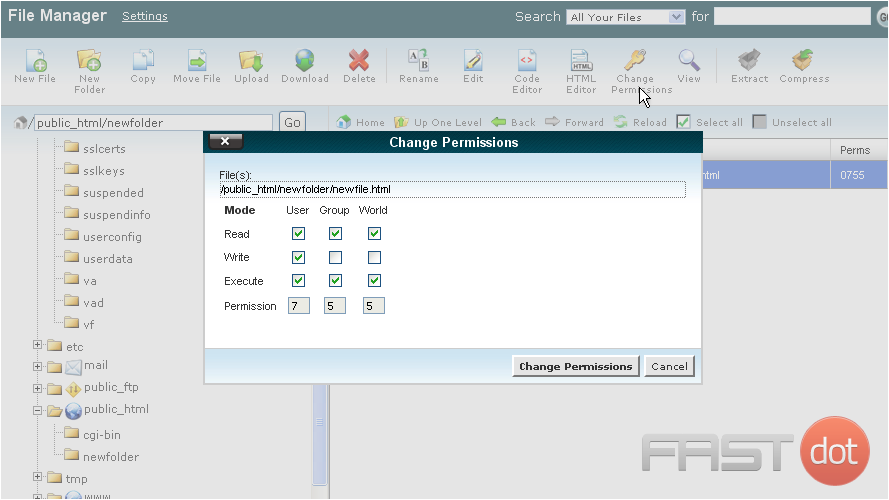
- Change Permissions:
- Select the file or folder for which you want to change the permissions.
- Click on the Permissions icon in the top toolbar.
- A window will appear with checkboxes to set read, write, and execute permissions for the owner, group, and public.
- Adjust the permissions as needed and click Change Permissions.
Conclusion
The File Manager in cPanel is a versatile tool that allows you to manage your website files efficiently. By familiarizing yourself with its features and functions, you can perform a wide range of file operations directly from your browser, saving time and simplifying website management.
If you need further assistance or detailed guidance on any specific aspect of using File Manager in cPanel, feel free to ask!
This demo assumes you’ve already logged in to cPanel
Now let’s learn how to use File Manager
1) Click the File Manager icon
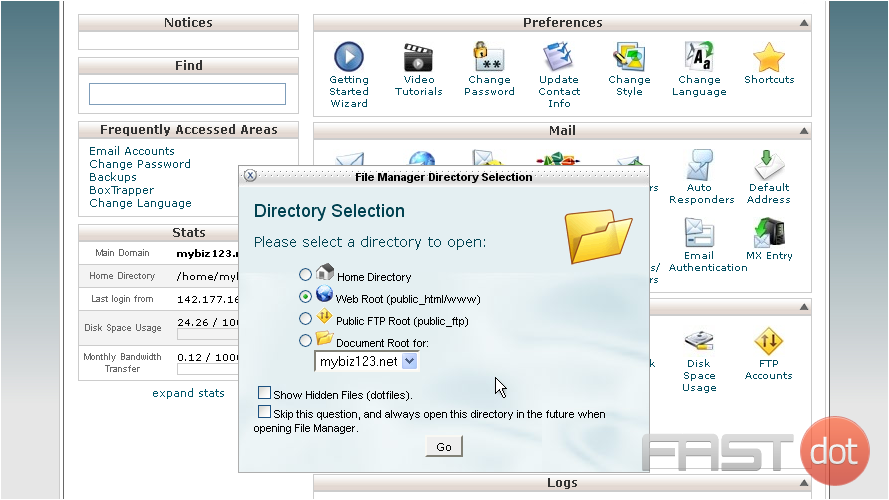
2) Choose the directory you wish to open, then click Go
This is the File Manager interface, where you can upload files to your account, delete files, change file permissions, and a host of other functions
On the left is a collapsible list of folders in your account while on the right is a list of all files and folders within the folder selected on the left
It is in the public_html folder where your website files (html pages, gif images, etc) must go
3) Use this function to upload files to your account, and set their permissions
4) Creating a new folder is easy…
5) … as is creating a new file
6) You can also use File Manager to change the permissions of files or folders
Basically, File Manager makes it easy to manage the files and folders in your account, when you don’t have access to an FTP application
This is the end of the tutorial. You now know how to use File Manager in cPanel
Do you have any questions? Ask us in the forums →

