How to setup Hotlink protection in cPanel
Now let’s learn how to use Hotlink Protection, so peoplecan’t link directly to images in our website
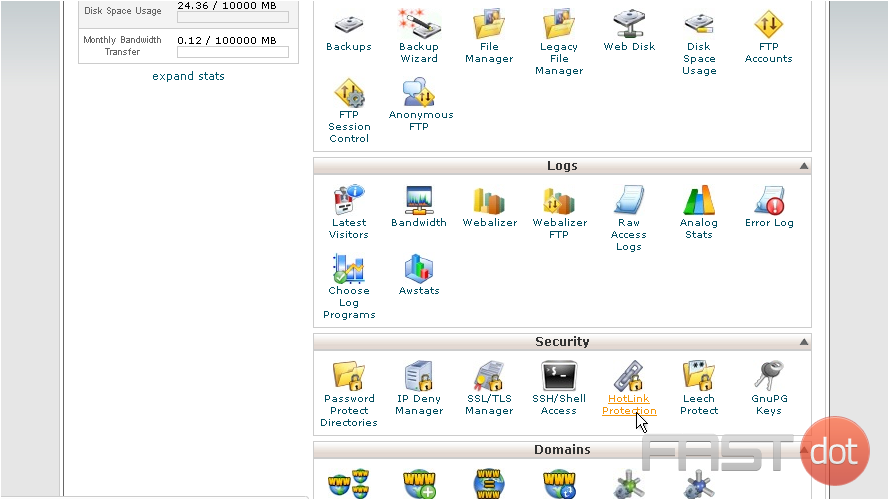
1) Click the Hotlink Protection icon
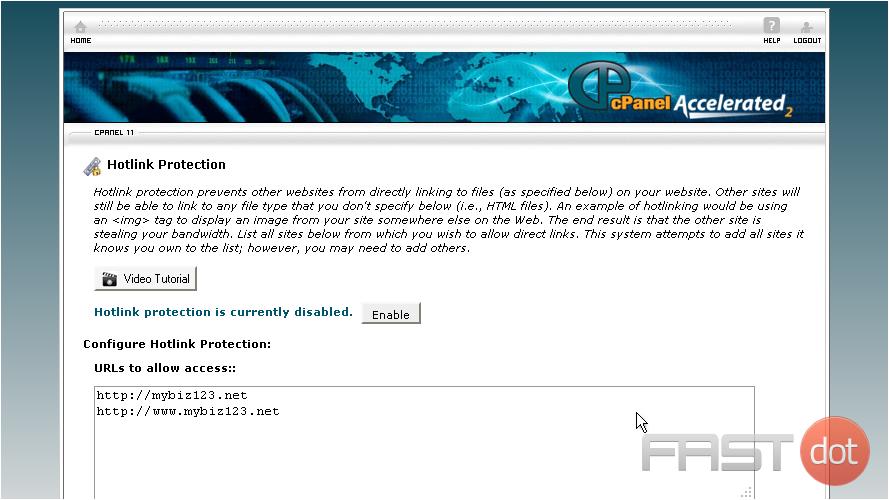
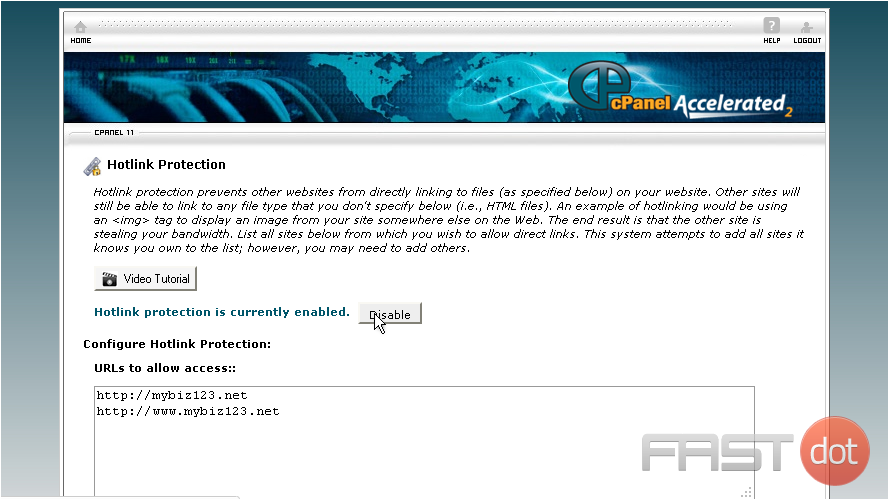
Hotlink Protection prevents other websites from directly linking to certain files (typically images) on your website. You’ll want to prevent this if you have copyrighted images, or to simply save on bandwidth usage
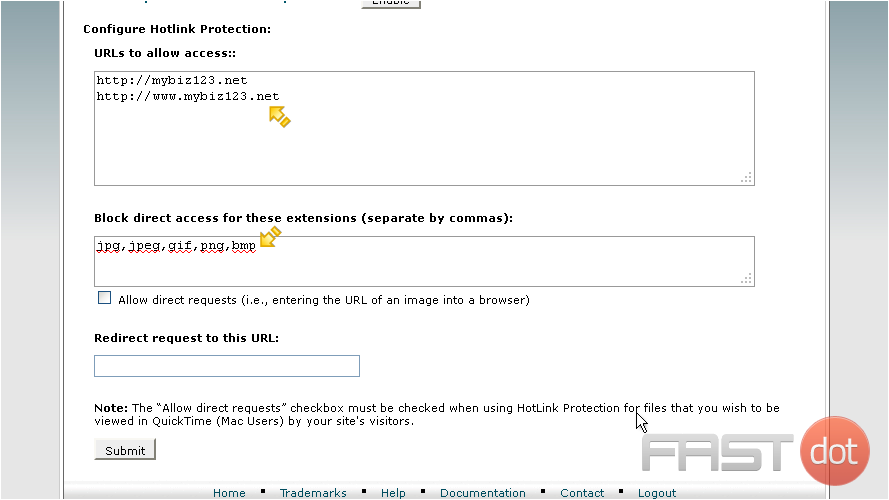
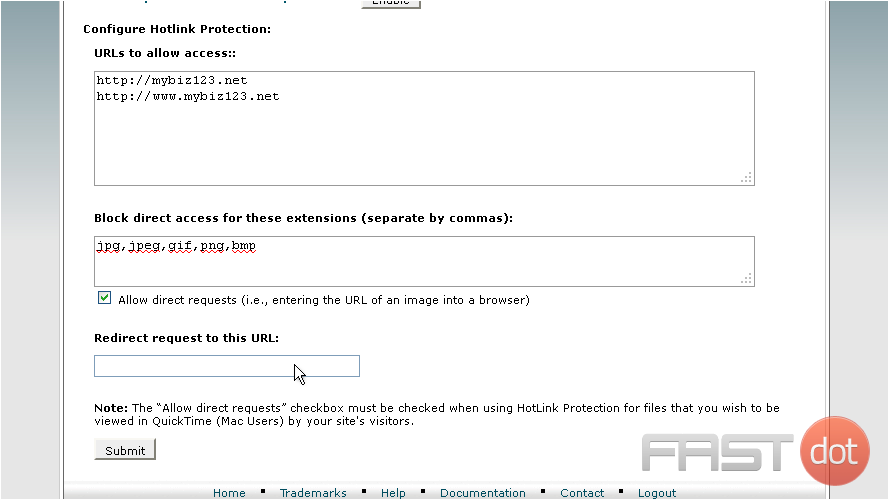
2) You’ll first want to make sure your own sites are listed here, so you are able to hotlink to your images
3) Enter all the file types you want protected here…
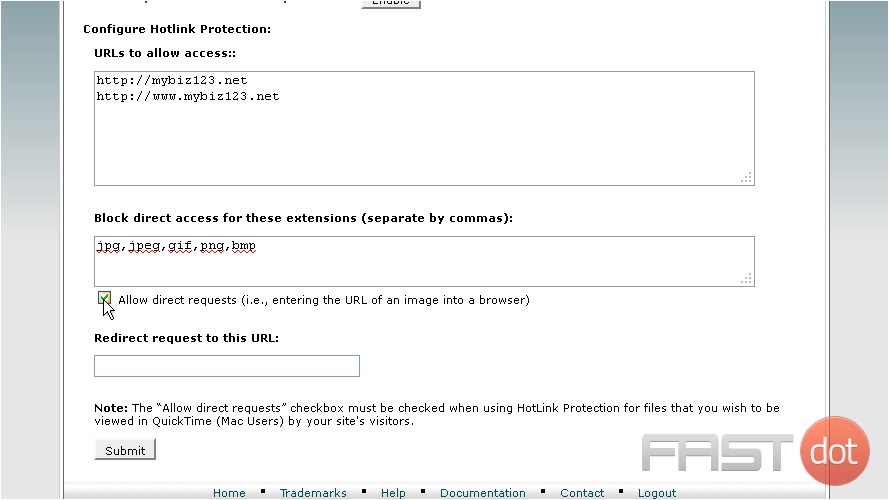
4) … and if you want to allow people to be able to manually enter the URL of a protected file, check this box
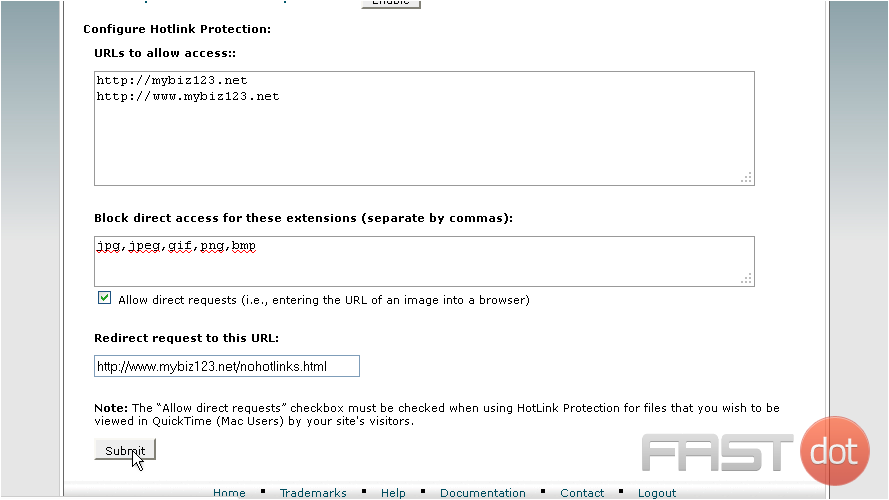
5) Then enter a URL you want to redirect to, for anyone who tries to hotlink to your files or images
6) Click Submit
That’s it! You’ve successfully enabled hotlink protection
7) To disable hotlink protection, click this Disable button
Setting Up Hotlink Protection in cPanel: A Detailed Guide
Hotlink protection is a crucial feature for website administrators, especially if you’re concerned about unauthorized websites using your bandwidth by linking directly to the files on your server (typically images or videos). cPanel, a widely used web hosting control panel, offers an easy way to enable hotlink protection. This guide will walk you through the process of setting it up, ensuring that your content is safeguarded against unauthorized use.
Understanding Hotlink Protection
Hotlink protection works by preventing other websites from directly linking to files on your website. This is particularly important for images and multimedia content, which can consume significant bandwidth when accessed repeatedly. By enabling hotlink protection, you ensure that your content is only served to your own website visitors, thereby saving bandwidth and potentially reducing hosting costs.
Steps to Enable Hotlink Protection in cPanel
- Log into cPanel: Access your cPanel account using your username and password. The login details are typically provided by your web hosting service.
- Find the Hotlink Protection Tool: Once logged in, look for the ‘Security’ section, or use the search feature in cPanel to find ‘Hotlink Protection’.
- Access Hotlink Protection: Click on the ‘Hotlink Protection’ icon. This will take you to the hotlink protection setup page.
- Configure Hotlink Protection:
- URLs to Allow Access: Here, you should list the URLs that are allowed to access your files. These should include your own domain(s). For example, if your website is
www.example.com, you should includeexample.comandwww.example.com. Don’t forget to include variations of your URL that might be used to access your site, includinghttps://,http://,www., and so on. - Block Direct Access for These Extensions: Specify which file types you want to protect. Common file types include
jpg,jpeg,png,gif,bmp,mp4, etc. You need to enter the extensions separated by commas. - Redirect Request: Optionally, you can provide a URL to redirect any hotlinked requests. This could be a page informing users of the unauthorized use or any other page you prefer.
- URLs to Allow Access: Here, you should list the URLs that are allowed to access your files. These should include your own domain(s). For example, if your website is
- Activate Hotlink Protection: After configuring the settings, click on the ‘Submit’, ‘Activate’, or ‘Enable’ button (the exact wording may vary). This will activate hotlink protection on your website.
- Test Your Configuration: It’s important to test if the hotlink protection is working correctly. Try accessing one of your protected files from an external site and see if it’s blocked or redirected as per your settings.
Additional Considerations
- Impact on Legitimate Sharing: Be aware that hotlink protection might interfere with legitimate content sharing, such as RSS feed readers or social media platforms. Ensure that your settings don’t inadvertently block these services.
- Updating Settings: If you add new domains or subdomains, remember to update your hotlink protection settings to include these.
- CDN Services: If you’re using a Content Delivery Network (CDN), you’ll need to ensure that it’s included in the list of allowed URLs.
Conclusion
Setting up hotlink protection in cPanel is a straightforward process that can save you bandwidth and protect your content from unauthorized use. By following the steps outlined above, you can effectively prevent other websites from directly linking to your files. Regularly reviewing and updating your hotlink protection settings ensures that your website remains secure and operates efficiently within your hosting environment.

