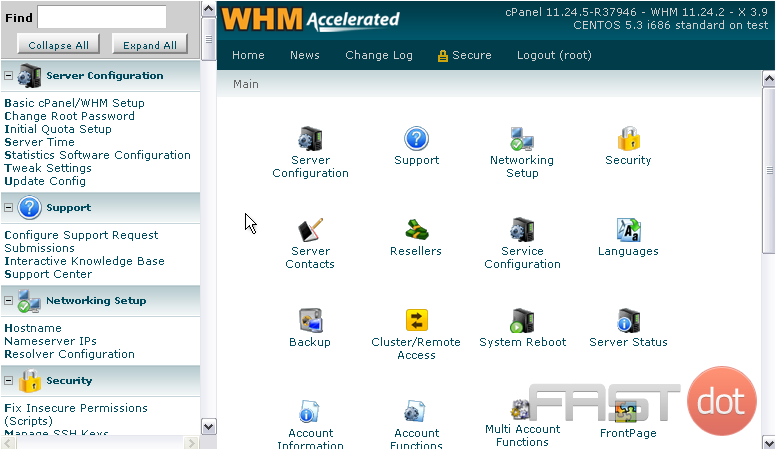
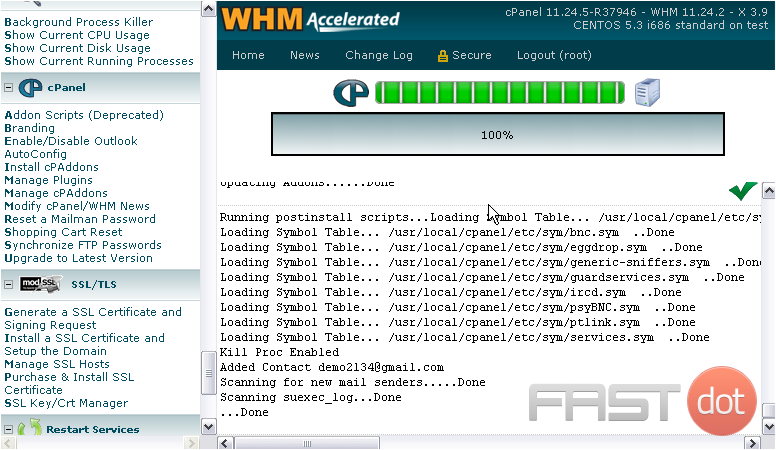
Depending on your update settings, you may or may not need to run cPanel’s update script manually in order for it to check for and install updates.
If you’d like to change or verify your update settings, we showed how early on in the Setup series.
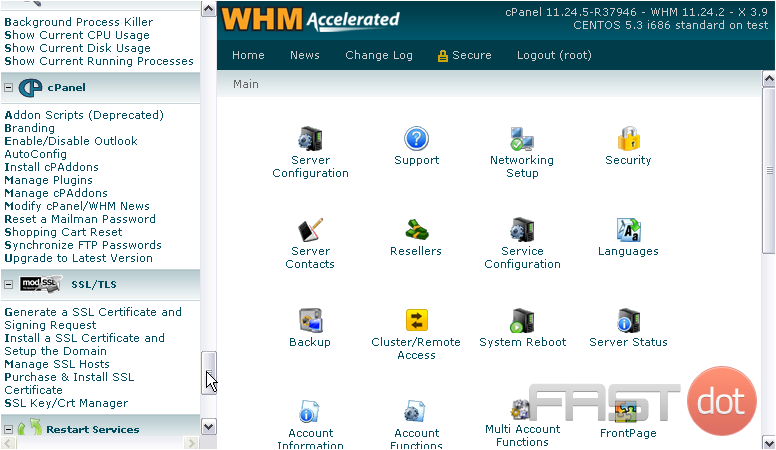
1) To manually run cPanel’s update script, go to the cPanel section.
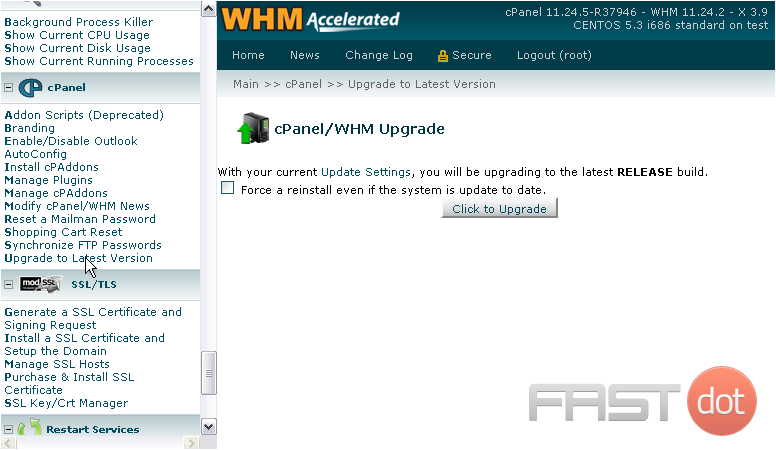
2) Click Upgrade to Latest Version.
As you can see here, our Update Settings dictate that we’ll be updating to the latest RELEASE build of cPanel, assuming we don’t have it already.
With this checkbox, you can force cPanel to reinstall itself, even if the system is up to date.
3) To upgrade, click this button.
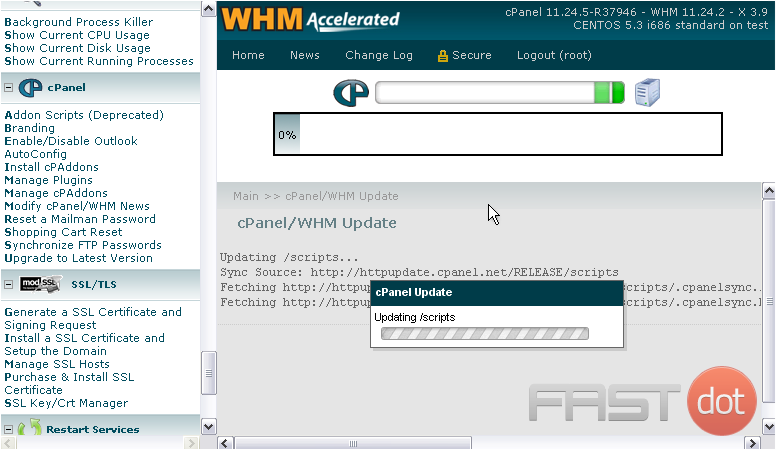
It may take an hour or more for the update to complete, depending on what needs to be installed, the speed of your connection, and your server hardware.
The percentage bar up here will update as the upgrade script runs.
That’s it! The upgrade is now complete.
Upgrading cPanel & WHM (WebHost Manager) manually is an essential task for server administrators seeking to keep the server environment secure and to ensure access to the latest features. Before proceeding with a manual upgrade, it’s crucial to back up your server and ensure that you understand the potential impacts of the upgrade on your server environment and the websites hosted on it.
Here’s how to perform a manual upgrade of cPanel & WHM:
Step 1: Log in to Your Server
Log in to your server via SSH as the root user. You can do this using a terminal on Linux or macOS, or tools like PuTTY on Windows.
Step 2: Initiate a Manual Update
Once logged in, you can initiate the manual update process by running the following command:
/usr/local/cpanel/scripts/upcp
This script will start the cPanel & WHM update process. The upcp script is the cPanel & WHM Update Configuration script, which automates the update process.
Optional Flags
The upcp script can be run with several optional flags, but in most cases, running it without any flags is sufficient for a standard update. However, for specific scenarios, you might consider the following:
--force: Forces a reinstallation of the current version of cPanel & WHM and updates all services. Useful if you suspect that the current installation is corrupt.
/usr/local/cpanel/scripts/upcp --force
Step 3: Monitor the Update Process
The update process may take some time, depending on your server’s connection speed and the current version of your software. During the process, the script will output logs to your terminal. It’s crucial to monitor these logs for any errors or issues that might arise during the update.
Step 4: Verify the Update
After the update process completes, you can verify the cPanel & WHM version by logging into the WHM interface using a web browser. The version number is displayed at the top right corner of the WHM dashboard.
Alternatively, you can check the version via the command line by executing:
/usr/local/cpanel/cpanel -V
Step 5: Check for Errors
Review the update logs for any errors or warnings. The update logs are located in /var/cpanel/updatelogs/. The log filenames are timestamped, making it easier to find the log for the most recent update.
You can view the latest update log using the following command:
tail -n 100 /var/cpanel/updatelogs/update.XXXXXX.log
Replace update.XXXXXX.log with the actual name of the latest log file.
Additional Considerations
- Compatibility: Before upgrading, check the cPanel & WHM documentation for compatibility with your server’s operating system and any third-party applications or plugins you have installed.
- Backups: Ensure you have recent backups of all critical data, including websites, databases, and configuration files.
- Third-party Applications: Some third-party applications or custom configurations might require adjustments after an upgrade.
By following these steps, you can manually upgrade cPanel & WHM on your server, helping to ensure your hosting environment benefits from the latest security patches, features, and improvements. Always refer to the official cPanel documentation for the most current information and best practices.

