This demo assumes you’ve already logged in to cPanel
Now let’s learn how to password protect a directory, so that people will need a password to view web pages within it
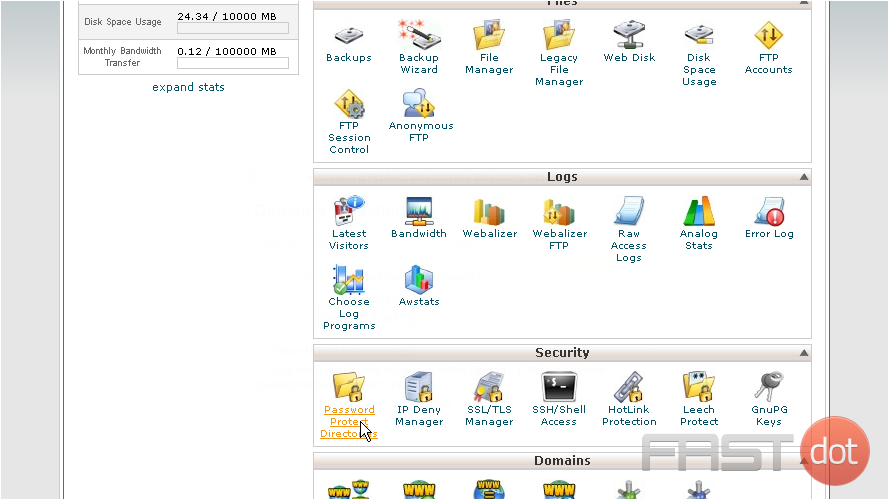
1) Click Password Protect Directories
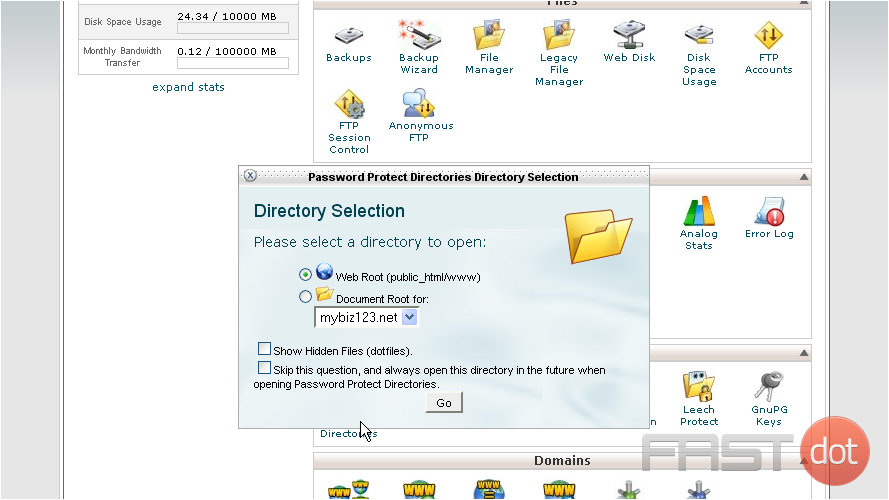
2) Select the directory to start with, then click Go
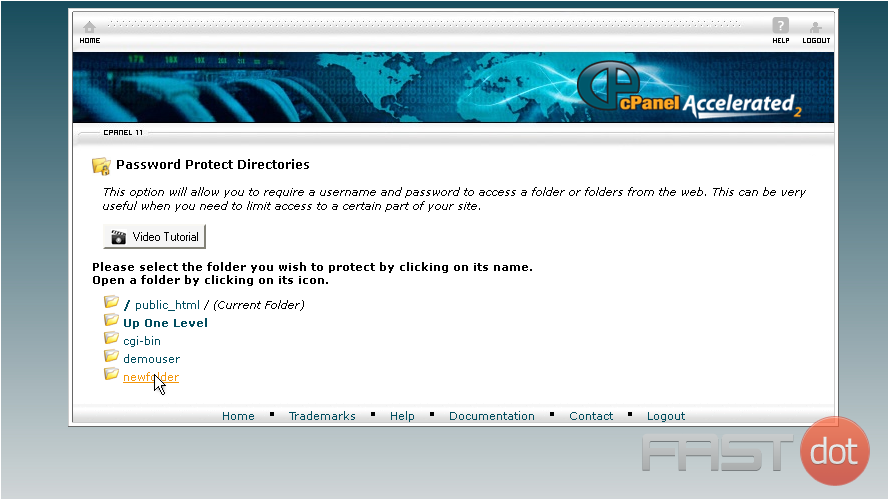
3) Select the directory you want to password protect by clicking it’s name
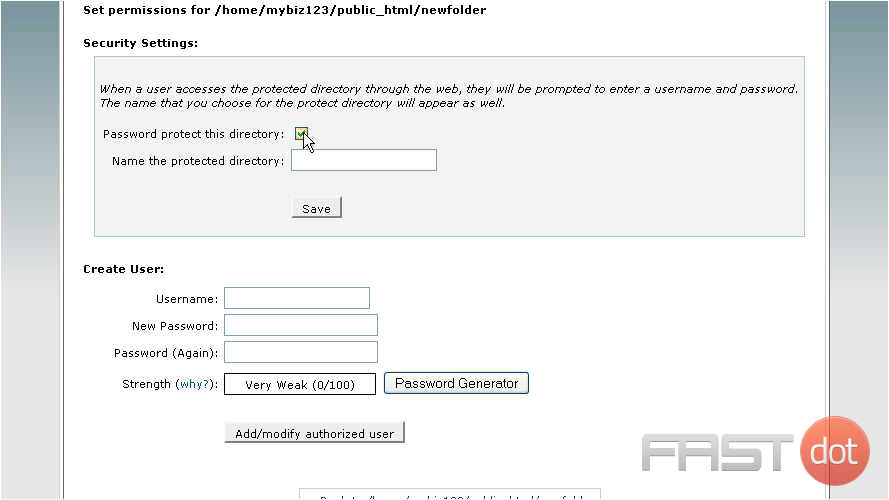
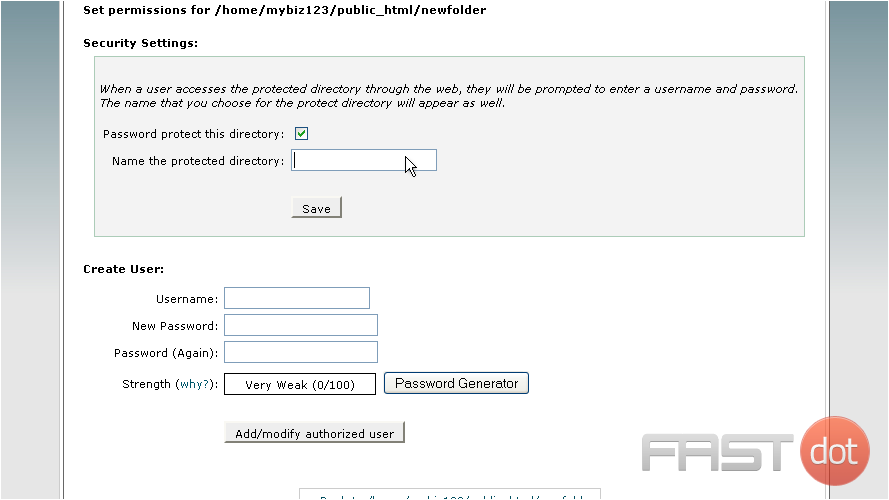
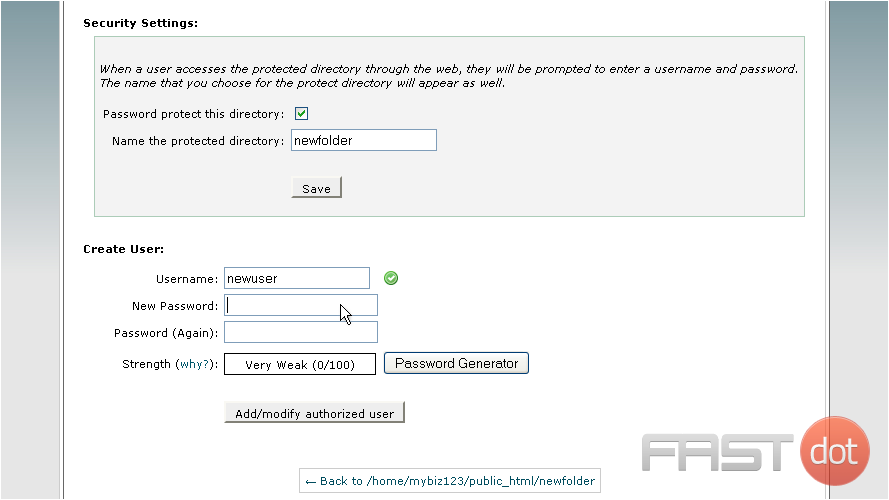
4) Check the Password protect this directory box…
5) Then give a name for the directory, and click Save
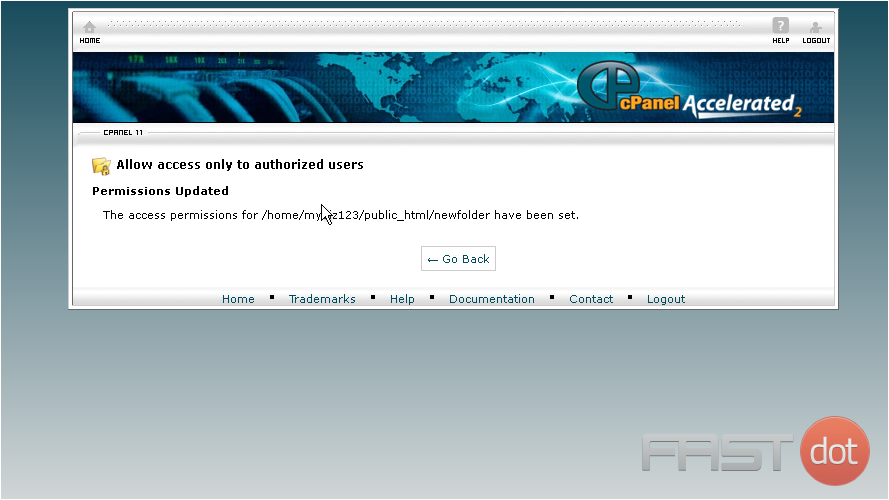
The directory is now protected, and requires a password to enter it via a browser
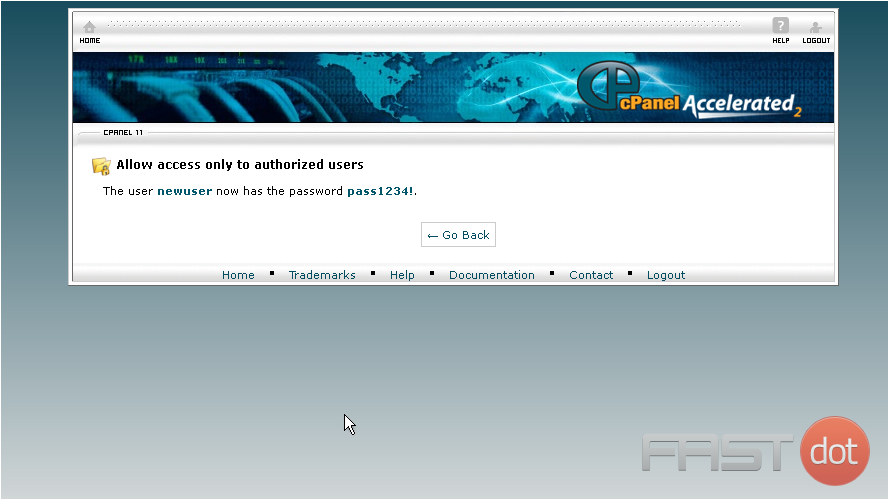
We must therefore create at least one user, and assign them a password to access the directory
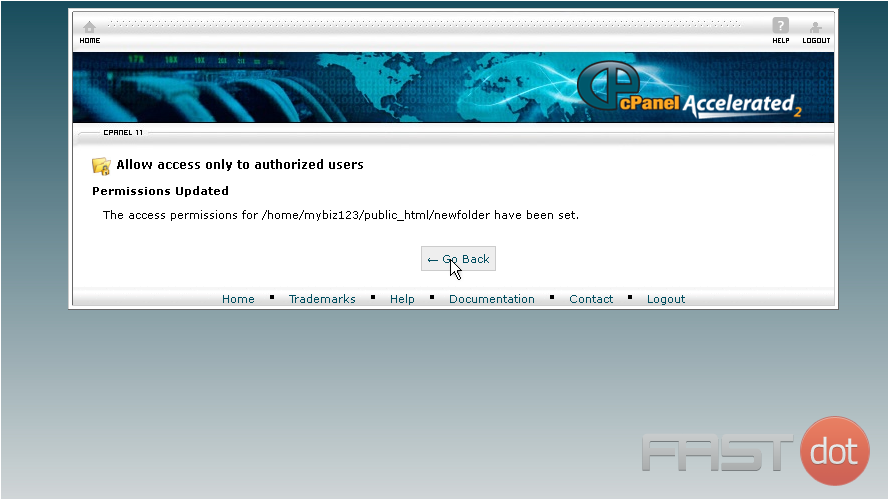
6) Click Go Back
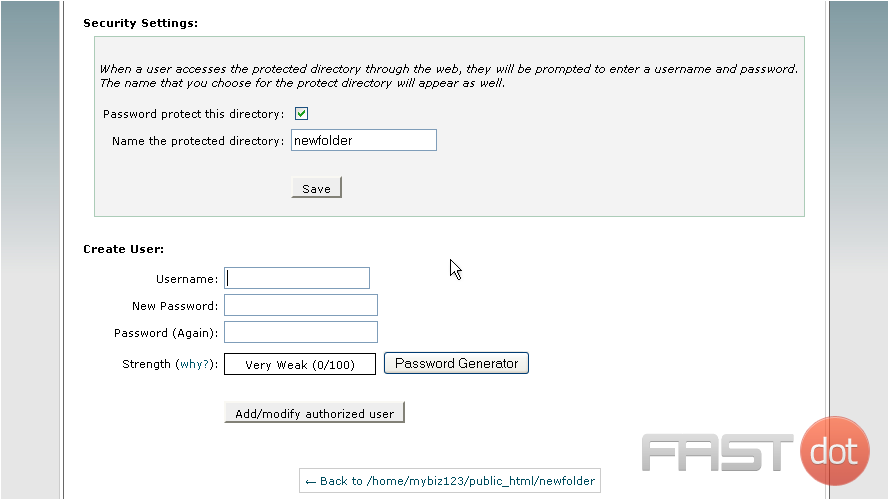
7) Enter a username here
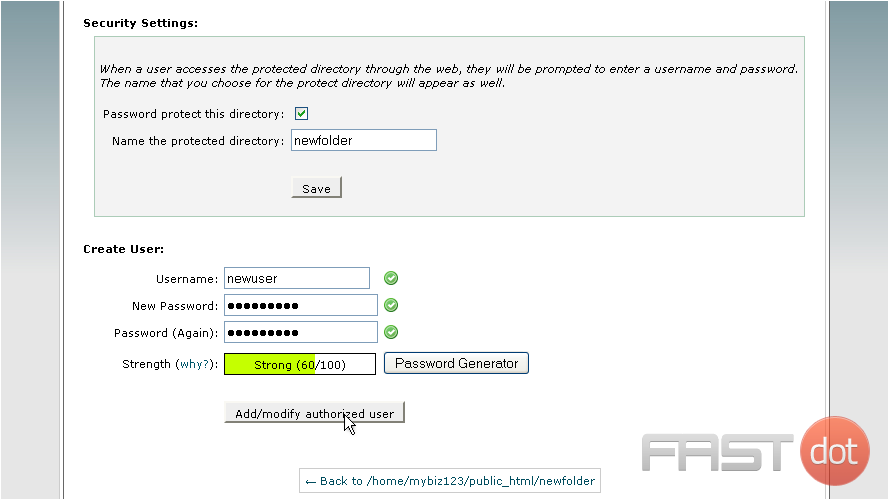
8) Then enter and confirm a password
9) Click Add authorized user
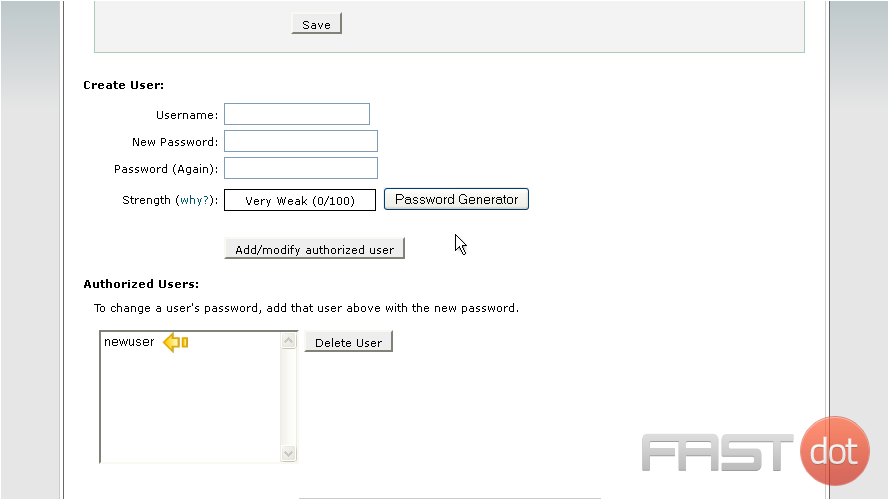
The protected directory now has one user who has access to it. Repeat this process for each additional user you want to grant access for
You can see the active user for this directory here and can add or delete users from this page at any time
Password protecting a directory in cPanel is an effective way to restrict access to specific parts of your website, ensuring that only authorized users can access sensitive content or administration areas. This feature can be particularly useful for developers, website administrators, and digital agencies managing client websites. Here’s a step-by-step guide on how to password protect a directory using the cPanel interface.
Step 1: Log Into cPanel
- Access cPanel: Open your web browser and navigate to your website’s cPanel login page, which usually follows the format of
http://yourdomain.com/cpanelorhttps://yourdomain.com:2083. Enter your cPanel username and password to log in.
- Find the Directory Privacy Option: Once logged in to cPanel, look for the “Directory Privacy” icon. This may be located under the “Files” section. If you’re having trouble finding it, use the search bar in cPanel to search for “Directory Privacy.”
Step 3: Select the Directory to Protect
- Choose the Directory: Upon opening the Directory Privacy feature, you’ll see a list of your account’s folders. Navigate through the folders by clicking on the folder icons or names until you find the directory you wish to protect. Directories are typically organized in a hierarchical structure similar to file managers on desktop operating systems.
- Open the Directory’s Settings: Click on the name of the directory you want to password protect.
Step 4: Enable Password Protection
- Set the Privacy: To enable protection, you will see an option or checkbox labeled “Password protect this directory” or something similar. Check this box.
- Name the Protected Area: You will be prompted to enter a name for the protected directory. This name is displayed to users when they are prompted for a username and password. It can be anything you choose, such as “Admin Area” or “Members Only.”
Step 5: Create User Accounts
- Create a Username and Password: Scroll down to the section where you can create user accounts that will have access to the protected directory. Enter a username and password for the account. cPanel often includes a password strength meter to ensure you choose a secure password. You may also have the option to generate a password.
- Add/Save the User: After filling in the username and password fields, click on the button to save or add the user. This might be labeled “Save,” “Add,” or “Add/modify authorized user,” depending on your cPanel version.
Step 6: Finalize and Test
- Complete the Setup: After adding the user, your directory is now password protected. Ensure all changes are saved if there’s a save option available.
- Test the Protection: Open a new browser window or tab and navigate to the URL of the protected directory. You should be prompted to enter the username and password you just created. If you’re not prompted or if you encounter any issues, double-check the settings you applied to ensure everything is configured correctly.
Additional Tips
- Multiple Users: You can repeat the process of adding user accounts if you need multiple people to have access to the protected directory.
- Subdirectories: When you password protect a directory, be aware that all subdirectories (folders within the protected folder) will also be protected under the same credentials by default. If this is not desired, you may need to adjust settings individually for subdirectories.
- Maintenance: Regularly review and update the access credentials for your protected directories, especially if users no longer need access or if security concerns arise.
Password protecting a directory in cPanel is a straightforward process that adds an essential layer of security to your website. By following these steps, you can ensure that sensitive areas of your site are accessible only to authorized users, enhancing both privacy and security.

