How to modify a hosting account in WHM
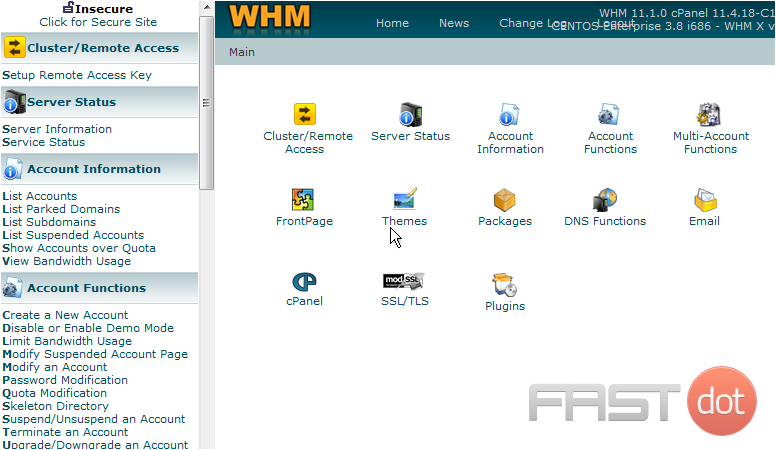
This demo assumes you’ve already logged in to WebHost Manager (WHM)
Now let’s learn how to modify (or edit) an existing hosting account in WHM
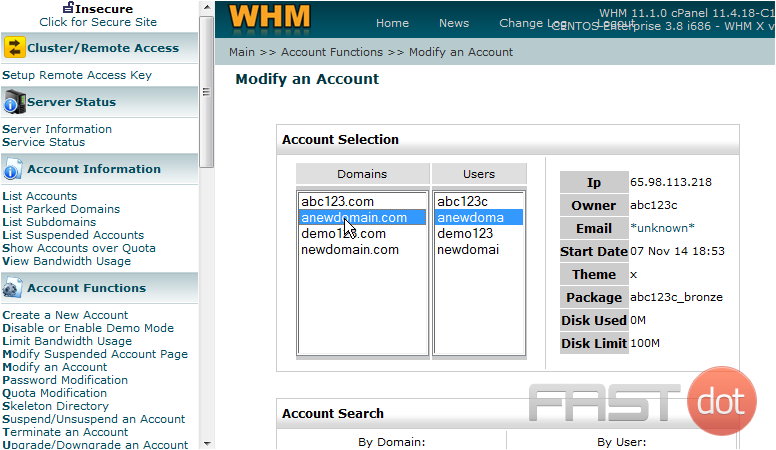
1) Click the Modify an Account link
2) Click the account you wish to modify, we’ll choose the anewdomain.com account
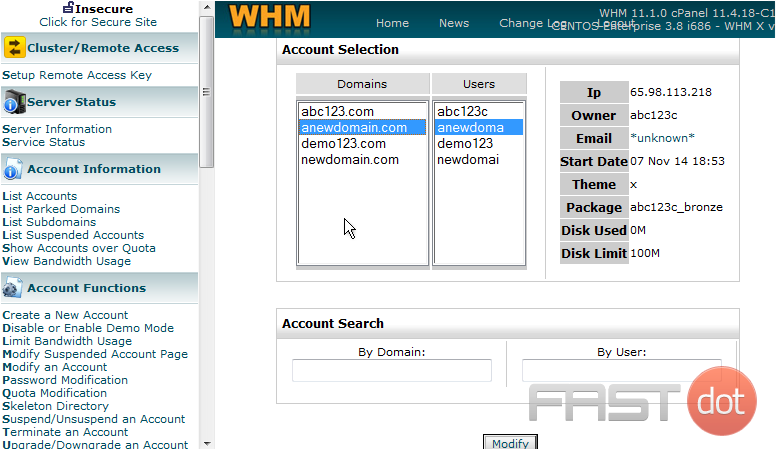
3) Then click Modify
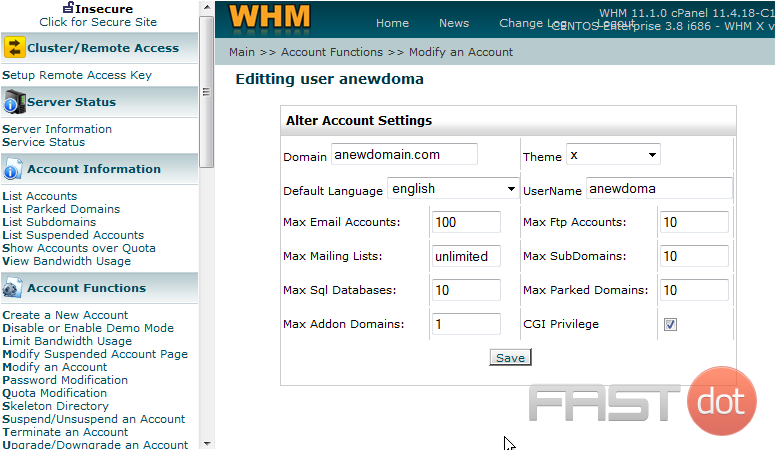
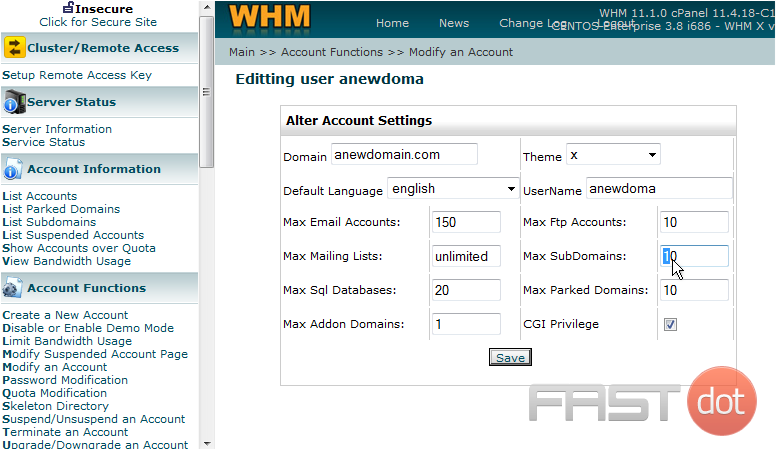
This is where you can modify an account. You can change the cPanel theme, the number of allowed email accounts, mailing lists, MySQL databases, FTP accounts, subdomains, parked domains, and/or addon domains
4) Let’s go ahead and change a few things…..
5) When finished, click Save
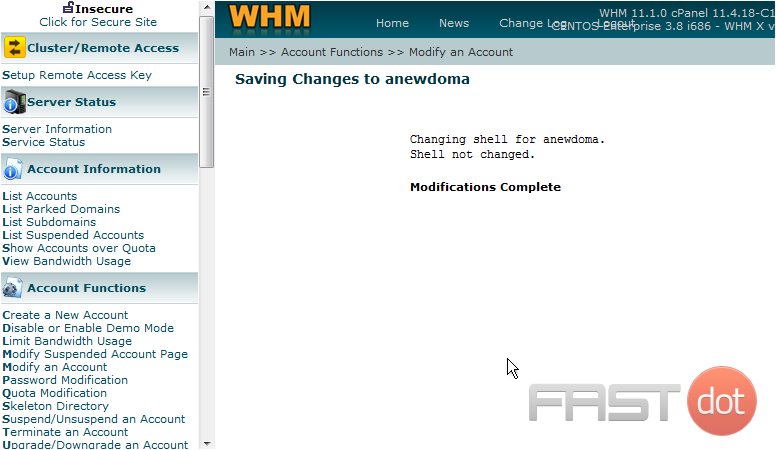
That’s it! The account has been modified
Modifying a hosting account in WHM (WebHost Manager) is a common task for web hosting and server administrators. It allows you to change various settings and configurations of a cPanel account, including the package, theme, disk space quota, bandwidth limit, and other features. This can be particularly useful for digital agencies managing multiple client accounts or for administrators looking to adjust resources based on changing needs. Here’s how to modify a hosting account in WHM:
Step 1: Access WHM
First, you need to log into WHM. You can usually do this by navigating to https://yourserverIP:2087 or https://yourdomain.com/whm and entering your username and password. Ensure you have root or reseller access to modify accounts.
- Once logged into WHM, locate the search bar at the top left corner of the WHM dashboard.
- Type in “Modify an Account” and click on the search result with the same name. This action will direct you to the page where you can select which hosting account you want to modify.
Step 3: Select the Account to Modify
- On the “Modify an Account” page, you will see a list of cPanel accounts under your WHM. These accounts are usually listed by domain name or by the cPanel username.
- Select the account you wish to modify by clicking either on the domain name or the username.
- After selecting the account, click the “Modify” button at the bottom of the page.
Step 4: Make the Desired Changes
- You will be taken to a page where you can change a variety of settings for the selected account. These settings include:
- Package: Upgrade or downgrade the hosting package.
- Theme: Change the cPanel theme.
- Disk Quota: Adjust the disk space limit.
- Monthly Bandwidth Limit: Change the bandwidth allocation.
- Email Accounts, FTP Accounts, SQL Databases, Subdomains, Parked Domains, Addon Domains: Limit the number of each resource the account can create, if needed.
- Locale: Set a default language for the cPanel interface.
- Adjust the settings according to your needs. Be mindful of the implications of changing these settings, as they can directly affect the hosted websites’ operations.
Step 5: Save Changes
- After making the necessary modifications, scroll to the bottom of the page and click on the “Save” button to apply the changes.
- WHM will process the changes, and you should see a confirmation screen once the modifications have been successfully applied.
Best Practices
- Backup: Always ensure that backups are made before making significant changes to an account, especially if adjusting quotas or permissions that could potentially affect website functionality.
- Communication: If you are managing client accounts, communicate any changes to the account holders, particularly if the modifications will impact their website operation or available resources.
- Review: Periodically review account usage to ensure that allocations are still in line with the needs and that resources are optimally distributed.
Conclusion
Modifying a hosting account in WHM is a straightforward process that allows for significant control over the hosting environment and resource allocation. By following the steps outlined above, web hosting and server administrators can efficiently manage and adjust the configurations of hosted accounts to meet the evolving needs of their websites or applications. Always consider the potential impacts of changes and communicate effectively with any stakeholders to ensure a smooth transition.

