This tutorial will show you how to configure automatic backups in WHM
Taking regular backups is an important part of running any sort of website. You can configure WHM to automatically make backups of all the important
information on your server at specified intervals.
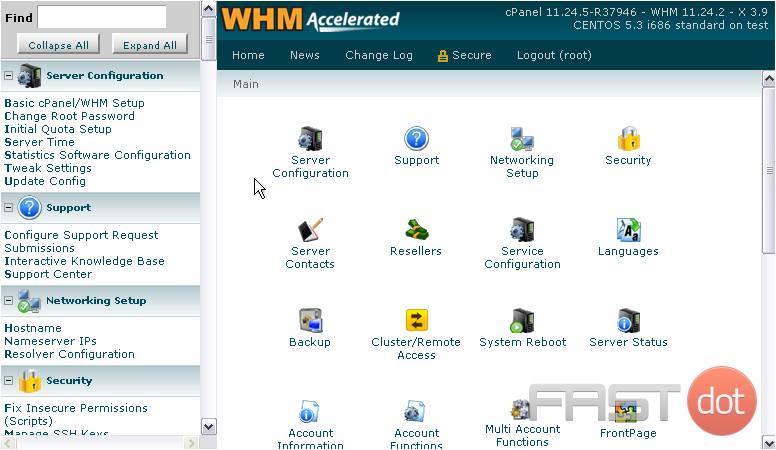
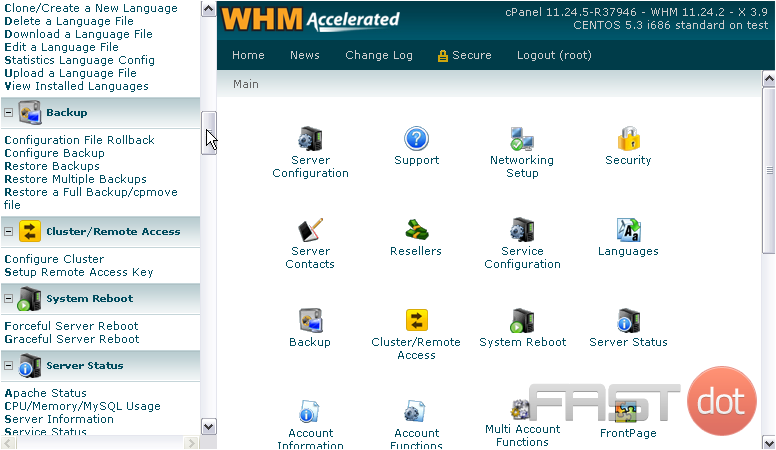
1) To do so, go to the Backup category.
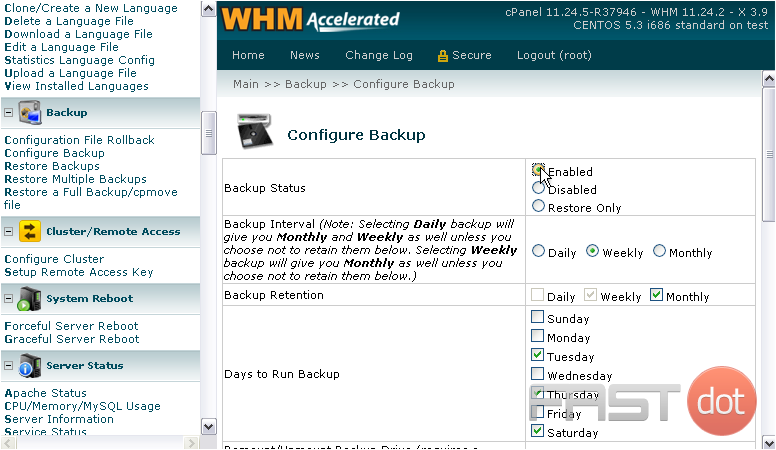
2) Click Configure Backup.
3) To enable backups, simply click the button next to Enabled.
Restore Only is an option if you have some backups to restore but don’t want the system to make any new ones.
Use Backup Interval to specify whether you want backups to be made Daily, Weekly, or Monthly. Selecting Daily will provide you with all three types, while Weekly will include Monthly backups, as well.
4) Change the Backup Retention settings if you want to modify that behavior.
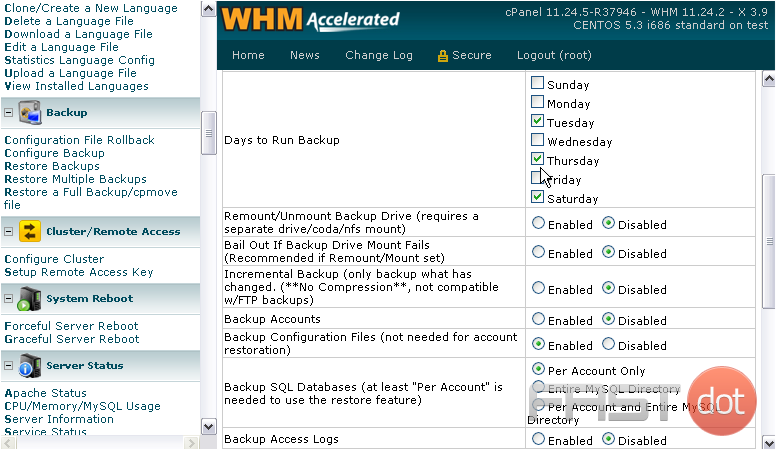
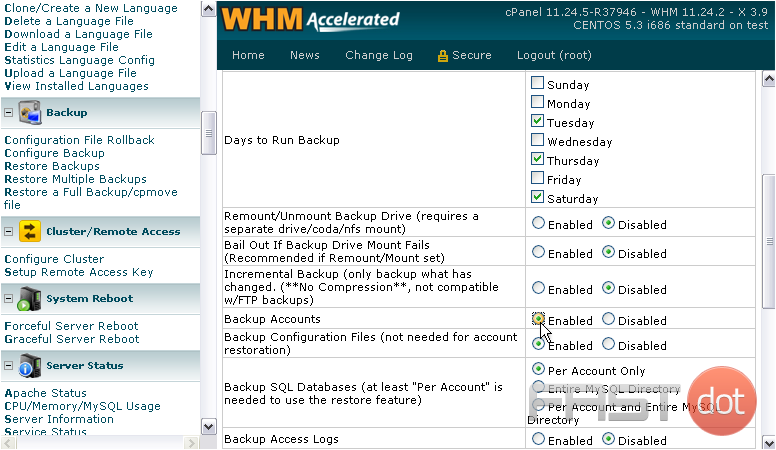
5) You can also modify the days of the week on which to run backups, for whichever interval they might be.
When enabled, Remount/Unmount Backup Drive tells WHM your backup folder is on its own drive partition — maybe a separate hard drive, or even a network drive.
If you enable that setting, you should also enable the next one — Bail Out If Backup Drive Mount Fails.
If you’re not sure about either of the previous options, just leave them both off.
Incremental Backups can be made instead of complete backups each time. This will store only information or files that are new or have been changed.
This option is recommended to conserve system resources, but the backups would be uncompressed, so you’d need to make sure you have enough free hard drive space to enable this option. Note that this option is not compatible with FTP backups.
6) If you want to backup account data and home folders, click Enabled next to Backup Accounts.
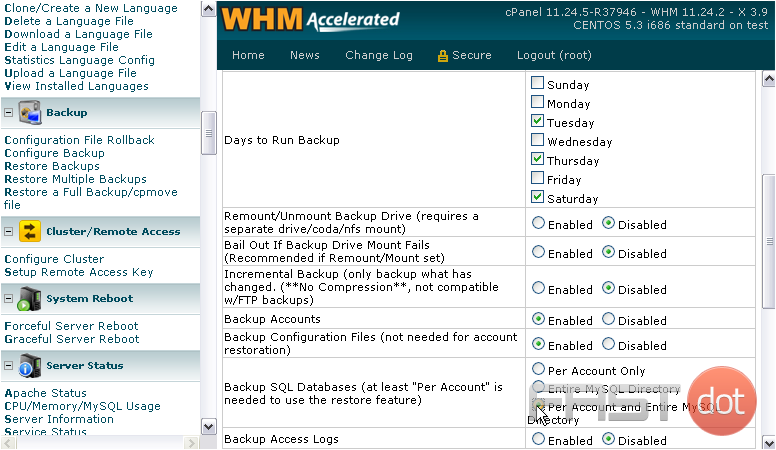
7) Leave Backup Configuration Files checked.
8) We’ll change the SQL backups to Per Account and Entire MySQL Directory.
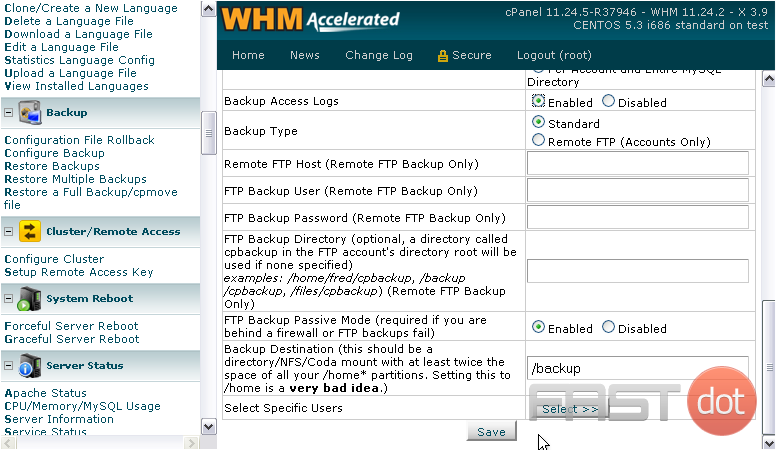
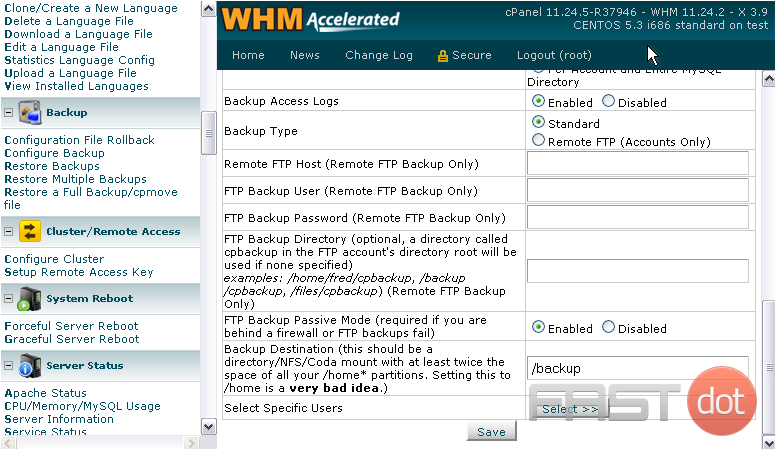
And, it can’t hurt to include access logs in the backup, too.
9) Choose a Backup Type. Standard will save the backups to a specified location on your system. Remote FTP can be used to send backups to a remote server, but that method can only be used for account data.
If you set this to FTP backups, you will also need to fill out all the fields below with the correct FTP information.
10) Make sure this directory is correct for your system. The default should be fine, for now.
Ideally, you’ll have an extra hard drive or a network filesystem (NFS) partition connected to another server to store the backups. That’s beyond the scope of this tutorial, however.
Wherever you’re going to keep the backups, you need to ensure that there will be room for at least twice the amount of data in your home directories.
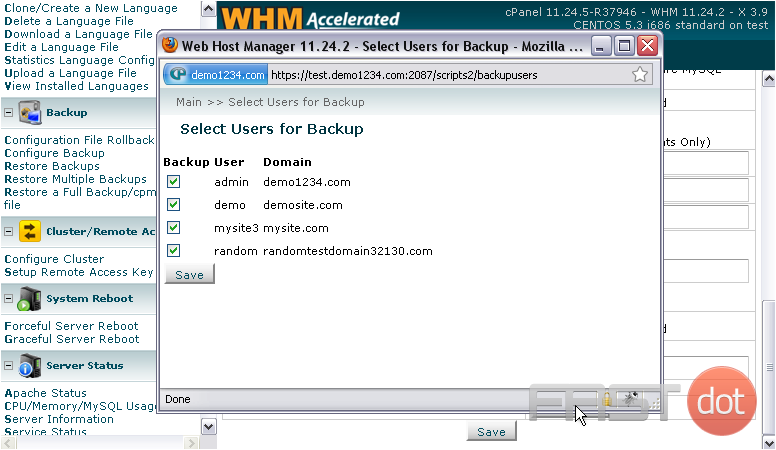
11) By default, all users’ accounts will be backed up. Click this button to Select Specific Users to back up.
12) Select or deselect whichever users you want, then click Save.
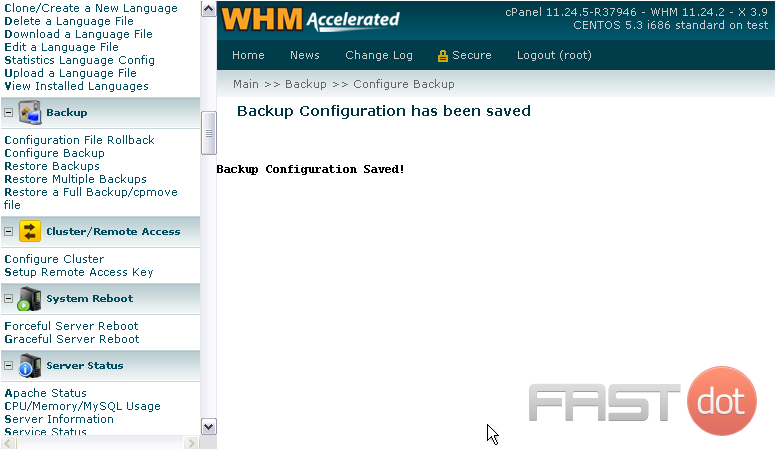
13) When finished changing the backup settings, click Save.
Your backup configuration has been saved!
This completes the tutorial. You now know how to enable and configure automatic backups on your WHM server.
For details on restoring backups, view the tutorial that follows.
Do you have any questions? Ask us in the forums ?

