This tutorial will show you how to manage multiple stores in Magento
- 1 This tutorial will show you how to manage multiple stores in Magento
- 1.1 Step 1: Understand Magento’s Multi-Store Architecture
- 1.2 Step 2: Set Up Multiple Stores in Magento
- 1.3 Step 3: Configure Store URLs
- 1.4 Step 4: Manage Products for Multiple Stores
- 1.5 Step 5: Configure Store-Specific Settings
- 1.6 Step 6: Monitor and Manage Customer Data
- 1.7 Step 7: Test and Launch
- 1.8 Best Practices for Managing Multiple Stores in Magento
Managing multiple stores in Magento Commerce (or Magento Open Source) is a powerful feature that allows you to run and manage multiple stores from a single admin panel. Magento’s multi-store architecture supports different storefronts with unique domains, designs, product catalogues, and pricing structures—all while sharing a common backend.
Here’s a detailed guide to managing multiple stores in Magento:
Step 1: Understand Magento’s Multi-Store Architecture
Magento operates using a hierarchical structure:
- Global: The highest level, encompassing all websites, stores, and store views.
- Website: A collection of stores. Each website can have separate settings, customers, and payment methods.
- Store: A website can have multiple stores. Each store has its own product catalogue.
- Store View: Each store can have multiple views, typically used for different languages or layouts.
Step 2: Set Up Multiple Stores in Magento
- Log in to the Admin Panel:
- Access the Magento Admin Panel with administrative privileges.
- Create a New Website:
- Navigate to Stores > Settings > All Stores.
- Click Create Website.
- Fill in the following details:
- Name: The name of the website (e.g., “Store 2”).
- Code: A unique identifier for the website.
- Sort Order: The position of the website in the list (optional).
- Click Save Website.
- Create a New Store:
- Still under Stores > Settings > All Stores, click Create Store.
- Fill in the details:
- Website: Select the website the store will belong to.
- Name: The name of the store (e.g., “Electronics Store”).
- Root Category: Select the root category for the store.
- Click Save Store.
- Create a Store View:
- In Stores > Settings > All Stores, click Create Store View.
- Configure the store view:
- Store: Select the parent store.
- Name: Enter the name of the store view (e.g., “English”).
- Code: Provide a unique code for the view.
- Status: Set to Enabled.
- Sort Order: Define its position (optional).
- Click Save Store View.
Step 3: Configure Store URLs
Each store and website can have its own domain or subdomain.
- Set Up the Base URL:
- Navigate to Stores > Configuration > General > Web.
- Select the desired website from the Store View dropdown.
- Under Base URLs, update the following:
- Base URL: Enter the store’s URL (e.g.,
https://store2.example.com/). - Secure Base URL: Enter the secure URL (if SSL is enabled).
- Base URL: Enter the store’s URL (e.g.,
- Update the
.htaccessor Web Server Configuration:- For Apache:
- Add virtual host entries in the server configuration to point to the appropriate Magento installation.
- For Nginx:
- Update the server block to map domains to the corresponding store codes.
- For Apache:
- Configure
index.php:- In Magento’s root directory, update the
index.phpfile to specify the store code in the URL.
- In Magento’s root directory, update the
Step 4: Manage Products for Multiple Stores
Magento allows product catalogues to vary across stores:
- Go to Catalog > Products.
- Select a product and use the Store View dropdown to switch between stores.
- Modify product attributes like price, description, or visibility for specific stores.
- Save changes.
Step 5: Configure Store-Specific Settings
Magento enables customisation of settings for each store or store view.
- General Settings:
- Navigate to Stores > Configuration.
- Select the desired store view from the dropdown in the upper-left corner.
- Adjust configurations like:
- Currency.
- Payment methods.
- Shipping methods.
- Tax settings.
- Theme Customisation:
- Assign unique themes to stores by going to Content > Design > Configuration.
- Select the store view and set the theme.
- Language and Translations:
- Use store views to support different languages.
- Install language packs or create custom translations for each store view.
Step 6: Monitor and Manage Customer Data
- Shared or Separate Customer Accounts:
- Choose whether customer accounts are shared across websites by navigating to Stores > Configuration > Customers > Customer Configuration.
- Under Account Sharing Options, set Share Customer Accounts to Global or Per Website.
- Orders and Analytics:
- Each website can have separate order tracking, analytics, and reporting to keep store data organised.
Step 7: Test and Launch
- Test Store Functionality:
- Verify that all stores load correctly with their respective URLs.
- Test checkout, product visibility, and customer login for each store.
- Launch and Monitor:
- Make the stores live and monitor their performance.
- Use Magento’s reporting tools to track sales and customer activity per store.
Best Practices for Managing Multiple Stores in Magento
- Use Clear Naming Conventions:
- Assign logical names and codes to websites, stores, and views for easy management.
- Centralised Product Management:
- Avoid duplicate products by sharing the same product catalogue across stores where applicable.
- Regular Backups:
- Ensure regular backups to prevent data loss during updates or customisation.
- SEO for Multiple Stores:
- Optimise metadata and URLs for each store to avoid duplicate content issues.
- Monitor Performance:
- Use caching solutions like Varnish or CDN services to maintain fast loading times across multiple stores.
By setting up and managing multiple stores effectively, you can cater to diverse customer needs, expand your business reach, and maintain centralised control, all within Magento Commerce’s powerful framework.
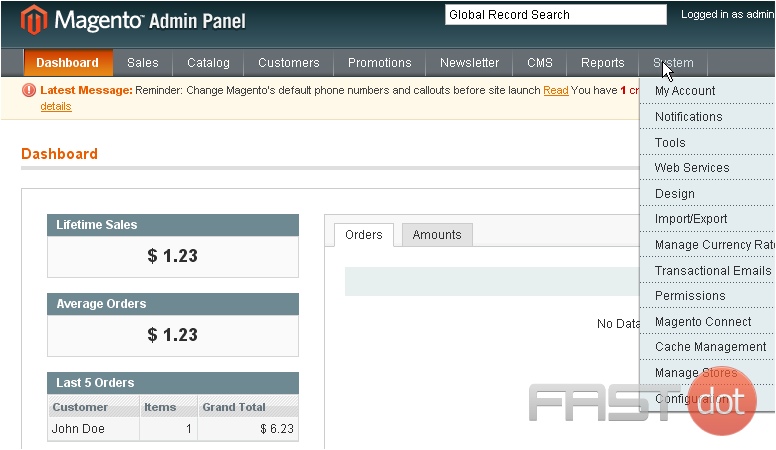
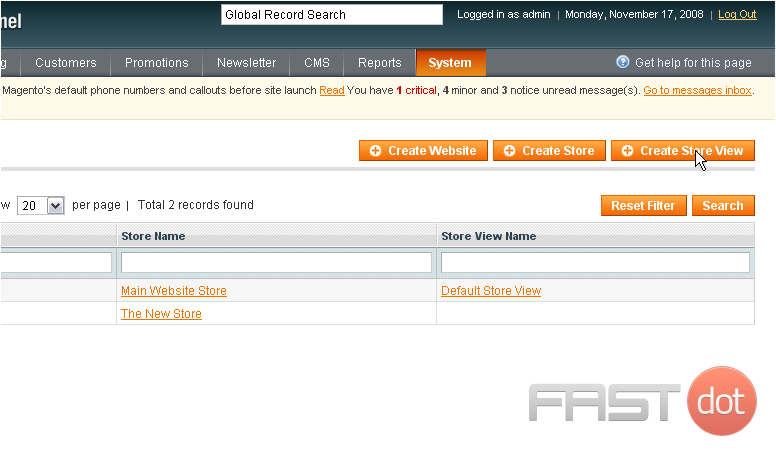
1) Go to System… and click Manage Stores.
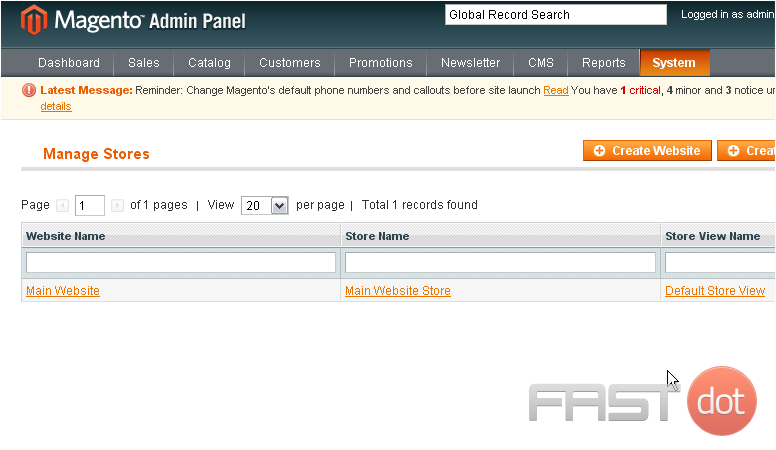
On this page, you can view all of the stores that have been set up
2) To create a new website, click this button
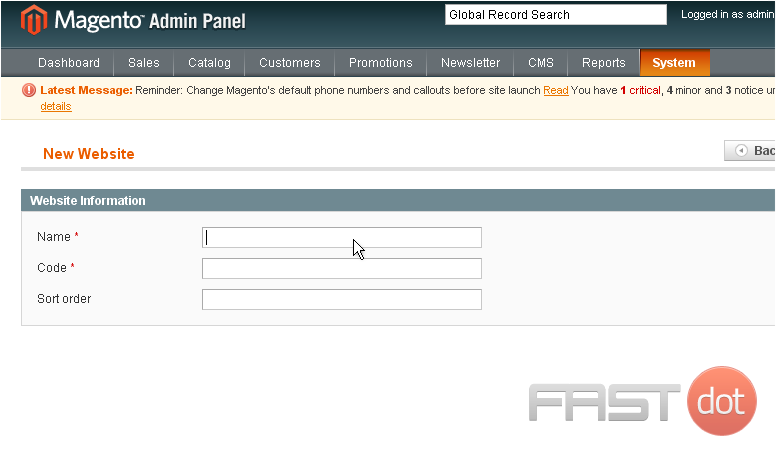
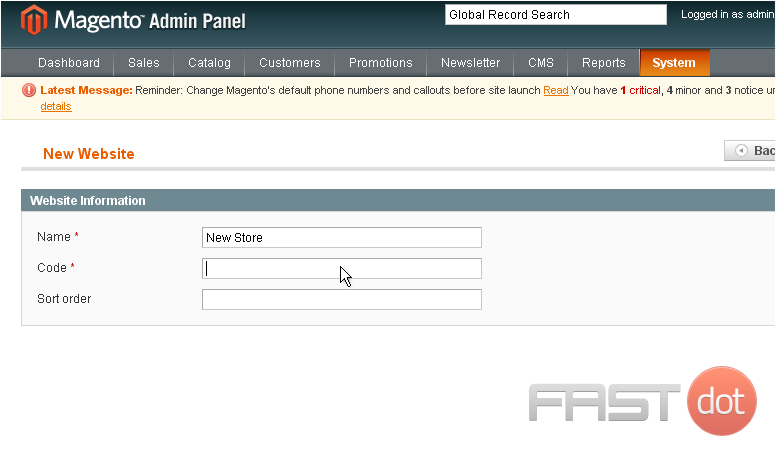
3) Enter a name for the new website
4) Enter a code for the website
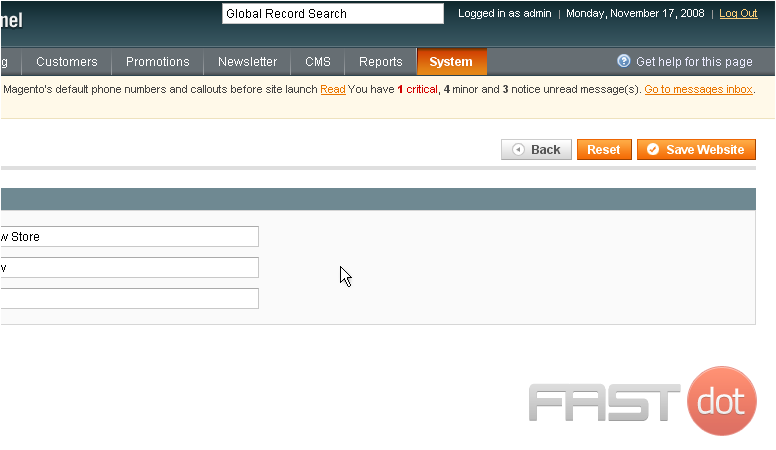
5) Click Save Website
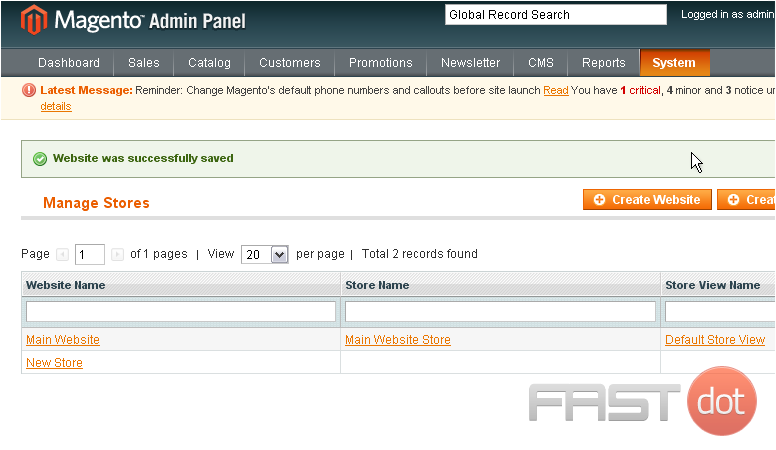
The website has been saved
We will now need to create a name for the new store
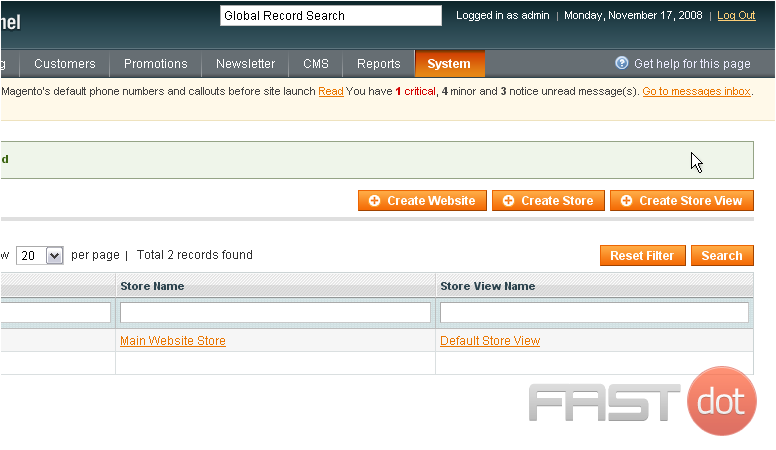
6) Click Create Store
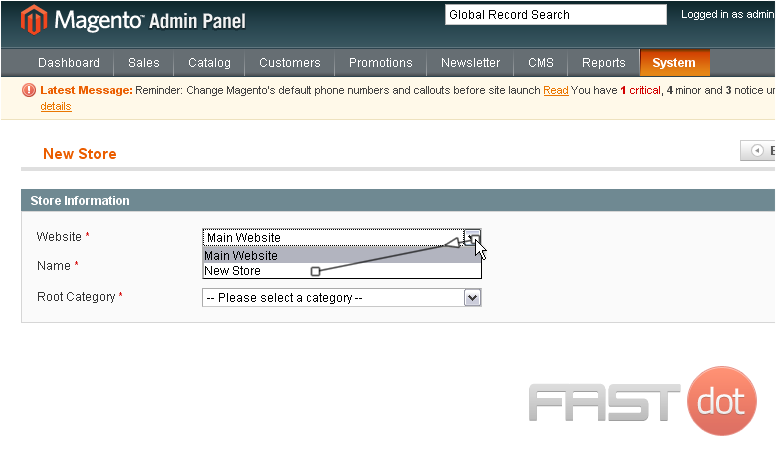
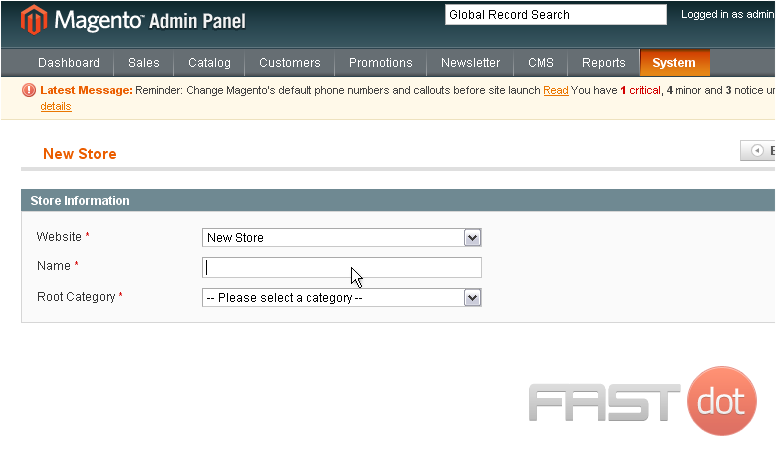
7) Choose the website
8) Enter a name for the new store
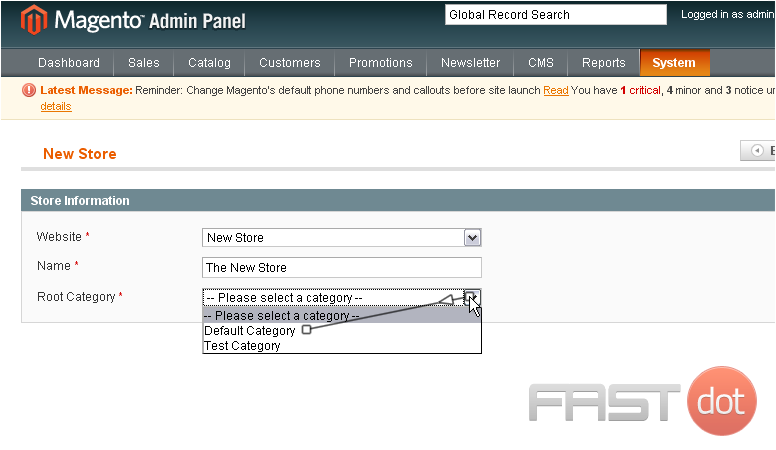
9) Select the root category
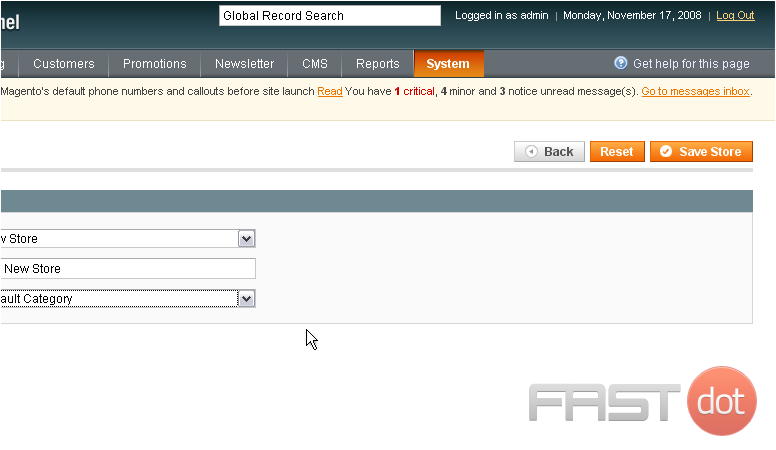
10) Click Save Store
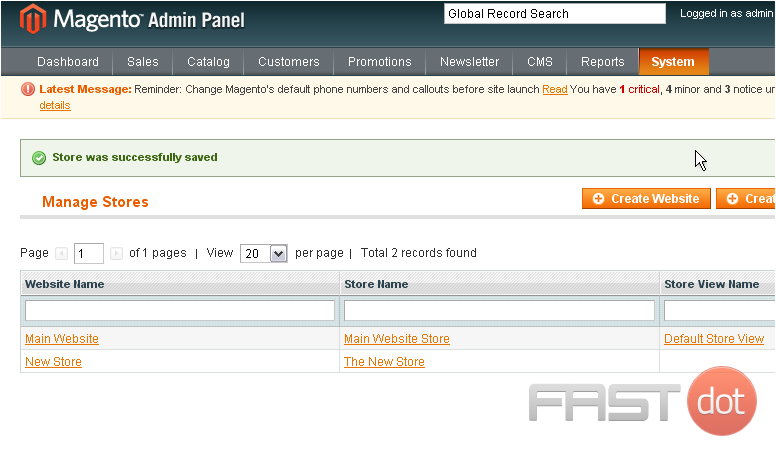
The store has been saved
Now, we will create a store view name
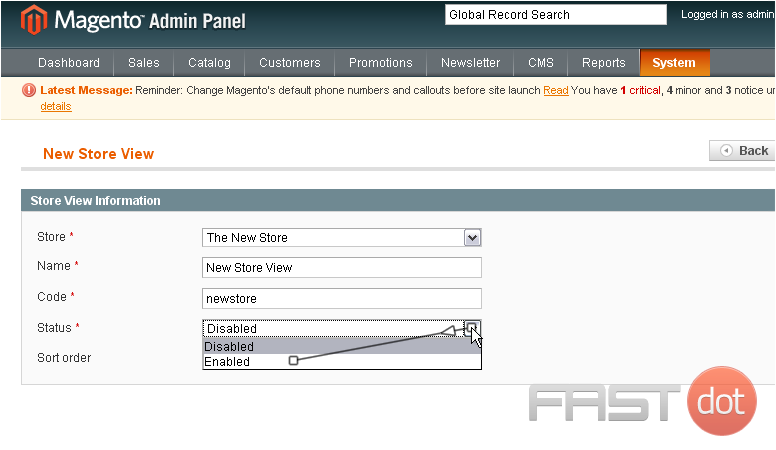
11) Click Create Store View
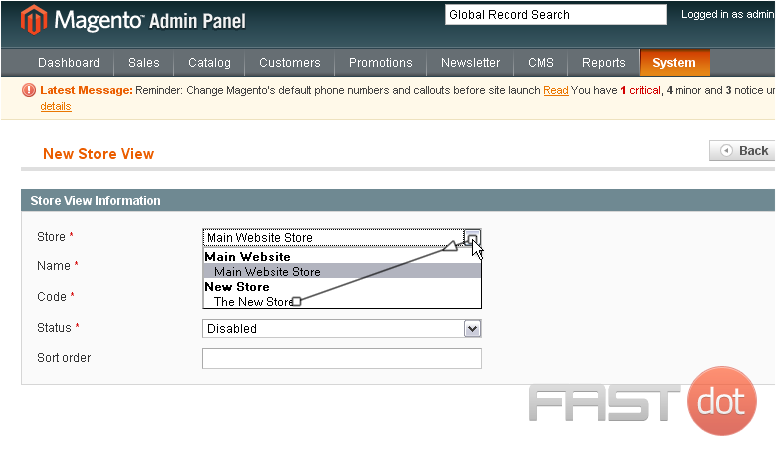
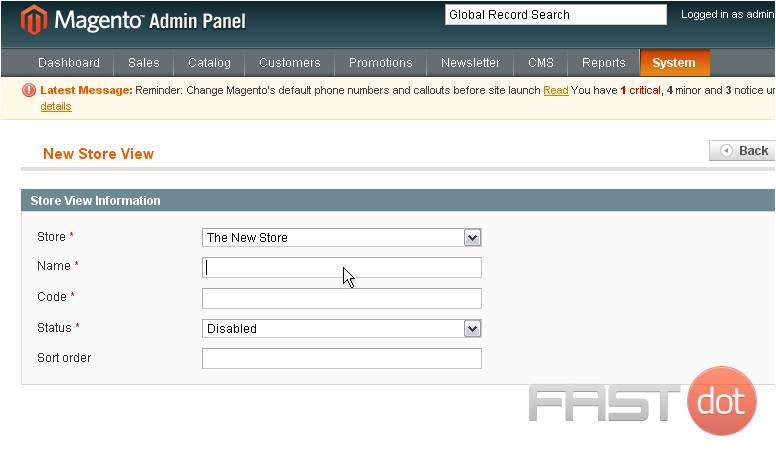
12) Select the store
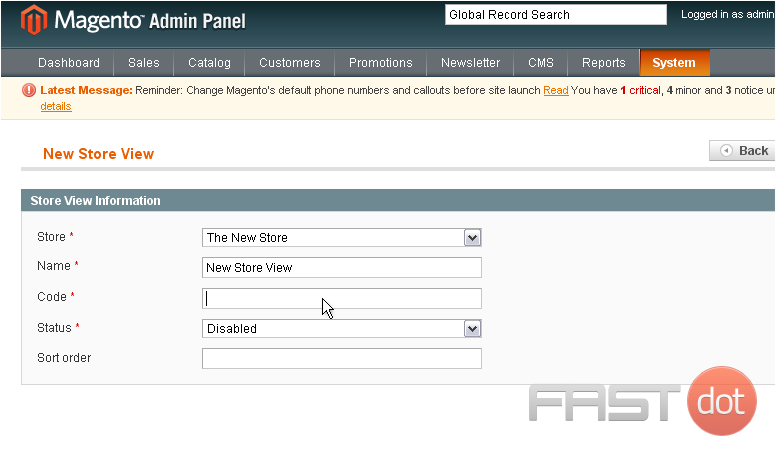
13) Enter a name
14) Enter the new store code
15) Select the status
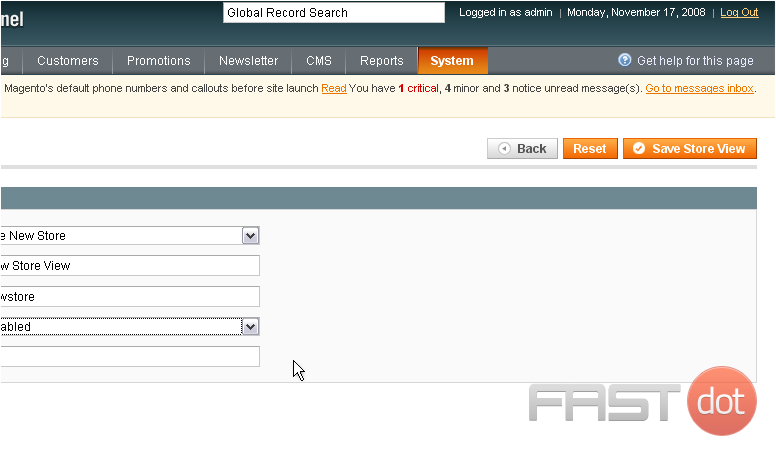
16) Click Save Store View
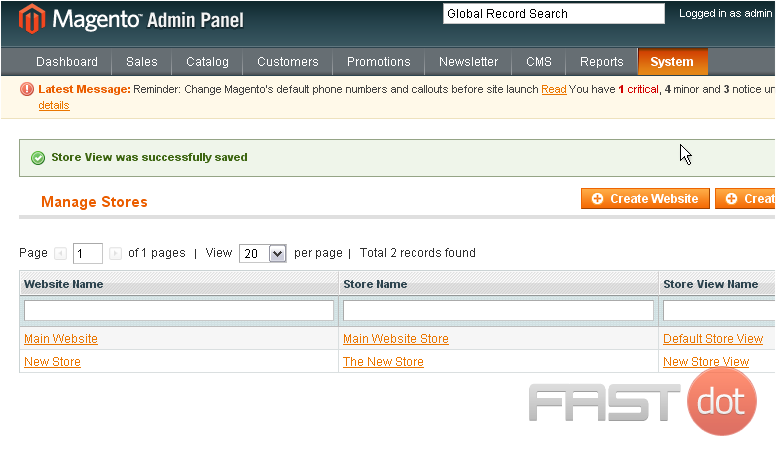
The store has been saved
This is the end of the tutorial. You now know how to manage multiple stores in Magento Commerce
Do you have any questions? Ask us in the forums ?

