Unlock the full potential of your WordPress site with easy customisation techniques that take mere minutes! From creating a custom menu to adding a custom menu widget, mastering these elements allows you to select categories that resonate with your audience. With insights from the WordPress community on platforms like Stack Exchange, this article will guide you through practical strategies for enhancing your site’s functionality and aesthetics. Get ready to transform your WordPress experience effortlessly!
What is WordPress Customisation?
- 1 Getting Started with WordPress
- 2 Customising Menus
- 3 Customising Widgets
- 4 Customising the Homepage
- 5 Customising the Footer
- 6 Advanced Customisation Techniques
- 7 Testing and Troubleshooting
- 8 Frequently Asked Questions
- 8.1 What is WordPress customisation?
- 8.2 What can be customised on a WordPress website?
- 8.3 How can I customise my WordPress menus?
- 8.4 What are widgets and how can I customise them?
- 8.5 Can I customise my WordPress website without coding?
- 8.6 Is WordPress customisation a one-time process?
- 8.7 Get Started with WordPress Hosting Today
WordPress customization involves the modification of themes, plugins, and settings to align with specific personal or brand preferences. By adjusting these components, users can significantly enhance both the aesthetics and functionality of their websites.
For example, selecting a responsive theme ensures mobile compatibility and improves the overall user experience.
Plugins such as Yoast SEO serve to optimize content for search engines, while WooCommerce facilitates the transformation of a standard blog into a comprehensive online store.
Additionally, adjusting settings such as permalinks and comment controls further customizes the site to meet the needs of the target audience.
Each modification not only personalizes the website but also contributes to increased engagement and overall performance.
Importance of Customising Your Site
Customizing a WordPress site is essential for enhancing user experience, increasing engagement, and establishing a robust online presence. A well-customized site can significantly improve user experience; for example, research indicates that 70% of users abandon a website due to poor navigation.
Utilizing tools such as Elementor or Beaver Builder allows for the creation of intuitive layouts that guide visitors seamlessly through the site. Furthermore, enhancing branding through the use of custom logos, color schemes, and fonts with plugins like WP Branding not only differentiates the site but also cultivates trust among users.
Additionally, a well-structured content organization utilizing categories and tags ensures that users can quickly locate the information they seek, ultimately increasing page views and decreasing bounce rates.
Getting Started with WordPress
To effectively customize your WordPress site, it is important to familiarize yourself with the dashboard and essential features, including themes and plugins.
Accessing the WordPress Dashboard
Accessing the WordPress dashboard is a straightforward process; one simply needs to log in via yoursite.com/wp-admin to manage various customization options.
Upon logging in, it is advisable to familiarize oneself with the layout. The left sidebar contains essential sections, such as ‘Posts’, where users can create and manage blog entries, and ‘Appearance’, where themes and menus can be customized.
To change the theme, navigate to ‘Appearance’> ‘Themes’, and then select or upload a new theme. It is also important to explore the ‘Plugins’ section to enhance functionality; popular options include:
- Yoast SEO for optimization
- Elementor for page building
Taking the time to explore each section will allow users to fully utilize the capabilities of the WordPress platform.
Understanding Themes and Plugins
Themes dictate the visual presentation of a website, while plugins enhance its functionality, both of which are essential for effectively customizing WordPress.
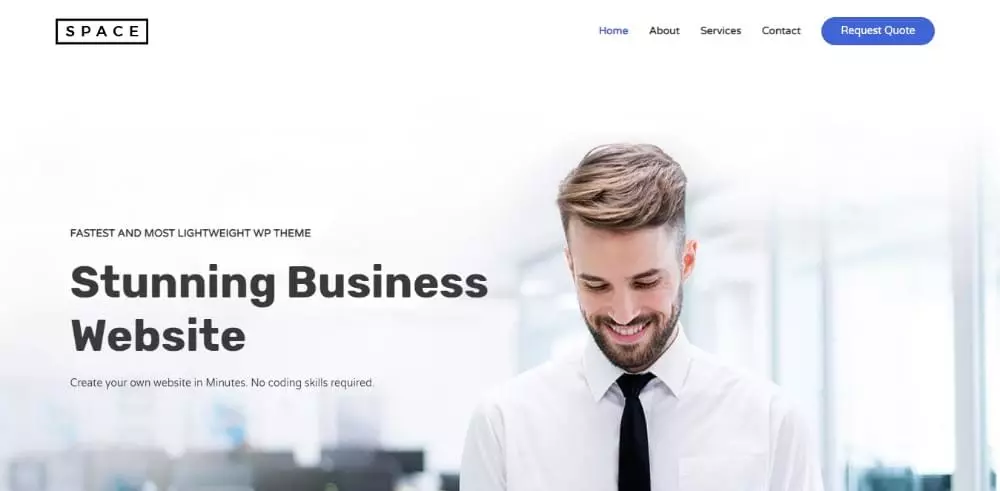
Selecting the appropriate theme is of paramount importance; Astra is a widely recognized option, noted for its speed and flexibility. To install Astra, one should navigate to ‘Appearance’> ‘Themes’ in the WordPress dashboard, then search for the theme and click ‘Install.’
To further improve website performance, plugins such as WP Rocket are recommended for optimizing loading speed. One can easily install WP Rocket by going to ‘Plugins’> ‘Add New,’ searching for WP Rocket, and following the installation prompts.
The strategic combination of a well-designed theme and effective plugins not only enhances the visual appeal of the website but also significantly improves the user experience.
Customising Menus
Customizing menus in WordPress significantly enhances site navigation, facilitating users’ ability to locate content and thereby improving overall usability.
Creating a Custom Menu
To create a custom menu, navigate to Appearance> Menus within your WordPress dashboard and follow the prompts to add new menu items.
Begin by selecting the pages you wish to include in your menu, such as ‘Home,’ ‘About,’ and ‘Contact.’ It is also advisable to incorporate categories for blog posts or custom links to external sites as needed.
Ensure that your menu is intuitive by grouping related items together, thereby facilitating easier navigation. After selecting your items, arrange them in the desired order by utilizing the drag-and-drop functionality.
Finally, do not forget to save your changes and refresh your site to view the new menu in action.
Adding Pages and Posts to Menus
Adding pages and posts to your custom menu can be accomplished through the Menus section, which facilitates quick access to your most important content for users.
To begin, navigate to Appearance> Menus in your WordPress dashboard. Here, you can select the specific pages and posts from the left-hand panel. After selecting the desired items, click ‘Add to Menu.’
Once added, you can rearrange them by dragging and dropping to establish their hierarchy. It is also advisable to consider visibility settings; for instance, utilizing plugins such as `User Role Editor’ can help restrict menu access based on user roles.
This approach ensures that only relevant content is presented to each visitor, thereby enhancing the overall user experience.
Organising Menu Structure
Organizing your menu structure into logical categories can significantly enhance user experience and improve site navigation efficiency.
To optimize your menu, it is advisable to implement drop-downs for subcategories. For instance, in the context of an e-commerce site, primary categories may include:
- Men
- Women
- Accessories
while subcategories such as “Shoes” and “Bags” can be appropriately categorized under their respective headers.
It is crucial to ensure that your menu is responsive; a mobile-friendly design should arrange items in a toggle format, facilitating easy access for users without creating clutter.
Additionally, it is recommended to regularly assess the effectiveness of your menu through user feedback and analytical tools such as Google Analytics to further refine navigation.
Customising Widgets
Widgets provide a versatile means of incorporating functionality and content into a WordPress site, particularly within the sidebars and footer regions.
What are Widgets?
Widgets are small components that execute specific functions, such as displaying recent posts or incorporating custom HTML, and can be easily modified through the dashboard. There exists a variety of widget types that enhance website functionality.
For instance, a ‘Recent Posts’ widget presents the latest blog entries, thereby maintaining visitor engagement. A ‘Search’ widget simplifies navigation, enabling users to locate content with ease. Additionally, a ‘Custom HTML’ widget allows site owners to insert personalized content or promotional banners.
To implement these widgets, one should navigate to the Widgets section within the dashboard, drag the desired widget to the preferred sidebar or footer, and customize its settings accordingly.
This method can substantially improve user experience and site interactivity.
Adding Widgets to Sidebars
To incorporate widgets into your sidebar, navigate to Appearance> Widgets, where you can utilize a drag-and-drop interface to allocate items into your selected widget area.
In this context, it is advisable to consider your website’s objectives when selecting appropriate widgets. For instance, if your goal is to increase visitor engagement, you may wish to add a Recent Posts widget to keep your audience informed about newly published content. Alternatively, incorporating a Search Bar widget can significantly improve navigability.
To optimize the effectiveness of your sidebar, consider utilizing tools such as Site Origin’s Page Builder, which facilitates further layout customization. Once you have placed your chosen widgets, it is important to preview your changes to ensure they contribute positively to user experience without overcrowding the sidebar.
Make any necessary adjustments to maintain balance and readability.
Using Custom HTML and Text Widgets
Custom HTML and text widgets provide the capability to incorporate unique content or code, thereby enhancing the flexibility of your site’s layout.
By encapsulating your content within a the presentation of your text becomes visually appealing, which significantly increases engagement for visitors. This method not only improves the aesthetic quality of the site but also facilitates the delivery of more personalized messaging.
To utilize these widgets effectively, one should begin by accessing the website’s admin panel. From this interface, it is possible to add a custom HTML widget to the preferred sidebar or footer.
For example, the following CSS can be employed to style a simple text introduction:
.intro { font-size: 18px; color: #333; padding: 15px; border: 1px solid #ccc; }By surrounding your content with a you ensure that the text is presented in an engaging manner, thereby enhancing both the visual appeal and the personalization of the messaging.
Customising the Homepage
Customizing the homepage is essential for establishing a positive first impression, guiding visitors to important content, and improving the overall user experience.
Setting a Static Front Page
To establish a static front page, proceed to Settings> Reading and select a specific page to serve as your homepage.
If you have not yet created a dedicated page for your homepage, it is advisable to do so. Utilize a straightforward page builder such as Elementor or Gutenberg to design your layout, ensuring that it emphasizes key content that effectively represents your brand.
This approach can significantly enhance the user experience by providing clear navigation and focused content. A static front page may also benefit your SEO strategy, as it allows for the optimization of specific keywords pertinent to your offerings.
After saving your changes, it is important to regularly update the content to maintain freshness and engagement for returning visitors.
Using Page Builders for Custom Layouts
Page builders such as Elementor and Beaver Builder facilitate layout customization through a drag-and-drop interface, significantly enhancing the design process. These tools enable users to create customized website designs without requiring extensive coding expertise.
For instance, Elementor features a live editor that allows for real-time modifications, while Beaver Builder is distinguished by its user-friendly backend interface. Users can begin by installing one of these plugins on their WordPress site and then easily arrange elements such as text boxes, images, and buttons as needed.
Both tools offer responsive design options, ensuring that layouts are visually appealing across various devices. For those in search of a wide array of templates, Elementor boasts an extensive library, making it a preferred choice among designers.
Customizing the footer of a WordPress site can enhance navigation and provide essential information to users, thereby improving the overall structure of the site.
To add footer widgets, proceed to Appearance> Widgets and drag the desired widgets into the footer widget area provided by your theme. Once you have accessed the footer widget area, carefully consider which widgets will best enhance the user experience.
Popular options include:
- ‘Recent Posts’ to keep visitors informed,
- ‘Categories’ for improved navigation,
- ‘Social Media Links’ to promote your online presence.
It is essential to strike a balance between aesthetic appeal and functionality. Avoid overcrowding the footer; typically, 2 to 4 well-chosen widgets are sufficient.
After positioning the widgets, preview your site to ensure that they display correctly across all devices, making any necessary adjustments to settings for clarity and engagement.
Customizing footer menus enables the provision of quick access to important links, thereby enhancing the overall navigation experience for users. To create effective footer menus, it is essential to begin by identifying the key pages that the audience frequently visits.
It is advisable to include links to essential sections such as ‘Contact Us,’ ‘Privacy Policy,’ and ‘FAQ’ as a baseline. Additionally, incorporating links to social media profiles and a newsletter signup can foster audience engagement.
Including links to key product categories or top blog posts can facilitate users’ access to relevant content more efficiently.
Utilizing tools such as WordPress’s built-in menu customizer or plugins like Max Mega Menu will allow for the easy design and updating of the footer, ensuring that it complements the main navigation seamlessly.
Advanced Customisation Techniques
Advanced customization techniques, including the implementation of custom CSS and third-party widgets, can substantially enhance the functionality and aesthetics of a WordPress site.
Using Custom CSS
Utilizing custom CSS enables the modification of a website’s appearance beyond the standard options provided by themes. For instance, one might implement h1 { color: blue; } to change header colors or body { font-family: Arial, sans-serif; } to adjust font styles.
After applying these changes, it is advisable to use the live preview feature to assess their impact. Should any issues arise, it is important to check for syntax errors, such as missing semicolons, and make the necessary adjustments. Additionally, regularly clearing the browser cache will ensure that the most recent updates are visible.
To add custom CSS in WordPress, navigate to the Customizer by selecting Appearance> Customize, and then choose ‘Additional CSS.’ This area provides an opportunity to enhance the site through custom styling options.
Integrating Third-Party Widgets
Integrating third-party widgets can significantly enhance your site’s capabilities, ranging from social media feeds to interactive content, thereby improving overall user engagement.
To begin the integration process, it is advisable to select reliable options, such as the Instagram Feed or Google Calendar widget. Utilizing a plugin like Elementor can facilitate this process, as it offers user-friendly drag-and-drop functionality.
For instance, when using the Instagram Feed widget, one can easily install the corresponding plugin, connect their account, and customize the display settings. This seamless integration allows for the showcasing of recent posts, thereby fostering a sense of community among users.
Additionally, the implementation of a live chat widget, such as that offered by Tawk.to, can enhance real-time user interaction, which may lead to increased conversion rates. Choosing user-friendly plugins is crucial to ensuring a smooth and efficient integration process.
Testing and Troubleshooting
Conducting tests and troubleshooting changes prior to publication is essential to ensure that customization efforts achieve the intended outcomes without adversely affecting performance.
Previewing Changes Before Publishing
WordPress provides the functionality to preview changes in real-time, allowing users to evaluate the impact of customizations prior to implementing them on the live site.
To initiate the preview process, users should navigate to the Customizer located under the Appearance section. Adjustments made to the site’s design will trigger an automatic update of the preview.
To assess responsiveness, users can click on the device icons-representing desktop, tablet, and mobile views-to examine how the changes render across various screen sizes.
If the modifications do not display as anticipated, it is advisable to clear the browser cache or temporarily disable any caching plugins.
Additionally, for specific layout concerns related to custom CSS, users can utilize browser developer tools to test modifications before applying them permanently.
Frequently Asked Questions
What is WordPress customisation?
WordPress customisation is the process of personalising and tailoring your WordPress website to suit your specific needs and preferences. This can include changing the appearance, functionality, and layout of your site.
What can be customised on a WordPress website?
There are many elements that can be customised on a WordPress website, including menus, widgets, themes, fonts, colors, and more. These elements can be edited and configured to create a unique and visually appealing website.
To customise your WordPress menus, go to the Appearance section in your dashboard and select Menus. From there, you can add, remove, and edit menu items, as well as change the order and hierarchy of your menus.
What are widgets and how can I customise them?
Widgets are small blocks of content that can be added to different areas of your WordPress website, such as sidebars, footers, and headers. To customise widgets, go to the Widgets section in your dashboard and drag and drop the desired widgets into your designated widget areas.
Can I customise my WordPress website without coding?
Yes, you can customise your WordPress website without any coding knowledge. The WordPress platform offers a user-friendly interface that allows you to make changes and edits to your website using simple drag and drop tools and settings.
Is WordPress customisation a one-time process?
No, WordPress customisation is an ongoing process. As your website evolves and your needs change, you may need to make adjustments and updates to your customisations. Fortunately, WordPress makes it easy to make these changes without disrupting your site’s functionality.