How Can Contact Form 7 Streamline Communication on Your WordPress Site?
- 1 How Can Contact Form 7 Streamline Communication on Your WordPress Site?
- 2 Key Takeaways:
- 3 What Is Contact Form 7?
- 4 Why Is Contact Form 7 Important for Your WordPress Site?
- 5 How to Install and Set Up Contact Form 7 on Your WordPress Site?
- 6 What Are the Best Practices for Using Contact Form 7?
- 7 What Are the Alternatives to Contact Form 7?
Contact Form 7 is a popular WordPress plugin that allows website owners to easily add customizable contact forms to their sites. This plugin has gained immense popularity due to its user-friendly interface, multiple form options, and seamless integration with WordPress. With over 5 million active installations, Contact Form 7 is a trusted and reliable choice for streamlining communication on your WordPress site.
Having a contact form is essential for any website as it allows visitors to easily get in touch with you. Contact Form 7 offers several benefits that make it an important tool for your WordPress site.
- Easy Communication: With a contact form, visitors can quickly reach out to you without having to leave your site or open their email program.
- Professional Appearance: Contact Form 7 offers customizable forms that can be tailored to match the design and branding of your website, giving it a professional and unified look.
- Customizable Forms: This plugin allows you to create multiple forms with different fields, making it easy to collect specific information from visitors.
Installing and setting up Contact Form 7 on your WordPress site is a straightforward process.
- Install the Plugin: Go to the Plugins section in your WordPress dashboard, click on “Add New,” search for “Contact Form 7,” and click “Install Now.”
- Create a New Form: Go to Contact > Add New and enter the name of your form.
- Add Form Fields: Click on the “Form” tab and add fields such as name, email, message, etc.
- Configure Form Settings: You can customize various settings for your form, such as email notifications and confirmation messages.
- Add the Form to Your Site: Once your form is complete, copy the shortcode provided and paste it into the desired page or post on your site.
To get the most out of Contact Form 7, it is important to follow some best practices.
- Keep Forms Simple: Avoid adding too many fields on your forms as it can be overwhelming for visitors and may deter them from filling it out.
- Use Captcha to Prevent Spam: Enable reCAPTCHA in your form settings to prevent spam submissions.
- Regularly Check and Test Forms: Make it a habit to regularly check your forms to ensure they are functioning properly and test them from a visitor’s perspective.
While Contact Form 7 is a popular choice, there are other alternatives to consider such as WPForms, Gravity Forms, Ninja Forms, and Formidable Forms. Each of these plugins offers unique features and customization options that can cater to different needs.
Key Takeaways:
- Streamline communication on your WordPress site with Contact Form 7.
- Easily create professional and customizable forms for your site.
- Follow best practices like using captcha and regularly checking and testing forms for optimal use.
What Is Contact Form 7?
Contact Form 7 is a widely used WordPress plugin that allows for the creation and management of multiple contact forms on a website. It offers users the ability to customize forms and their email contents using simple markup. With Contact Form 7, you have the flexibility to manage multiple contact forms and customize them to your liking. In addition to its contact form capabilities, the plugin also supports features such as CAPTCHA and Akismet spam filtering.
Why Is Contact Form 7 Important for Your WordPress Site?
In today’s digital age, having a reliable and efficient way to communicate with your website visitors is crucial. This is where Contact Form 7 comes in. As one of the most popular and trusted plugins for WordPress, it offers a plethora of benefits that can streamline communication on your website. In this section, we will discuss the importance of Contact Form 7 and how it can enhance your website’s communication capabilities. From its user-friendly interface to its customizable forms, we’ll explore the key features that make Contact Form 7 an essential tool for any WordPress site.
1. Easy Communication
- Install the Contact Form 7 plugin on your WordPress site.
- Create a new form by following the intuitive form creation process.
- Add form fields to gather the necessary information from your site visitors.
- Configure form settings to tailor the communication process to your specific needs.
- Embed the completed form into your site, ensuring it’s easily accessible to visitors.
A website owner integrated Contact Form 7, making communication with clients easy and efficient. This streamlined process allows for swift responses to inquiries, leading to increased customer satisfaction and improved business performance.
2. Professional Appearance
- Choose a clean and modern form design to enhance professionalism and create a more polished appearance.
- Utilize the customization options to match the form’s look and feel with your website’s branding, adding a touch of professionalism to the overall design.
- Ensure that the form fields are logically organized and easy to navigate for a seamless and professional user experience.
3. Customizable Forms
- Access the WordPress dashboard and navigate to the Contact section in the admin panel.
- Click on ‘Add New’ to create a new form.
- Utilize the various form field options to create custom forms that meet your specific requirements.
- Adjust the form settings, including mail, messages, and additional settings, to tailor the form to your needs.
- Finally, embed the customized form into your desired pages or posts on your WordPress site.
Contact Form 7, released in 2007 by Takayuki Miyoshi, revolutionized WordPress communication with its customizable forms, setting a new standard for user-friendly contact form plugins.
How to Install and Set Up Contact Form 7 on Your WordPress Site?
In today’s fast-paced digital world, having a reliable and efficient way for visitors to contact you is crucial for any WordPress site. This is where Contact Form 7 comes in. In this section, we will guide you through the process of installing and setting up this popular plugin on your site. From creating a new form to adding it to your site, we’ll cover each step in detail to help streamline communication with your audience. Let’s get started!
1. Install the Plugin
- Access your WordPress dashboard and select ‘Plugins’ from the menu on the left-hand side.
- Search for ‘Contact Form 7’ in the search bar and click on ‘Add New’.
- Next to the Contact Form 7 plugin, click ‘Install Now’ and then ‘Activate’ to make it live on your website.
2. Create a New Form
- Go to your WordPress dashboard and click on ‘Plugins’ in the left-hand sidebar.
- Click on ‘Add New’ and search for ‘Contact Form 7’ in the search bar.
- Click ‘Install Now’ and then ‘Activate’.
- After activating, a new option labeled ‘Contact’ will appear in the sidebar. Click on ‘Contact’ and then ‘Add New’.
- Now, you can start creating your new form by adding fields like name, email, message, etc.
3. Add Form Fields
- Navigate to the ‘Contact’ section in your WordPress dashboard.
- Select ‘Contact Forms’ and choose the form you wish to add fields to.
- Click on ‘Edit’ and utilize the available options such as text, email, or dropdown to add new fields.
- Save the changes after adding the required form fields.
Fun Fact: With over 5 million active installations, Contact Form 7 is one of the most popular WordPress plugins.
4. Configure Form Settings
- Access Form Settings: After creating a form, go to the ‘Contact’ section in your WordPress dashboard to configure the settings for customization.
- Customize Email Notifications: Customize email notifications for both users and administrators based on specific form submissions.
- Integrate with Other Plugins: Incorporate additional plugins for enhanced functionality, such as reCaptcha integration for improved security.
- Configure Conditional Logic: Set up conditional rules to show or hide certain form fields based on user input.
To achieve optimal results, make sure that all form settings align with your website’s branding and communication objectives.
5. Add the Form to Your Site
- To incorporate the form into your website, access your WordPress admin dashboard.
- Navigate to ‘Contact’ in the menu on the left-hand side.
- Choose ‘Contact Forms’ and select the desired form.
- Copy the provided shortcode for the selected form.
- Paste the shortcode into the desired WordPress page or post to display the form.
What Are the Best Practices for Using Contact Form 7?
Contact Form 7 is a powerful tool for streamlining communication on your WordPress site. However, to fully utilize its benefits, it’s important to follow some best practices. In this section, we will discuss the top three best practices for using Contact Form 7. First, we’ll explore the importance of keeping forms simple for a better user experience. Then, we’ll discuss the use of Captcha to prevent spam and ensure the security of your forms. Lastly, we’ll touch on the importance of regularly checking and testing your forms to ensure they are functioning properly.
1. Keep Forms Simple
- Minimize Fields: Only request essential information to keep forms simple and streamline the form.
- Single Column Layout: Arrange fields in one column for easy completion and to keep the form simple.
- Clear Instructions: Provide concise and clear directions to avoid confusion and keep the form simple.
- Mobile-Friendly Design: Ensure the form is responsive for convenient access on all devices and to keep the form simple.
The concept of simplifying forms dates back to the early 20th century when companies started using standardized forms to streamline processes and improve efficiency.
2. Use Captcha to Prevent Spam
- Install a captcha plugin that is compatible with Contact Form 7.
- Access the plugin settings and enable captcha on your forms.
- Choose the appropriate type of captcha, such as image-based or question-based.
- Set up the captcha to appear after a certain number of form submissions.
- Regularly update the captcha plugin to ensure effective spam prevention.
When captchas were first introduced in the late 1990s, they were mainly used to distinguish between human users and bots. The term ‘captcha’ stands for ‘Completely Automated Public Turing test to tell Computers and Humans Apart.’ Its evolution has led to modern security measures in digital platforms.
3. Regularly Check and Test Forms
Regularly check and test forms for any technical issues or glitches. It is important to periodically test the forms to ensure they are functioning correctly. It is also crucial to verify that form submissions are being received as intended.
One example of the importance of regular form checks is a WordPress site that faced recurring form submission issues due to an outdated plugin. However, after implementing regular form checks, the site’s communication process significantly improved, resulting in the resolution of customer feedback delays.
What Are the Alternatives to Contact Form 7?
While Contact Form 7 is a popular and reliable option for managing communication on your WordPress site, it is not the only form plugin available. In this section, we will explore some alternatives to Contact Form 7 and how they can streamline communication on your website. From the user-friendly WPForms to the advanced features of Gravity Forms, we will discuss the unique benefits and features of each alternative option. By the end, you will have a better understanding of which form plugin best suits your needs.
1. WPForms
- Install the WPForms plugin from the WordPress dashboard.
- Create a new form by navigating to WPForms » Add New in the WordPress admin panel.
- Add form fields such as name, email, and message using the drag and drop builder.
- Configure form settings, including notifications and confirmations, to streamline communication.
- Finally, add the WPForms contact form to your WordPress site using the generated shortcode or block.
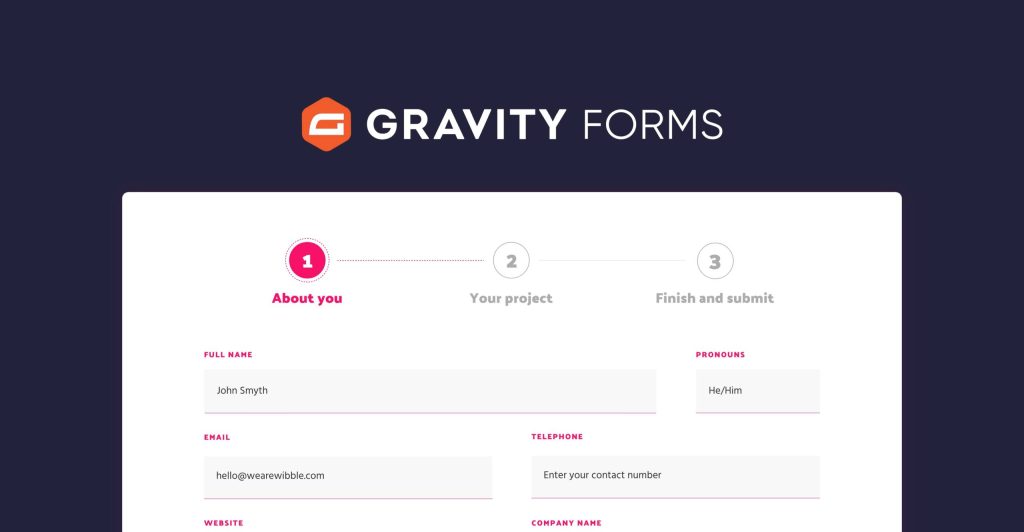
2. Gravity Forms
To begin, access your WordPress dashboard and select ‘Plugins’ and then ‘Add New’.
In the search bar, look for ‘Gravity Forms’.
Select ‘Install Now’ and then ‘Activate’.
Once activated, you can easily create forms using the user-friendly drag-and-drop interface.
Personalize the forms with a variety of field options and conditional logic.
3. Ninja Forms
- Install the Ninja Forms plugin from the WordPress plugin repository.
- Activate the Ninja Forms plugin on your WordPress dashboard.
- Create a new form using the user-friendly Ninja Forms interface.
- Add and customize form fields according to your communication needs with the help of Ninja Forms.
- Configure form settings to align with your site’s specific requirements using Ninja Forms.
- Embed the convenient and efficient Ninja Forms onto your WordPress site to streamline communication.
4. Formidable Forms
- Install the Formidable Forms plugin on your WordPress site.
- Access the Formidable Forms plugin settings and customize the form fields to fit your needs.
- Create a new form using the intuitive drag-and-drop builder.
- Easily integrate the Formidable Forms into your site’s pages using shortcodes.
Fact: Formidable Forms allows seamless integration with popular tools such as Zapier and Salesforce, enhancing workflow efficiency.