How to Optimize Images on WordPress for Faster Loading with Smush?
- 1 How to Optimize Images on WordPress for Faster Loading with Smush?
- 2 Key Takeaways:
- 3 What Is Image Optimization?
- 4 What Is Smush Image Compression and Optimization?
- 5 Why Use Smush for Image Optimization on WordPress?
- 6 How to Optimize Images on WordPress for Faster Loading with Smush?
- 7 What Are the Other Image Optimization Plugins for WordPress?
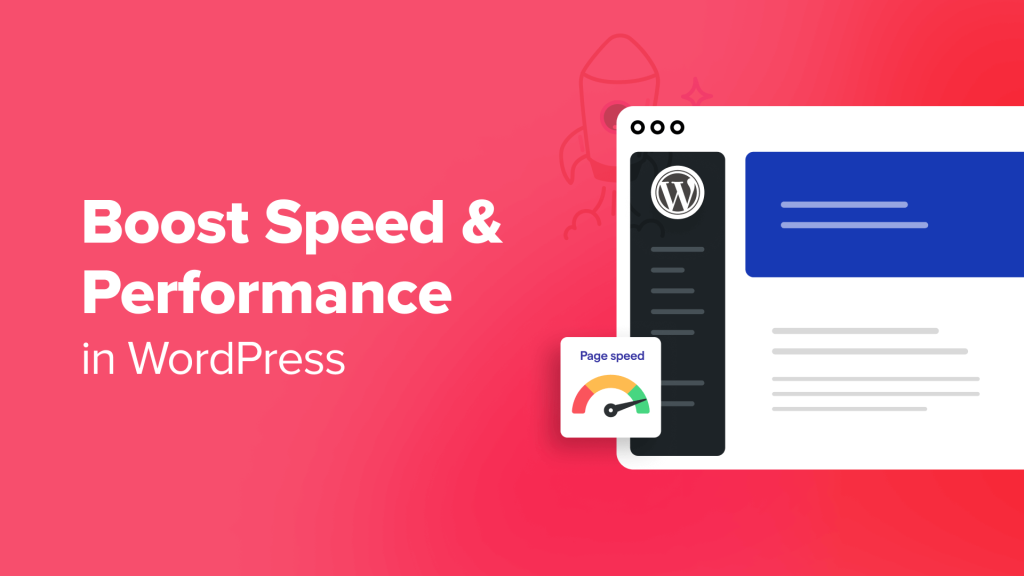
Image optimization is the process of reducing the file size of images on a website without compromising on quality. It plays a crucial role in improving the loading speed of a website, which is essential for delivering a seamless user experience. This is where Smush Image Compression and Optimization comes in.
Smush is a popular WordPress plugin that helps optimize images for faster loading. It works by compressing and resizing images without sacrificing their quality. This not only reduces the file size of images but also helps in improving the loading speed of a website.
Using Smush for image optimization on WordPress has numerous benefits, making it an essential tool for any website. Here are three reasons why you should consider using Smush for image optimization:
- Faster Loading Time: By compressing images, Smush helps reduce the file size, making them load faster on a website.
- Better SEO Ranking: As page loading speed is a crucial factor in search engine rankings, using Smush can help improve your website’s SEO.
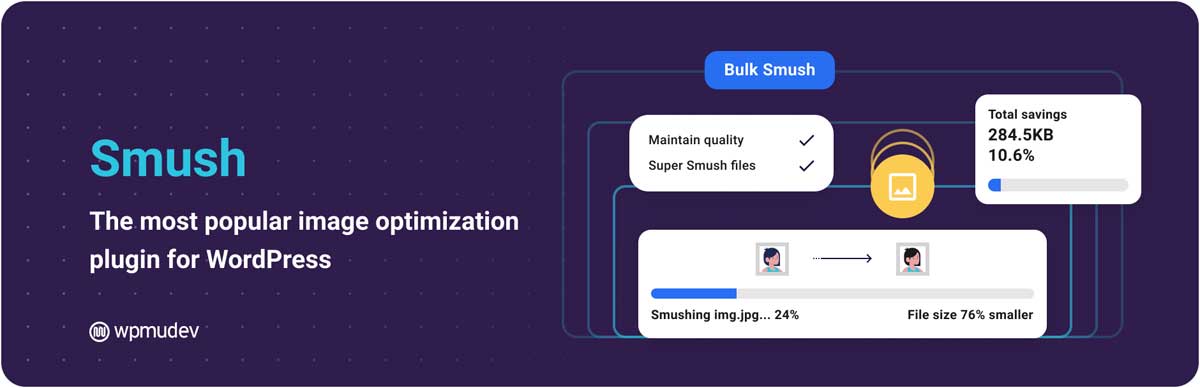
- Saves Storage Space: Smush also has a feature called “Super-Smush,” which compresses images up to 10x more than regular compression, saving valuable storage space on your server.
So, how can you optimize images on WordPress for faster loading using Smush? Here is a step-by-step guide:
- Install and Activate Smush Plugin: Install the Smush plugin from the WordPress dashboard and activate it.
- Configure Smush Settings: From the Smush settings, you can choose to optimize images upon upload, set compression levels, and enable lazy loading for images.
- Bulk Optimize Existing Images: Smush allows you to optimize existing images in bulk, saving you time and effort.
- Enable Automatic Image Optimization: With the “Automatic Smush” feature, all future uploads will be automatically optimized by Smush.
- Use Lazy Load for Images: Lazy loading delays the loading of images until a user scrolls down to them, reducing the initial load time of a webpage.
Other popular image optimization plugins for WordPress include Imagify, EWWW Image Optimizer, ShortPixel, and Optimole. However, Smush remains a top choice due to its user-friendly interface, fast optimization, and comprehensive features. By using Smush, you can ensure your website is optimized for fast loading, ultimately enhancing the user experience and improving your website’s performance.
Key Takeaways:
- Image optimization is crucial for a faster website and better SEO ranking.
- Smush is a powerful image compression and optimization plugin for WordPress.
- By using Smush, you can improve your website’s loading time, SEO ranking, and save storage space.
What Is Image Optimization?
Image optimization is the process of reducing the file size of images without sacrificing quality. This results in faster website loading times, improved user experience, and higher search engine rankings. Techniques for image optimization include resizing, compressing, and selecting the appropriate file format.
In 1992, the first software for image optimization, Luratech JPEG, was introduced, revolutionizing web graphics.
Why Is Image Optimization Important?
Image optimization is crucial for website performance and user experience. It ensures faster loading times, better SEO ranking, and reduced storage space. Optimized images lead to quicker page loading, enhancing user engagement and retention. Additionally, they contribute to improved search engine visibility and accessibility. Utilizing image optimization tools like Smush on WordPress enhances website performance and user satisfaction.
What Is Smush Image Compression and Optimization?
Smush Image Compression and Optimization is a WordPress plugin that aims to improve website performance and SEO by reducing image file sizes. It automatically compresses and resizes images upon upload, resulting in faster page load times. Additionally, it offers bulk compression and lazy loading features for existing images.
The idea of image compression can be traced back to the 1970s when algorithms were first developed to reduce the size of digital images for more efficient storage and transmission.
How Does Smush Work?
- Lossless compression: Smush reduces image file sizes without compromising their visual quality.
- Lazy loading: Images load as visitors scroll, improving page load times.
- Image resizing: Automatically scales large images to fit display dimensions, reducing load times.
- Bulk smushing: Optimize up to 50 images at once, saving time and effort.
- Automatic compression: New images are compressed upon upload, streamlining the optimization process.
Why Use Smush for Image Optimization on WordPress?
As a WordPress user, you may have heard of Smush, a popular image compression and optimization plugin. But why should you bother with optimizing your images? In this section, we will discuss the key advantages of using Smush for image optimization on WordPress. From faster loading times to improved SEO ranking and saving storage space, there are plenty of reasons to consider using Smush for your website. Let’s dive into the details and discover how this plugin can benefit your WordPress site.
1. Faster Loading Time
- Install and activate Smush plugin.
- Configure Smush settings according to your optimization needs.
- Bulk optimize existing images to compress and enhance loading speed for faster loading time.
- Enable automatic image optimization for future uploads.
- Utilize lazy load for images to further improve page loading times.
Consider implementing a content delivery network (CDN) to distribute image files across various servers, reducing loading times for global audiences and achieving a faster loading time.
2. Better SEO Ranking
- Research relevant keywords, such as “Better SEO Ranking,” and incorporate them into image file names, alt tags, and captions.
- Compress images without compromising quality to improve page loading speed and enhance user experience.
- Implement responsive design to ensure images adapt to various devices, further improving user experience and potentially boosting SEO ranking.
- Utilize image sitemaps and schema markup to provide search engines with detailed information about the images and potentially improve SEO ranking.
- Create engaging and relevant content surrounding the images, including keywords like “Better SEO Ranking,” to increase user interaction and potentially improve SEO ranking.
3. Saves Storage Space
- Compress images: Use Smush to reduce file sizes without compromising quality.
- Remove unnecessary data: Eliminate hidden bulky information from images to save space.
- Conversion to WebP format: Convert images to WebP, a high-quality and smaller image format, to save storage space and improve loading times.
How to Optimize Images on WordPress for Faster Loading with Smush?
Are you looking to improve the loading speed of your WordPress website? One effective way to do so is by optimizing your images with the Smush plugin. In this section, we will discuss how to optimize images on WordPress for faster loading using Smush. We will cover the step-by-step process of installing and activating the plugin, configuring its settings, bulk optimizing existing images, enabling automatic optimization, and utilizing lazy load for images. By the end, you’ll have a better understanding of how Smush can help improve your website’s performance.
1. Install and Activate Smush Plugin
- Access your WordPress dashboard.
- Navigate to the ‘Plugins’ section and click on ‘Add New’.
- In the search bar, type in ‘Smush’ and press ‘Enter’.
- Click on ‘Install Now’ and then ‘Activate’.
- Go to the ‘Media’ tab and select ‘WP Smush’ to configure your desired settings.
To further evaluate if Smush is the right fit for your specific optimization needs, be sure to check out user reviews.
2. Configure Smush Settings
- Log in to your WordPress dashboard and go to the Smush plugin settings.
- Click on ‘Settings’ and then choose ‘Smush’ to access the configuration options.
- Customize the settings to your liking, including enabling or disabling image resizing, setting maximum image dimensions, and selecting whether to preserve the original image.
- Save the changes after configuring the Smush settings to ensure that your images are compressed for faster loading.
3. Bulk Optimize Existing Images
- Access your WordPress dashboard and navigate to the Smush plugin.
- Select ‘Bulk Optimize Now’ to optimize all current images simultaneously.
- Monitor the progress of the optimization and ensure that it is completed successfully.
- After the bulk optimization is finished, you will notice improved loading times for your website.
The idea of bulk image optimization can be traced back to the early 2000s when web developers searched for effective methods to improve website performance despite the growing size of image files.
4. Enable Automatic Image Optimization
- Navigate to your WordPress dashboard and go to the Smush settings.
- In the settings, find the ‘Automatic Smush’ section.
- Toggle the button to enable automatic image optimization.
- Save the changes to activate automatic optimization for all newly uploaded images.
5. Use Lazy Load for Images
- Install and activate a lazy load plugin such as Lazy Load by WP Rocket or A3 Lazy Load from the WordPress plugin directory.
- Configure the lazy load settings according to your website’s specific requirements and layout.
- Test the lazy load functionality on various devices and browsers to ensure compatibility and optimal performance.
- Monitor the loading speed of the website and make adjustments to the lazy load settings if needed.
Lazy loading for images has transformed website performance, reducing loading times and improving user experience. This technique greatly enhances web page loading, particularly for content-heavy or image-rich websites.
What Are the Other Image Optimization Plugins for WordPress?
Smush Image Compression and Optimization is a powerful tool for optimizing images on WordPress and reducing website load times. However, it is not the only option available. In this section, we will discuss other popular image optimization plugins for WordPress, including Imagify, EWWW Image Optimizer, ShortPixel, Optimole, and Imagify. Each of these plugins offers unique features and benefits that can help improve your website’s performance. Let’s explore these alternatives and see how they compare to Smush.
1. Imagify
Optimizing images with the Imagify plugin on WordPress involves a few simple steps:
- Install and activate the Imagify plugin from the WordPress dashboard.
- Configure the Imagify settings based on your optimization preferences.
- Bulk optimize existing images using Imagify to compress and improve loading speed.
- Enable automatic image optimization to streamline future uploads.
- Employ lazy load for images to further enhance loading performance.
Pro-tip: Regularly check the optimized images to ensure the quality meets your standards while maintaining faster loading times.
2. EWWW Image Optimizer
- Install: Access the WordPress dashboard, navigate to Plugins, click on Add New, search for ‘EWWW Image Optimizer’, and click Install Now.
- Activate: Once the EWWW Image Optimizer plugin is installed, click Activate to enable its functionality.
- Configure Settings: Go to the plugin’s settings to customize compression levels, image dimensions, and other preferences.
- Bulk Optimize: Use the EWWW Image Optimizer to optimize existing images by selecting the Bulk Optimize option.
- Automatic Optimization: Enable automatic image optimization with the EWWW Image Optimizer to streamline the process for future uploads.
3. ShortPixel
- Visit the ShortPixel website and sign up for an account.
- After signing up, you will receive an API key.
- Install the ShortPixel plugin on your WordPress site.
- Activate the plugin and enter the API key for your ShortPixel account.
- Configure the compression settings for ShortPixel according to your preferences and website needs.
4. Optimole
Optimole is a highly regarded image optimization plugin for WordPress, providing automatic and real-time image compression as well as lazy loading functionality to improve website performance.
Pro-tip: To ensure optimal quality and faster loading times, it is recommended to regularly monitor website images when using Optimole.
5. Imagify
- Install and activate the Imagify plugin from the WordPress repository.
- Configure the settings according to your image optimization requirements.
- Optimize existing images in bulk with just one click.
- Enable automatic image optimization to ensure all new images are automatically optimized.
- Utilize lazy load for images to improve page loading speed.
Did you know? Imagify offers a user-friendly interface, making it easy for WordPress users to optimize their images with the help of the Imagify plugin for faster loading times.