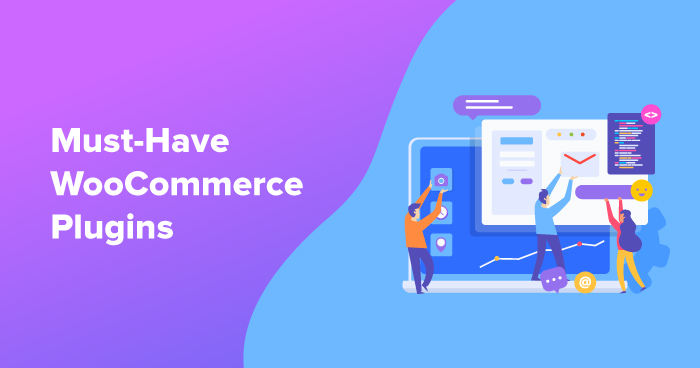
Managing media efficiently is crucial for enhancing your WordPress site’s performance optimization. With tools like WP Rocket, you can improve site speed and loading speed, which are key factors for SEO success on platforms like Google. This article explores how WordPress simplifies the organization, optimization, and display of media, ensuring a streamlined experience that elevates your site’s functionality and user engagement. Dive in to discover strategies that can transform your media management approach.
Overview of Media Management in WordPress
- 1 Organising Media in WordPress
- 2 Optimising Media for Performance
- 3 Displaying Media on Your Site
- 4 Advanced Media Management Techniques
- 5 Best Practices for Media Management in WordPress
- 6 Frequently Asked Questions
- 6.1 Can I easily organise media files on my WordPress site?
- 6.2 How can I optimise images for my WordPress site?
- 6.3 Can I create custom galleries to display media on my site?
- 6.4 Is it easy to add videos to my WordPress site?
- 6.5 How can I organise media across different pages and posts on my site?
- 6.6 Can I create a media library for registered users only?
- 6.7 Get Started with WordPress Hosting Today
WordPress offers a comprehensive media library that enables users to upload, organize, and optimize various media files with ease. The media library supports a wide array of file types, including images (JPEG, PNG), audio (MP3, WAV), and video (MP4, MOV), facilitating the incorporation of diverse content.
Additionally, users have the capability to edit images directly within the library, allowing for actions such as cropping or rotating, which enhances overall efficiency. The integration of performance optimization tools, such as WP Rocket, can significantly improve site speed.
By caching media files and reducing load times, WP Rocket ensures that the rich media experience is maintained without compromising site performance, thereby providing a smoother viewing experience for the audience.
Importance of Organising Media
Organizing media effectively can significantly enhance loading speed, thereby reducing bounce rates and improving overall user experience.
A well-structured media library facilitates quicker access to files, which has a considerable impact on site performance. For example, websites with organized image files can load several seconds faster than those that are disorganized. Research indicates that 53% of mobile users abandon websites that take longer than three seconds to load.
It is advisable to utilize tools such as Adobe Bridge for media categorization or plugins like FileBird for WordPress to manage media efficiently.
Additionally, by reducing image file sizes using tools such as TinyPNG, one can further improve loading times, creating a smoother browsing experience that is likely to keep visitors engaged.
Organising Media in WordPress
Organizing media in WordPress necessitates a strategic approach that employs categories, tags, and folders to enhance content retrieval and management efficiency.
Media Library Overview
The Media Library in WordPress functions as a central repository for managing images, videos, and documents within a website.
To access the Media Library, one should navigate to the WordPress dashboard and select ‘Media’ from the left sidebar. The interface presents a comprehensive list of all uploaded files, including thumbnails, file names, and attachment details.
Users have the option to filter files by type-images, audio, or videos-using the dropdown menu, or to search for specific media by entering relevant keywords in the search bar.
For optimal search engine performance, it is advisable to rename files to incorporate relevant keywords prior to uploading, as this practice enhances search visibility. Additionally, utilizing alt text for images further improves accessibility and discoverability.
Uploading Media Files
Uploading media files in WordPress is a straightforward process; however, selecting the appropriate formats and sizes is crucial for optimal site performance.
To upload media, one should navigate to the WordPress dashboard, click on ‘Media’, and then select ‘Add New’. Files can be uploaded by dragging and dropping them or by clicking ‘Select Files’.
For images, it is advisable to use:
- JPEG format for photographs
- PNG format for graphics
It is recommended to keep file sizes below 1MB to ensure efficient loading times. For videos, the MP4 format is the preferred choice, with a maximum size limit of 100MB.
Utilizing properly sized media not only enhances the user experience but also improves loading times, which are essential factors for effective search engine optimization (SEO).
Using Folders and Categories
Utilizing categories and folders can significantly enhance the organization of media files, facilitating easier and more efficient retrieval.
To create custom categories, one should navigate to the WordPress dashboard, select `Media,’ and then `Categories.’ Here, specific groups can be defined, such as `Events,’ `Promotions,’ or `Team Photos.’
For effective management, it is advisable to consider using plugins such as WP Media Folder ($39), which enables intuitive creation and organization of folders.
Best practices include maintaining a consistent naming convention and regularly reviewing categories to eliminate redundancies, thereby ensuring that the media library remains uncluttered and easily navigable.
Tagging Media for Easy Retrieval
Tagging media assets in WordPress enhances searchability and streamlines content management throughout the site.
To create effective tags, it is essential to begin by identifying relevant keywords that accurately describe the content of the media. Employing specific terms such as ‘travel,’ ‘landscape,’ or ‘food photography’ ensures that users can easily locate related items.
A highly useful tool for tag management is the Enhanced Media Library plugin, which facilitates the bulk addition of tags and the efficient categorization of media. Unlike categories that establish a hierarchical structure, tags serve as flexible descriptors that significantly improve searchability.
This method allows for enhanced filtering and organization, ultimately contributing to an improved user experience on the website.
Optimising Media for Performance
Optimizing media files is essential for improving loading speed, as this factor directly affects both user experience and search engine rankings.
Image Compression Techniques
Image compression is an effective method for significantly reducing file sizes, which in turn enhances your website’s loading speed and performance metrics, such as Largest Contentful Paint (LCP).
Utilizing plugins such as Imagify and Smush can streamline this process. For example, Imagify provides various compression levels ranging from ‘Normal’ to ‘Aggressive,’ enabling a balance between image quality and file size.
A typical image may decrease from 1.5MB to approximately 200KB with ‘Aggressive’ compression, resulting in loading time improvements of up to 60%.
On the other hand, Smush automatically optimizes images upon upload, making it particularly user-friendly for individuals with limited technical expertise.
It is advisable to conduct regular assessments of your site’s performance after implementing compression, using tools such as Google PageSpeed Insights to monitor enhancements and ensure continuous optimization.
Choosing the Right File Formats
Selecting the appropriate file format for media is crucial, as it can significantly influence both quality and loading speed. JPEG and WebP are among the most recommended formats for images.
JPEG is particularly well-suited for photographs due to its compression capabilities, which allow for a considerable reduction in file size without substantially compromising quality. However, it is important to note that JPEG does not support transparency.
In contrast, WebP offers superior compression while also maintaining transparency, making it a more versatile option. For example, an image saved in WebP format can be up to 30% smaller than its JPEG equivalent while preserving comparable quality.
For web-focused applications, it is advisable to utilize WebP for enhanced loading times, while retaining standard JPEGs to ensure compatibility with older browsers.
Responsive Images and Media Queries
Implementing responsive images and media queries ensures that media content adapts seamlessly to various screen sizes, thereby enhancing the user experience. Tools such as Picturefill can facilitate this process by providing a polyfill for older browsers that do not support the `srcset` attribute.
To begin, it is advisable to use the `srcset` attribute within the `` tag. For example: `
 `. This approach instructs the browser to select the most appropriate image based on the screen’s width.
Furthermore, CSS media queries can be employed to further adjust images. For instance, specific maximum widths can be set with the following code: `@media (max-width: 600px) { img { width: 100%; } }`.
In summary, employing tools like Picturefill can streamline the implementation of responsive images, ensuring compatibility with older browsers that lack support for the `srcset` attribute.
Using Plugins for Optimisation
Plugins such as WP Rocket ($49 per year) facilitate the optimization of media tasks, thereby enhancing site speed through effective caching and compression. Plus WP Rocket, several other widely used optimization plugins further improve the functionality of the WordPress media library.
For example, Smush (available for free or up to $49 per year) efficiently compresses images without compromising quality, while Imagify ($4.99 per month) provides advanced optimization for various file types. Another commendable option, ShortPixel ($4.99 per month), offers bulk image optimization and automatically resizes images upon upload.
Each of these tools integrates seamlessly with the existing media library, allowing for effortless enhancements to loading times, which are essential for both user experience and search engine optimization.
Displaying Media on Your Site
Effectively displaying media on a website significantly enhances user engagement and positively contributes to overall site performance.
Embedding Media in Posts and Pages
Embedding media in posts and pages is straightforward with the built-in functionality provided by WordPress, which significantly enhances both context and user engagement.
- To embed a YouTube video, one need only copy the video’s URL and paste it into the block editor; WordPress will automatically convert it into an embedded video.
- For images, the ‘Image’ block should be utilized to upload files or to insert a URL directly.
- When adding audio files, it is advisable to use the ‘Audio’ block, which supports various formats, including MP3 and WAV.
To adhere to best practices, it is essential to include captions for accessibility purposes and to ensure that the media used is relevant to the content. This approach will contribute to improved user engagement and retention.
Creating Galleries and Sliders
Creating galleries and sliders in WordPress significantly enhances image presentation and effectively engages visitors.
- To create a gallery, one should begin by navigating to the block editor and selecting the ‘Gallery’ block. From there, it is possible to upload or select images from the media library.
- For implementing slider functionality, it is advisable to utilize a plugin such as MetaSlider, which facilitates the creation of responsive sliders. The process involves installing the plugin, selecting the desired images, and configuring settings such as transition effects and timing.
In terms of design, it is important to strive for a clean layout with consistent image sizes and to employ white space to draw attention to the images. Additionally, it is essential to test the design across various devices to ensure an optimal user experience.
Customising Media Display Settings
Customizing media display settings enables one to tailor the presentation of images and videos for the audience, thereby optimizing the user experience.
To customize these settings, navigate to the WordPress media library and select the desired media file. In this section, adjustments can be made to the alignment using options such as ‘left,’ ‘center,’ or ‘right’ to control the positioning of the media.
Additionally, size parameters can be set to options like ‘thumbnail,’ ‘medium,’ or ‘large.’ The ‘Link To’ setting can be utilized to determine whether users will view a larger version of the image or be directed to an external site upon clicking.
For image captions, simply input text in the designated ‘caption’ field to provide context, thereby enhancing user engagement.
Advanced Media Management Techniques
Advanced media management techniques enable WordPress users to enhance their workflows and optimize media utilization throughout their websites.
Using Shortcodes for Media
Shortcodes provide an effective means of integrating media into WordPress posts and pages, thereby offering enhanced flexibility.
For instance, the following commonly used shortcodes can be employed:
- “ for creating a photo gallery,
- “ for embedding audio files, and
- “ for incorporating video content.
Best practices include ensuring that media files are optimized for web use, maintaining a consistent style throughout the site, and testing the functionality of shortcodes across various devices and browsers.
This approach not only improves the overall user experience but also enhances the site’s performance and accessibility.
Integrating Third-Party Media Sources
Integrating third-party media sources such as YouTube and SoundCloud significantly enhances content offerings and improves user engagement on your website.
To incorporate YouTube videos, one can utilize the Embed block in WordPress, which allows for the straightforward insertion of a video URL, automatically formatting it for the webpage. For SoundCloud, it is advisable to consider using the SoundCloud Embed block or plugins like ‘Compact WP Audio Player,’ which facilitate seamless integration of audio files.
Employing plugins such as ‘Embed Plus for YouTube’ can further enhance video customization, offering improved control over player size and viewing options.
These strategies contribute to a dynamic and engaging content experience, which is essential for maintaining visitor attention.
Managing User Permissions for Media Access
Effective management of user permissions is essential for ensuring secure and organized access to media files within a WordPress site. To configure user roles, one should navigate to the WordPress dashboard and select the ‘Users’ section.
In this area, various roles can be assigned, including Administrator, Editor, Author, Contributor, or Subscriber. For example, Editors have the capability to upload files but do not possess the authority to delete them, whereas Authors are limited to uploading only their own content.
To further refine access control, it is advisable to utilize a plugin such as ‘User Role Editor,’ which offers customization of permissions for each role. For instance, it may be prudent to grant Contributors the ability to view the media library without the option to upload files, thereby ensuring that media files remain organized and secure.
Best Practices for Media Management in WordPress
Implementing best practices for media management in WordPress can significantly enhance site performance and improve user engagement.
Regularly Auditing Your Media Library
Conducting regular audits of your media library is essential for identifying outdated or unnecessary files, thereby enhancing overall site performance.
To efficiently perform an audit of your media library, it is advisable to utilize tools such as Media Cleaner or WP-Optimize, which can scan for large files and detect unused media. It is recommended to schedule audits on a quarterly basis to maintain a streamlined library.
During the review process, categorizing files by size and type will facilitate informed decisions regarding which assets to delete or compress. For instance, images exceeding 1MB can often be resized without a significant loss in quality, utilizing tools like Imagify or TinyPNG.
Regular audits not only improve performance but also contribute to optimizing storage costs.
Backing Up Media Files
Backing up media files is crucial for protecting content from data loss and ensuring continuity in the event of issues.
To effectively back up media files, it is advisable to utilize the UpdraftPlus plugin, which provides both free and premium options. For a manual backup, one can access the WordPress dashboard, navigate to ‘Media,’ and download files directly.
Configuring UpdraftPlus to save backups to cloud storage solutions such as Google Drive or Dropbox significantly enhances security. It is recommended to schedule regular backups on a weekly or monthly basis, depending on the frequency of content updates.
This proactive approach serves to safeguard against unforeseen data loss, ensuring that the media library remains intact.
Staying Updated with WordPress Media Features
Staying informed about the latest WordPress media features is essential for leveraging new functionalities to enhance performance and user experience. To monitor these new features, it is advisable to regularly review WordPress release notes, which provide comprehensive information on updates and enhancements.
Engaging in community forums such as WordPress.org and Stack Overflow is also beneficial, as users share valuable insights and experiences regarding new functionalities. Additionally, following reputable blogs like WPBeginner and WPTavern can offer timely updates and practical advice.
Furthermore, subscribing to newsletters from plugin developers is recommended, as they often announce new features and best practices directly. By utilizing these resources, one can effectively enhance their WordPress site and maintain a competitive edge.
Frequently Asked Questions
Can I easily organise media files on my WordPress site?
Yes, WordPress has a built-in media library feature where you can upload, categorise, and manage all your media files.
How can I optimise images for my WordPress site?
WordPress has an image editor that allows you to crop, resize, and compress images directly within the platform. This helps to improve page loading speed and overall site performance.
Can I create custom galleries to display media on my site?
Yes, WordPress has a gallery feature that allows you to create custom image galleries with different layout options and display them on your site.
Is it easy to add videos to my WordPress site?
Definitely. You can easily embed videos from popular platforms like YouTube, Vimeo, or self-hosted videos using the WordPress media library.
How can I organise media across different pages and posts on my site?
WordPress allows you to assign media files to specific pages or posts, making it easy to organise and display them in the right context.
Can I create a media library for registered users only?
Yes, you can restrict access to your media library and only allow registered users to view or download files. This is a great feature for membership sites or private content.