phpMyAdmin is a popular web-based tool for managing MySQL and MariaDB databases. One common task you might need to perform is renaming a database table. This guide will walk you through the steps to rename a database table using phpMyAdmin.
Steps to Rename a Database Table
- Access phpMyAdmin:
Open your web browser and navigate to the phpMyAdmin URL. This is typically something like
http://localhost/phpmyadminif you are running it locally, or the specific URL provided by your web host. - Log In:
Log in to phpMyAdmin using your database username and password. This information is usually provided by your web hosting provider or set up during the installation of phpMyAdmin.
- Select the Database:
Once logged in, you will see a list of databases on the left-hand side. Click on the database containing the table you want to rename.
- Select the Table:
In the list of tables, click on the table you want to rename. This will open the table structure view.
- Open the Operations Tab:
Click on the Operations tab at the top of the page. This tab contains various options for managing the table.
- Rename the Table:
In the “Table options” section, you will see a field labeled Rename table to. Enter the new name for the table in this field.
NewTableName - Save the Changes:
Click the Go button to save the changes. phpMyAdmin will execute the SQL query to rename the table, and you will see a confirmation message.
Example: Renaming a Table
Suppose you have a table named old_table and you want to rename it to new_table. Follow these steps:
- Select the Database: Choose the database containing
old_table. - Select the Table: Click on
old_tablefrom the list of tables. - Open the Operations Tab: Click on the Operations tab at the top.
- Rename the Table: In the “Table options” section, enter
new_tablein the Rename table to field. - Save the Changes: Click Go to rename the table.
Conclusion
Renaming a database table using phpMyAdmin is a simple process that involves selecting the table, navigating to the Operations tab, and entering the new name. By following the steps outlined in this guide, you can easily rename tables within your database.
This tutorial assumes you’ve already logged in to phpMyAdmin
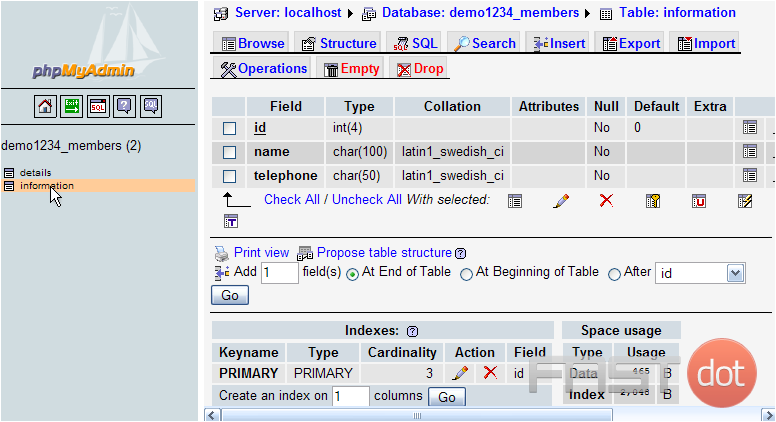
Now let’s learn how to rename database tables
Click the database table you wish to rename
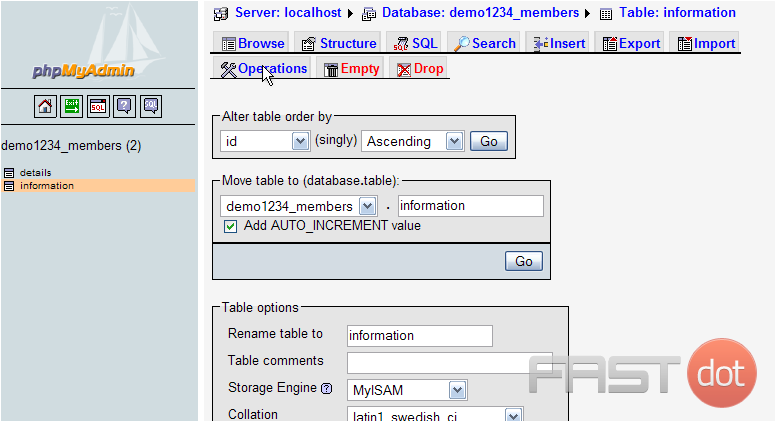
Then click the Operations button
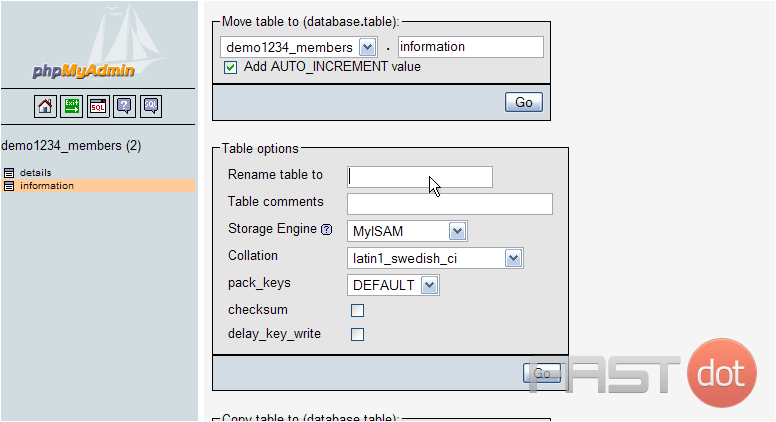
Enter a new name for the table here
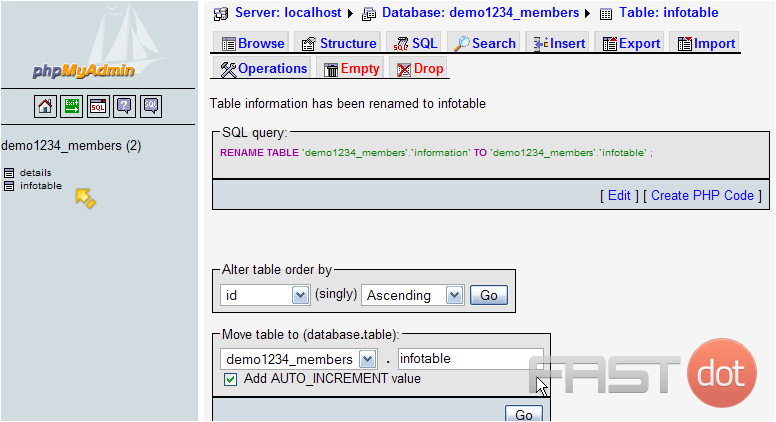
Then click Go
That’s it! The information table has been renamed infotable, and is listed here
This is the end of the tutorial. You now know how to rename database tables using phpMyAdmin