This tutorial assumes you already have LeapFTP running on your computer, and connected to a remote server
Table of Contents
Now let’s learn how to manage our website files.
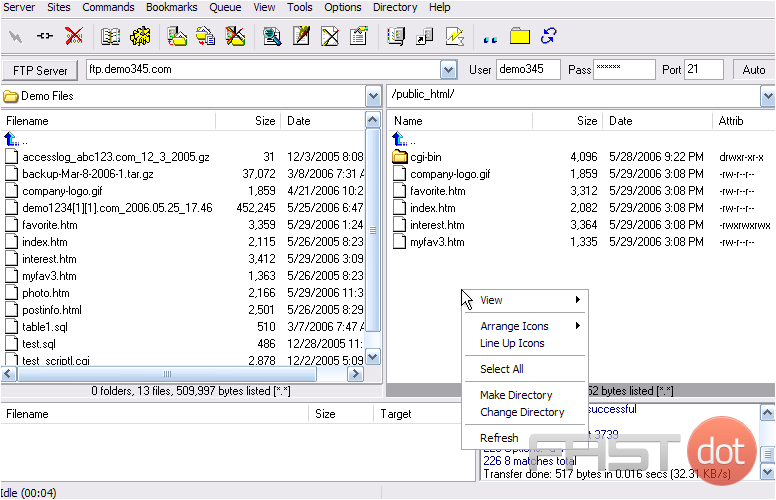
The first thing we’re going to do is create a new folder (or directory) on the remote server.
1) Right-click anywhere in the remote server window.
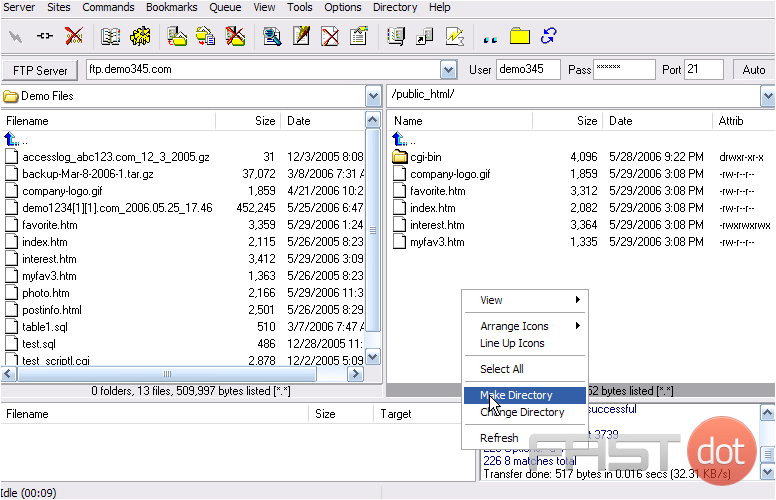
2) Then click the Make Directory link.
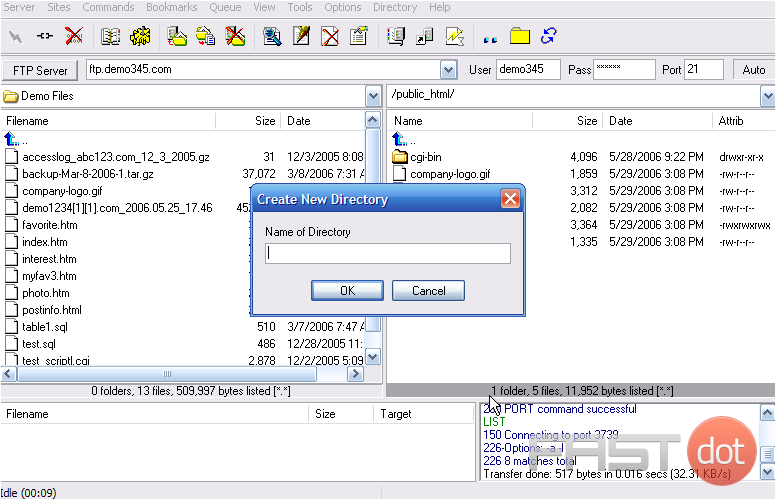
3) Type a name for the new folder here, then click OK.
That’s all there is to it. Now let’s rename this new folder…..
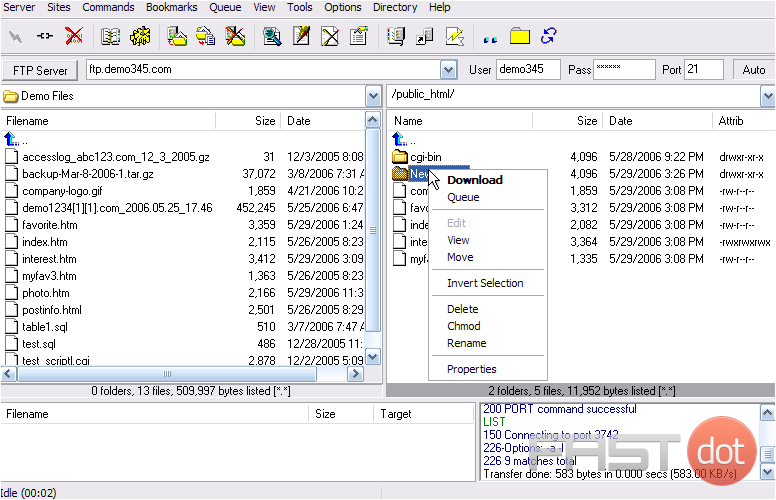
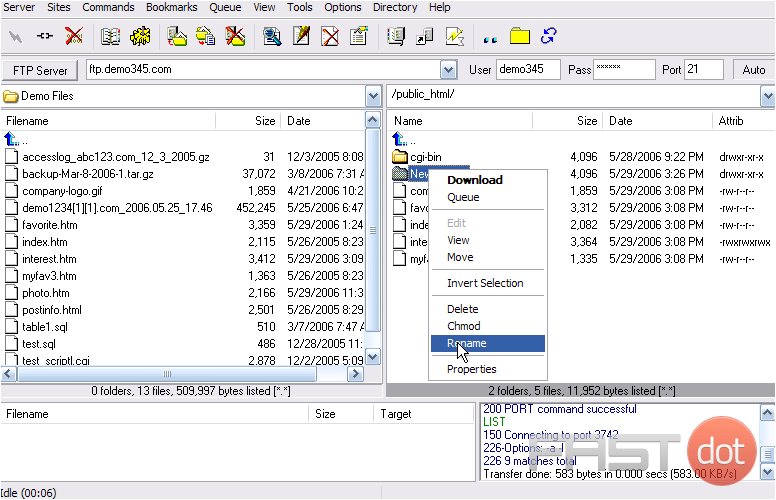
4) Right click the folder…..
5) Then click Rename.
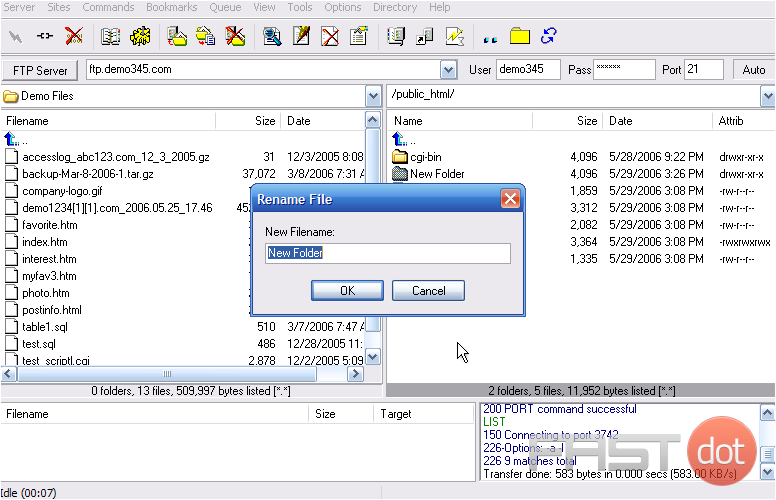
6) Type the new folder name in here, then click OK.
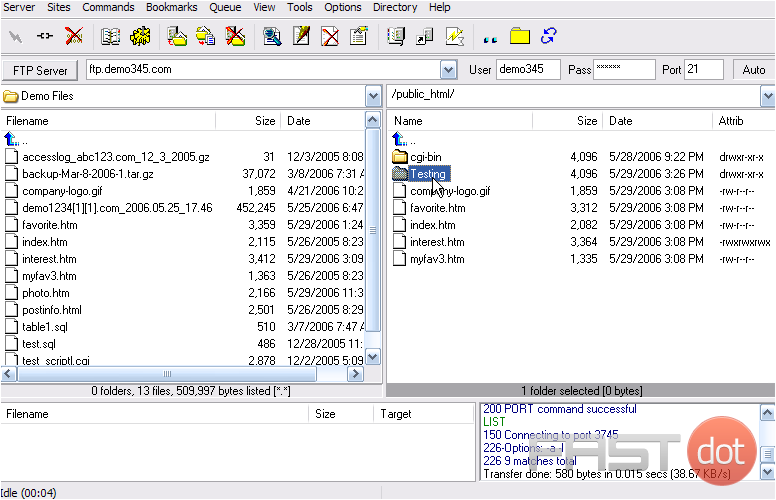
The new folder has been renamed.
You can also rename files the same way as you rename folders.
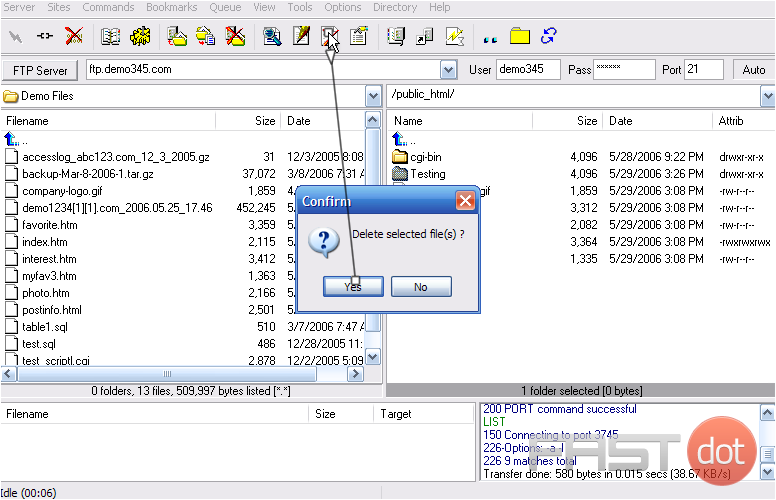
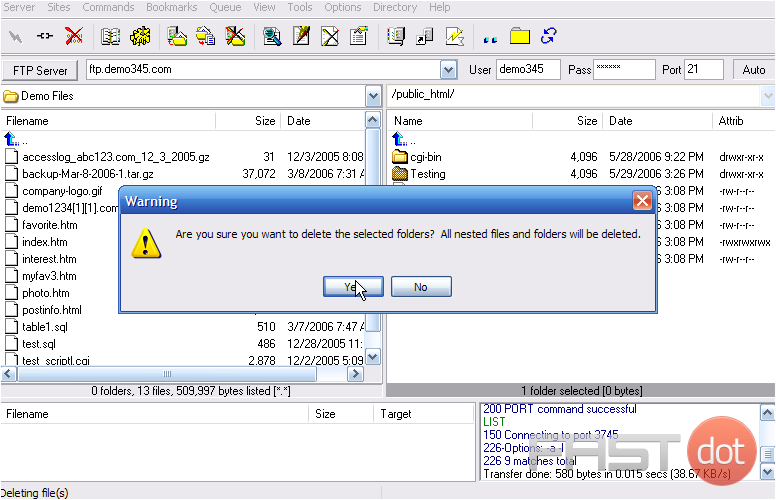
7) To delete a folder (or file), make sure it’s highlighted…..
8) ….. then click the delete icon here.
9) Click Yes to confirm.
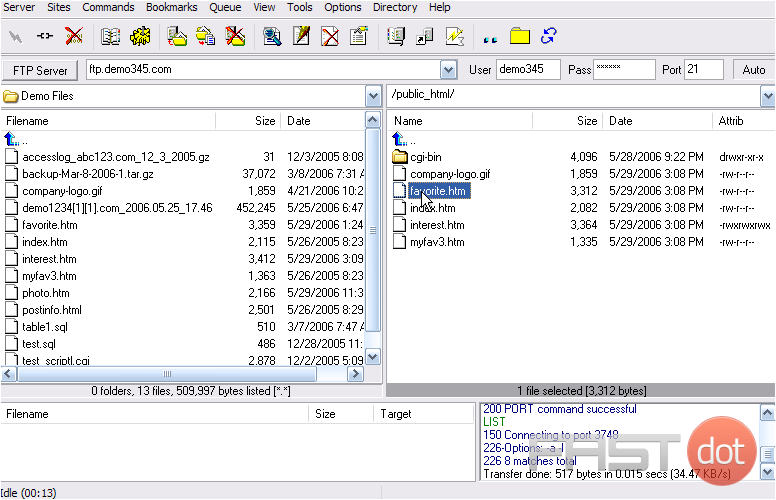
The folder we just created, has been deleted.
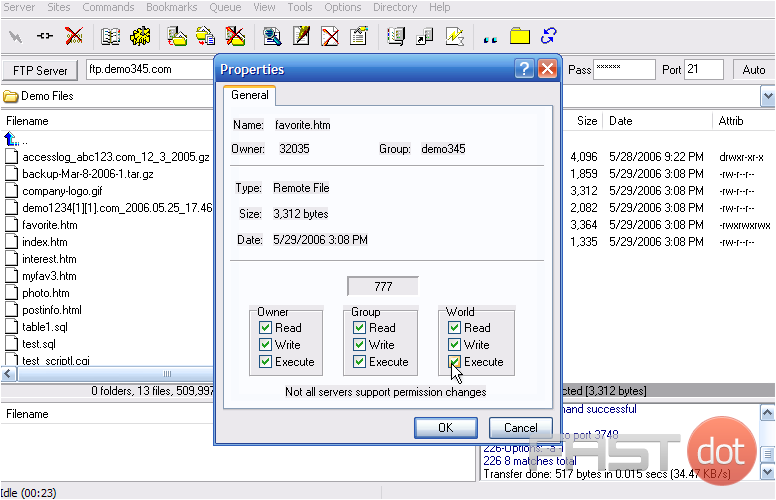
Now let’s learn how to change the permissions of a file.
10) Select the file for which you want to change the permissions…..
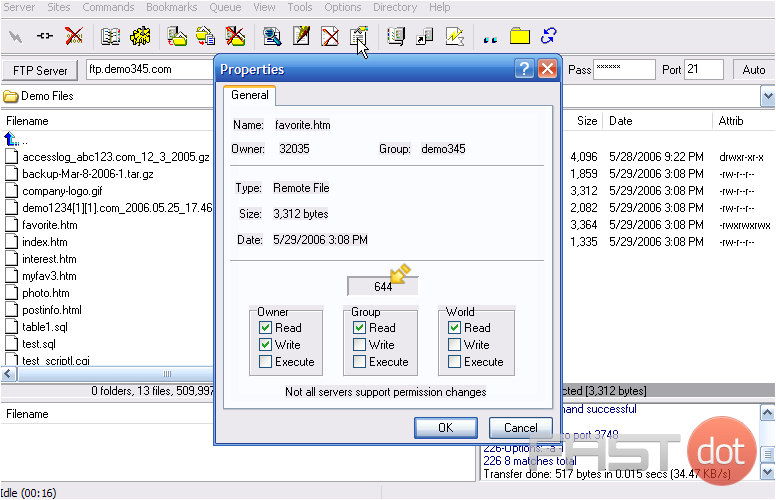
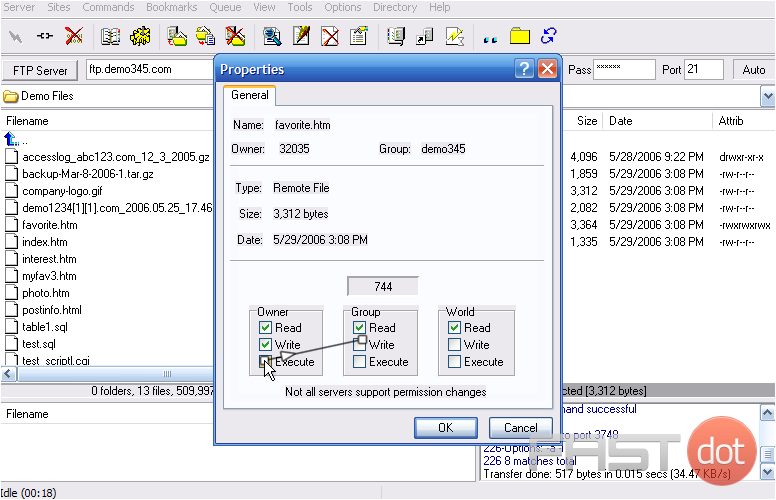
11) ….. then click the Properties icon here. To change the file permissions, simply enter the new permissions value here…..
12) ….. by checking off the appropriate boxes below.
13) Click OK when finished.
LeapFTP is a robust FTP (File Transfer Protocol) client known for its user-friendly interface and a wide array of features that facilitate the easy management of files and folders on a server. It is a preferred choice for web developers, server administrators, and digital agency professionals who require a reliable tool for file transfers and server management. This guide will walk you through the basics of managing files and folders in LeapFTP, from connecting to your server to performing essential file management tasks.
Step 1: Connect to Your Server
- Launch LeapFTP: Open the LeapFTP application on your computer.
- Create or Open a Site Profile: If you haven’t already created a site profile for your server, go to “File” > “Site Manager” or press
Ctrl+Sto open the Site Manager. Click on “New” to create a new site profile. Enter the details provided by your hosting provider, including the server name (or IP address), username, and password. Choose “Save” to store the profile for future use. - Connect: Select your site profile from the list and click “Connect” to establish a connection with your server.
- Server Side: Once connected, the right pane displays the files and folders on your server. You can navigate through your server’s directory structure here, much like you would in a standard file explorer.
- Local Side: The left pane shows your local files and folders. Navigate to the location on your computer where the files or folders you wish to manage are stored.
Step 3: Transfer Files and Folders
- Uploading: To upload files or folders from your local machine to the server, navigate to the local directory containing the files on the left pane, and navigate to the target directory on your server in the right pane. Select the files or folders you want to upload, then drag and drop them to the right pane or use the transfer buttons located between the panes.
- Downloading: To download files or folders from the server to your local machine, the process is similar but in reverse. Select the desired files or folders in the right pane, and drag and drop them to the desired location in the left pane or use the transfer buttons.
Step 4: Managing Files and Folders on the Server
- Create a New Folder: To create a new folder on the server, navigate to the location where you want the new folder, right-click in the server pane, and select “New Folder.” Enter the name for the folder and confirm.
- Rename Files/Folders: To rename a file or folder, right-click on the item in the server pane and select “Rename.” Type the new name and press Enter.
- Delete Files/Folders: To delete files or folders, select the items you want to remove, right-click, and choose “Delete.” Confirm the deletion if prompted.
- Change File Permissions: Right-click on a file or folder and select “Properties” or “CHMOD.” You can then modify the permissions by entering the numerical value or checking the appropriate boxes for read, write, and execute permissions.
Step 5: Disconnecting
Once you have finished managing your files and folders, it’s important to properly disconnect from the server to ensure security and integrity. Click on the “Disconnect” button or close LeapFTP.
Tips for Effective File Management
- Keep Organized: Use clear and consistent naming conventions for files and folders to keep your server well-organized.
- Regular Backups: Regularly backup your server’s content to prevent data loss.
- Monitor Transfer Queue: Keep an eye on the transfer queue at the bottom of LeapFTP during file transfers to ensure all operations complete successfully.
LeapFTP offers a comprehensive suite of tools for effective file and folder management, making it a valuable asset for anyone managing online content or server files. With practice, these basic tasks will become second nature, streamlining your workflow and enhancing your productivity.

