This tutorial will show you how to setup an IMAP account with SSL in Pegasus Mail
Table of Contents
1) To configure an IMAP email account with SSL, first click the “Tools” tab.

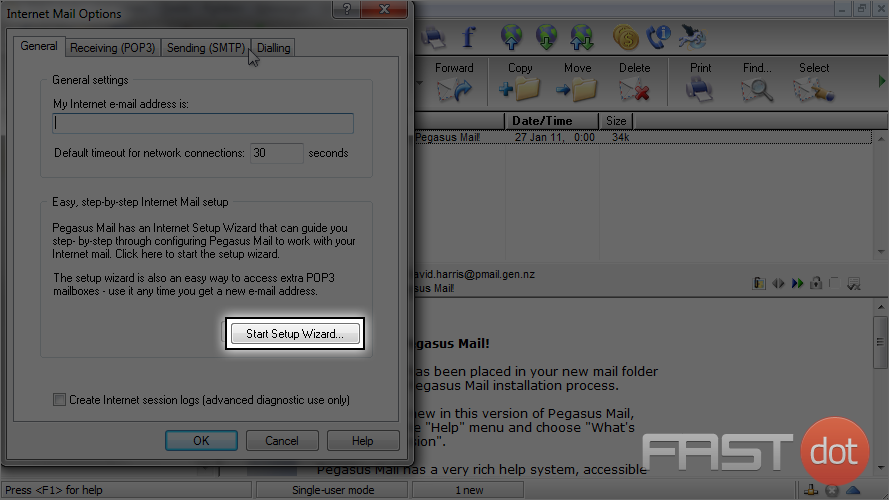
2) Then click “Internet Options”.

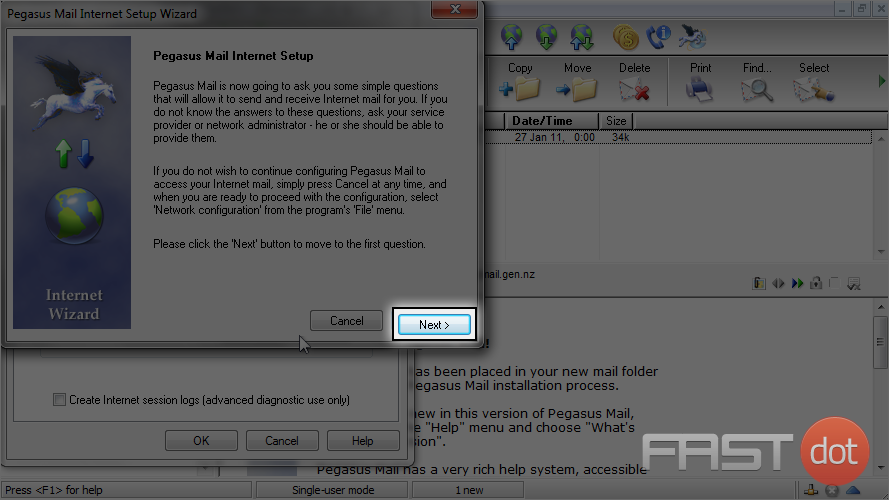
3) The easiest way to setup your email account is to start the Setup Wizard… click here.
4) Then click “Next”.
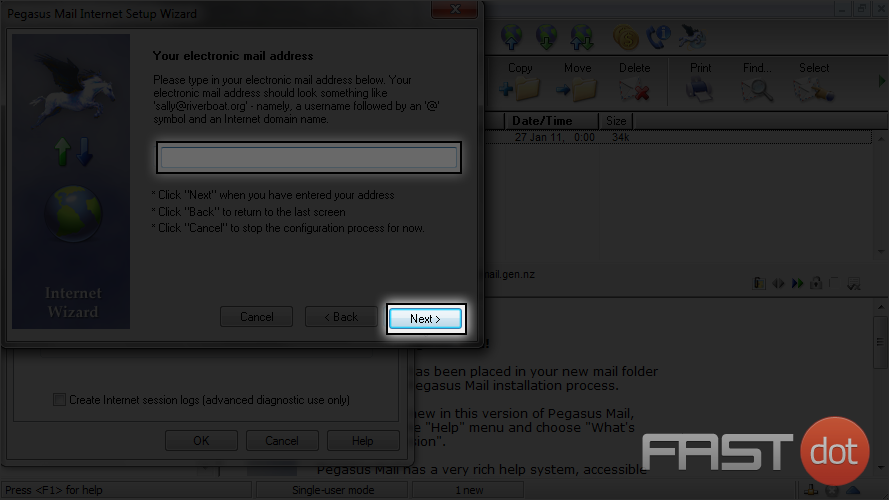
5) Enter your email address you wish to configure here, then click “Next” again.
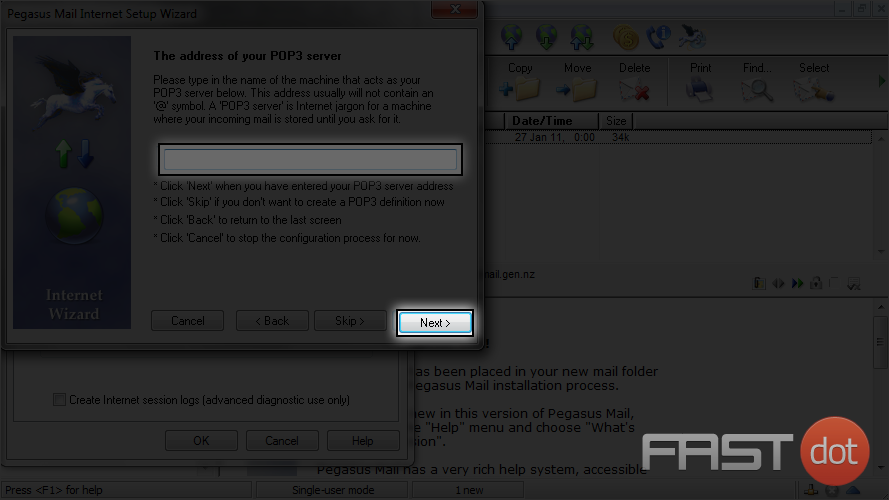
6) This screen is asking for your POP3 server address, but we’re setting up an IMAP account… so just leave this box blank and click “Next”.
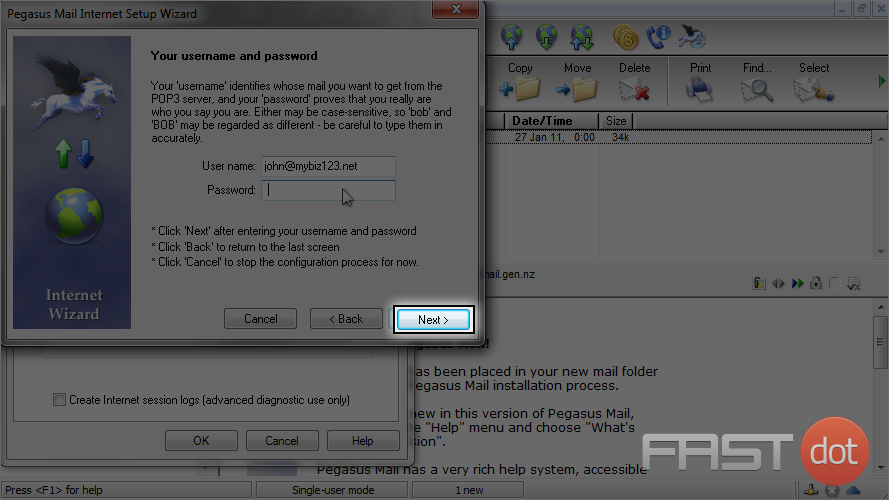
7) Enter your full email address as the username, and your email account’s password.
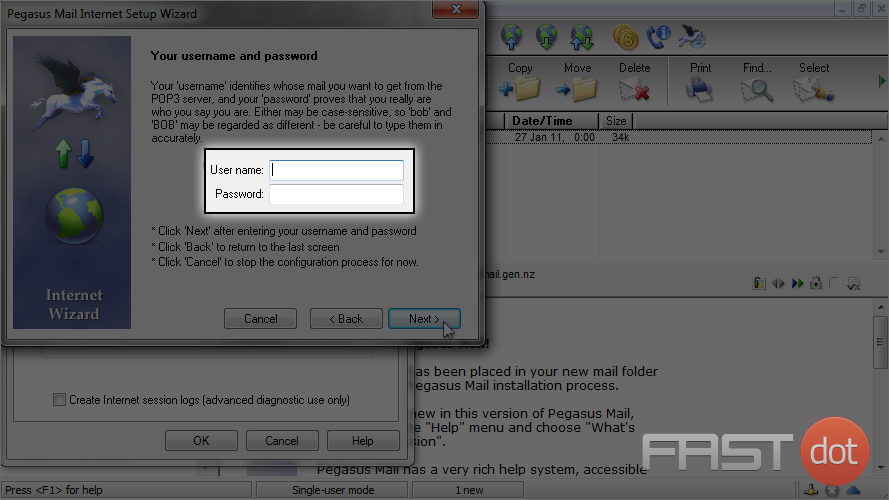
8) Then click “Next”.
9) Enter your outgoing server address here, then click “Next”.

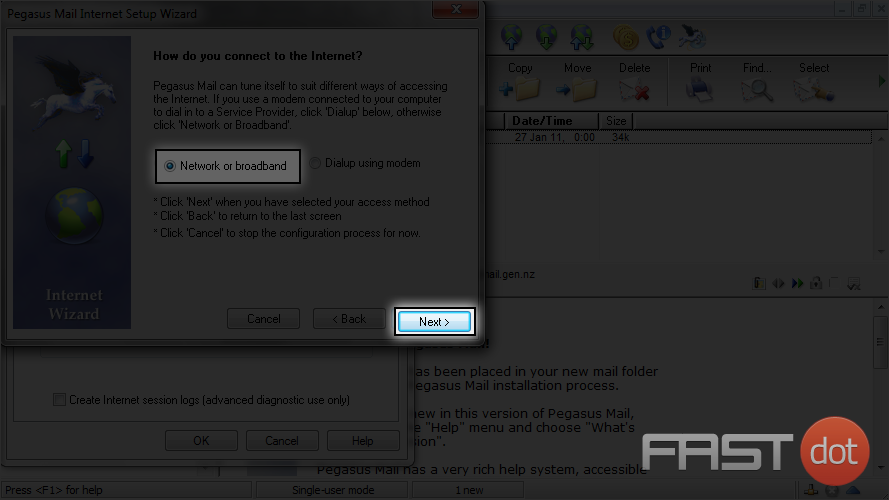
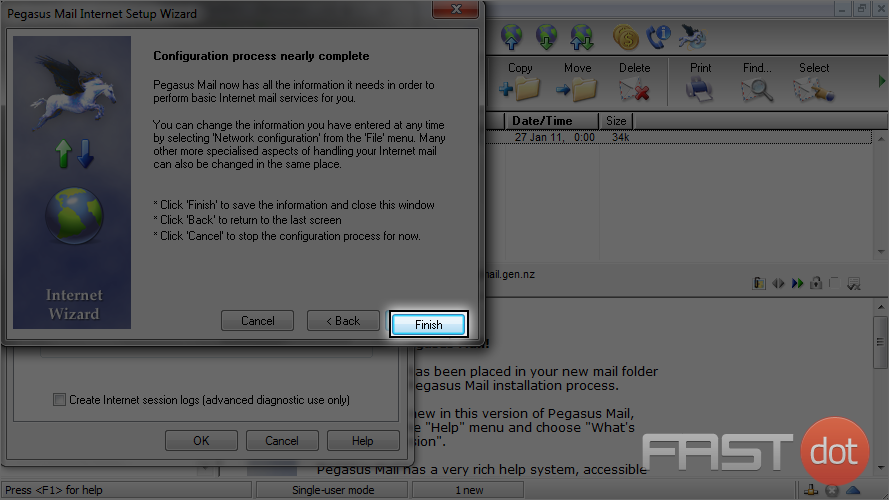
10) Ensure the “Network or Broadband” option is selected, then click “Next”.
11) Click “Finish”.
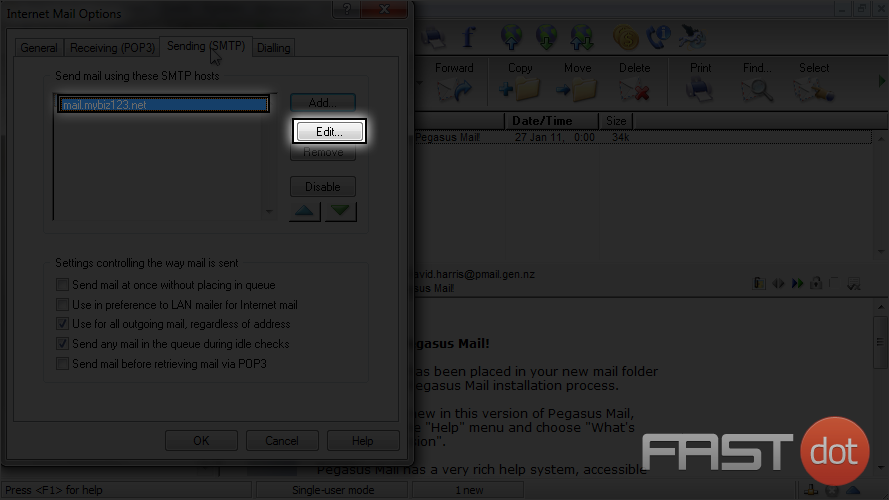
12) Now click the “Sending (SMTP)” tab here.

13) Ensure the SMTP address we just setup is selected, then click the “Edit” button.
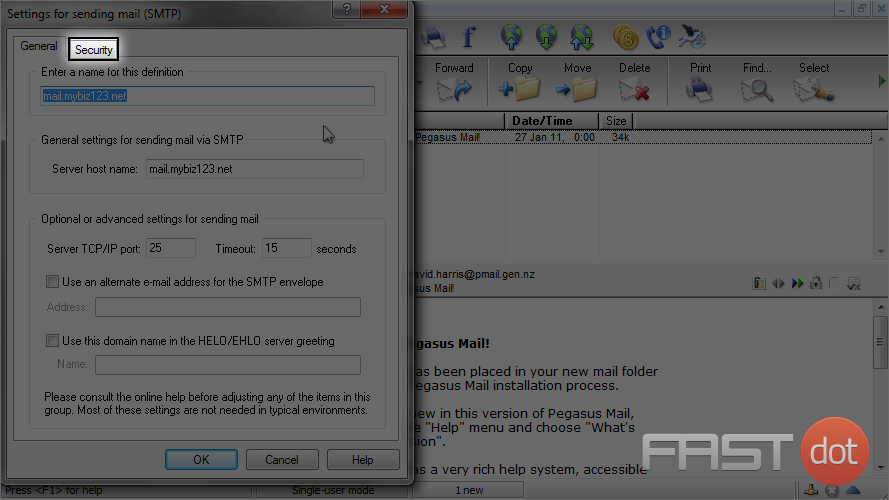
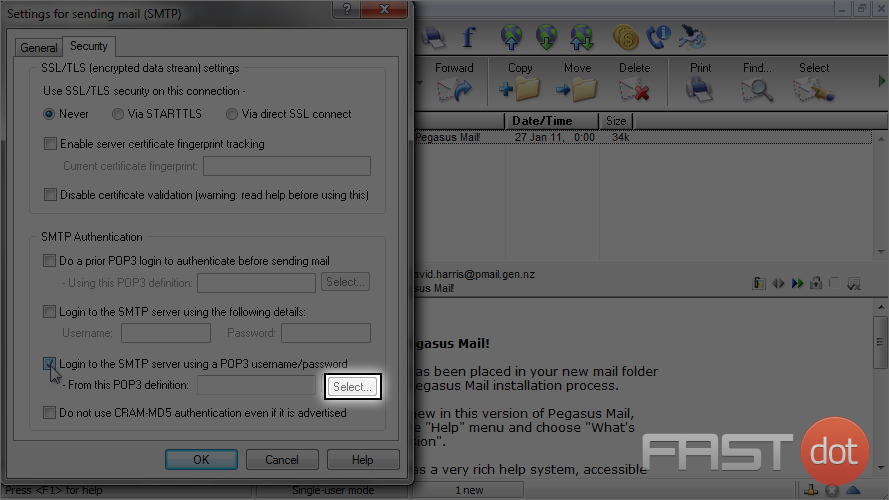
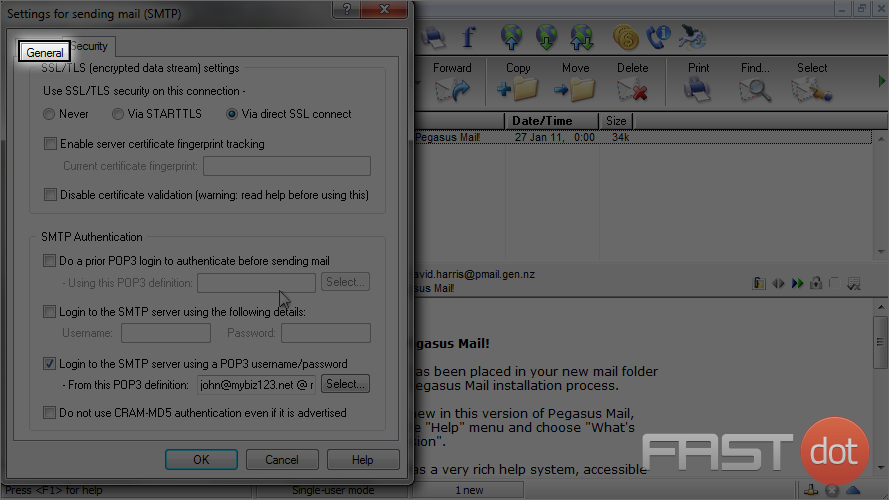
14) Click the “Security” tab.
15) Click here to setup SMTP authentication using your username and password.
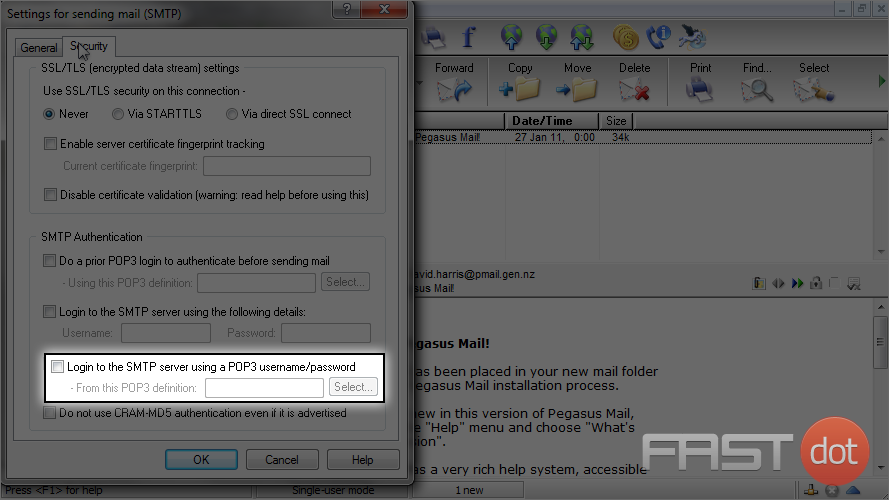
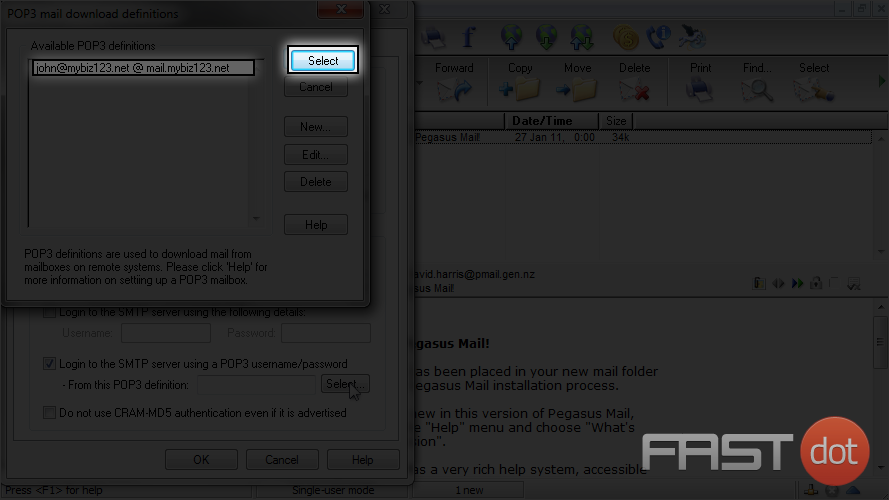
16) Then click this “Select” button.
17) Choose your POP3 definition (even though we’re configuring this email account for IMAP), then click “Select”.
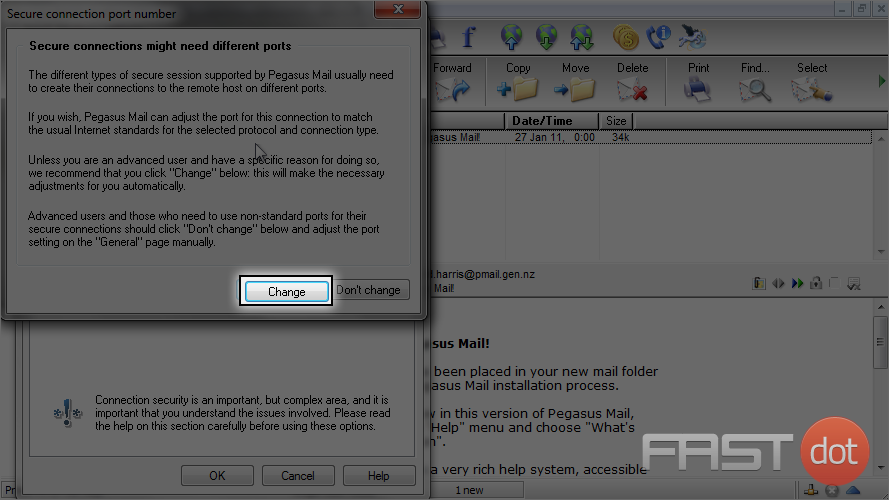
18) Click here to require a secure SSL connection for the outgoing server.
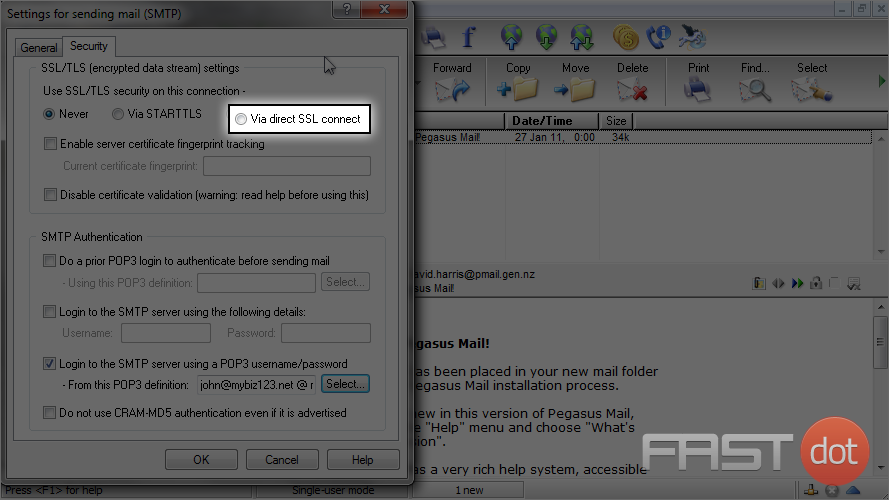
19) Then click “Change” so the port numbers are automatically adjusted.
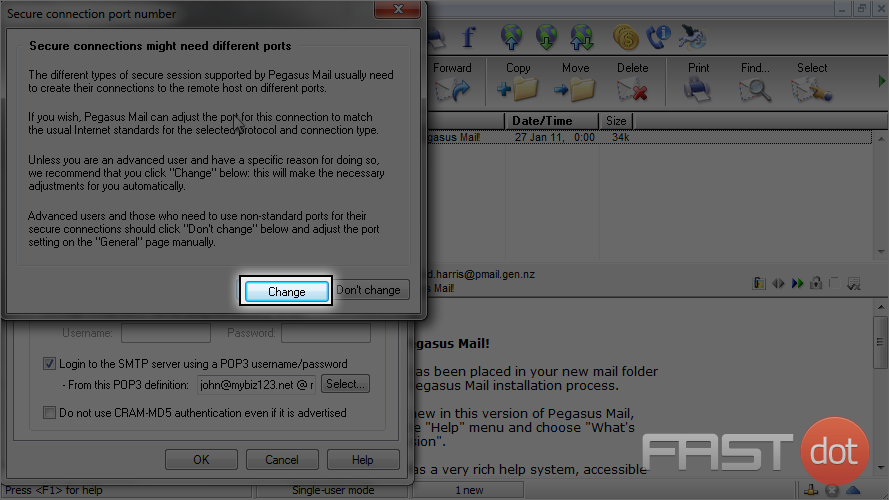
20) Click the “General” tab.
21) Click “OK”.
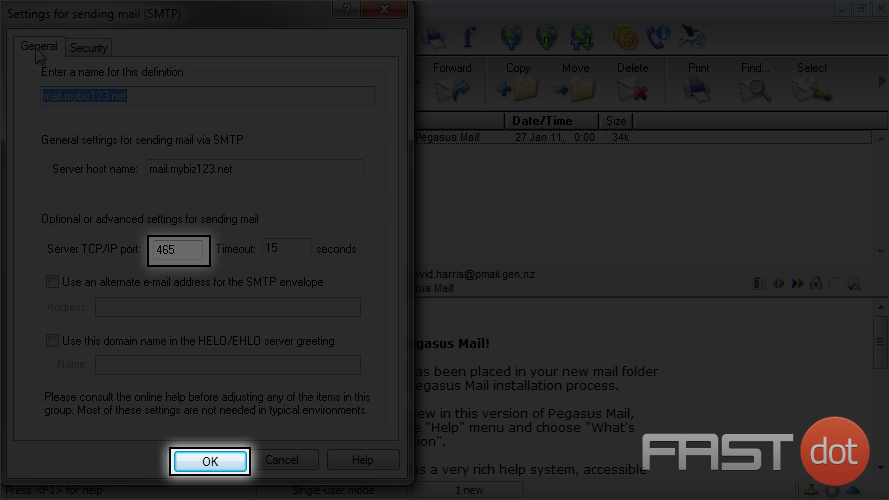
Note that the port number has been updated to 465, the standard port number for SMTP SSL.
22) Click “OK” again.

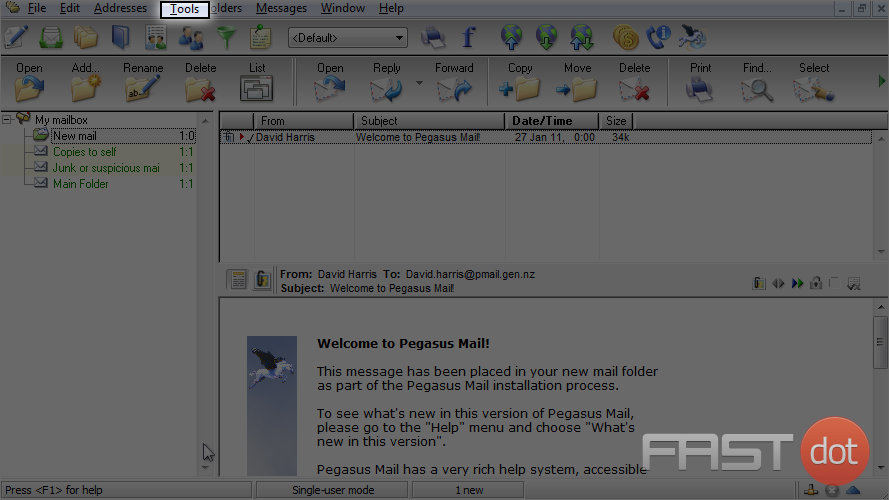
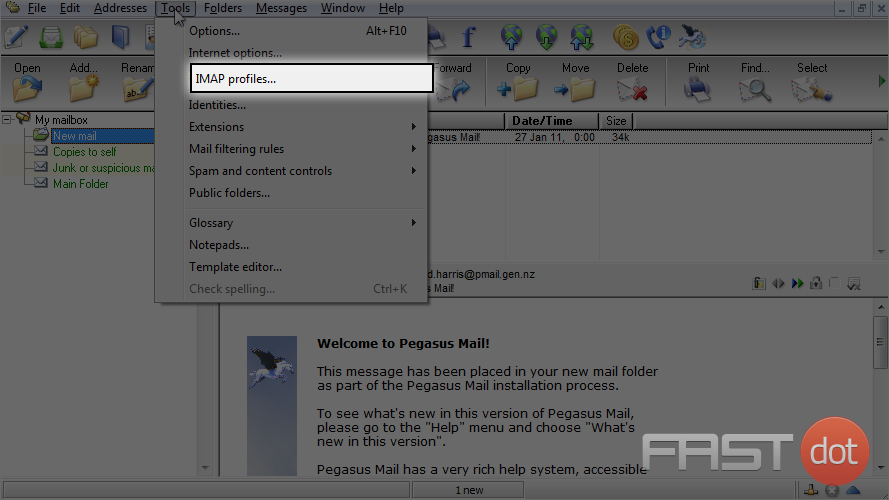
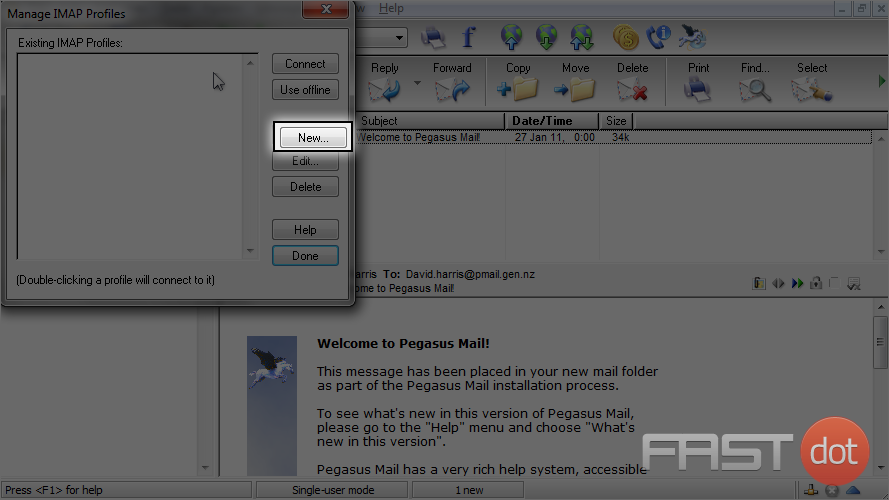
23) We now have to setup our IMAP profile. Click the “Tools” tab.
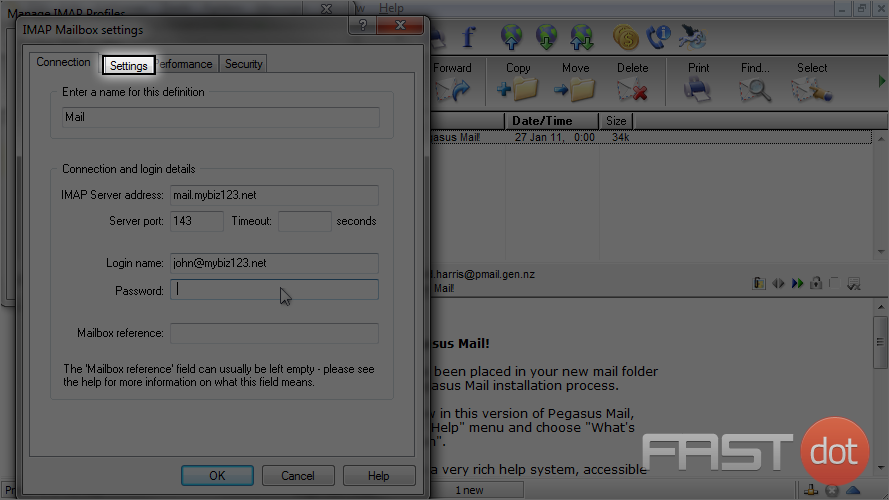
24) Then click “IMAP Profiles”.
25) Click “New”.
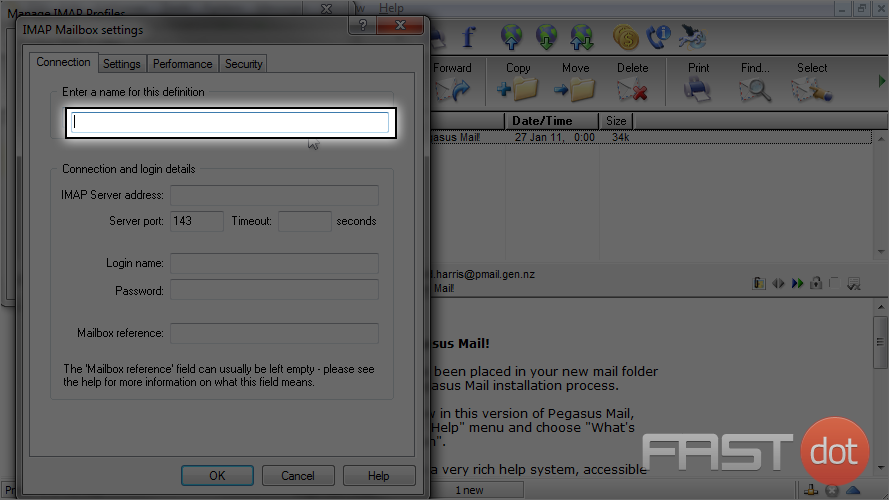
26) Enter a name for the IMAP connection.
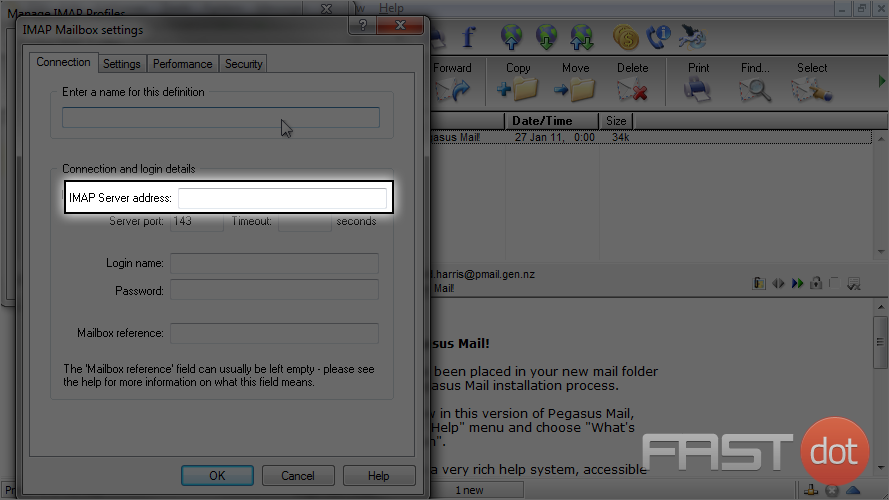
27) Then enter your IMAP server address here.
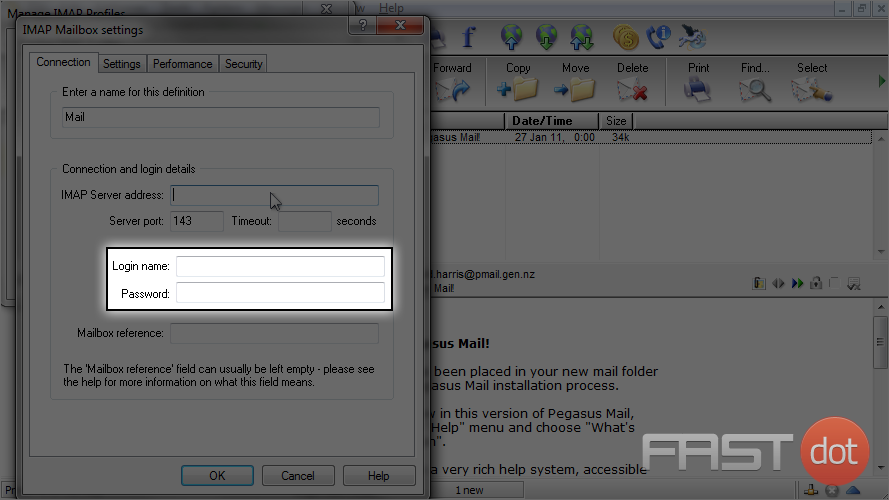
28) Enter your full email address as the username, and your email account’s password.
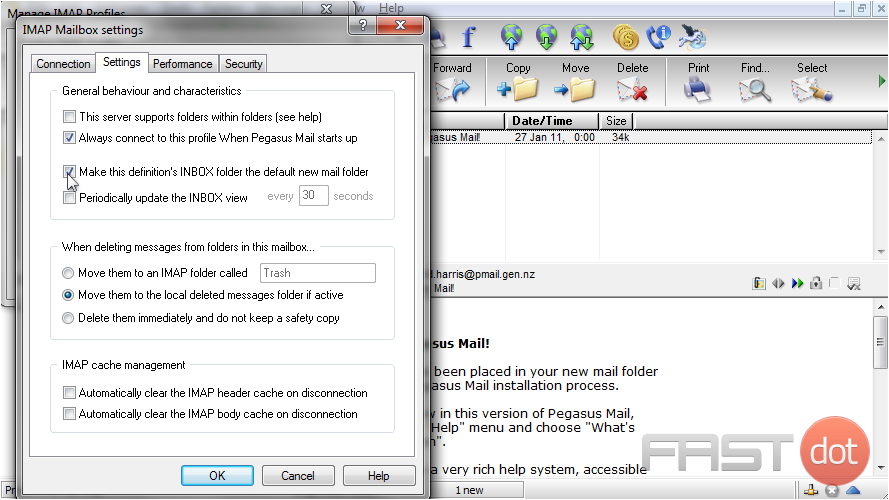
29) Then click the “Settings” tab.
30) Check the following options to set the IMAP inbox as the default.
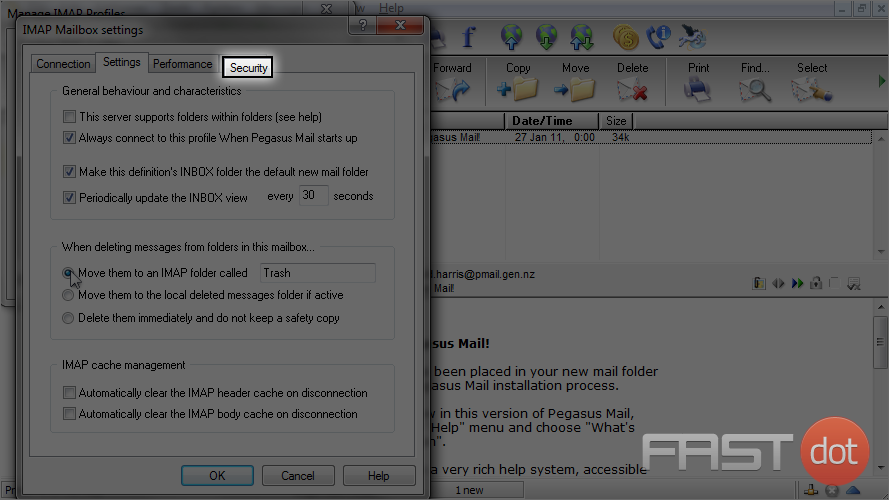
31) When finished, click the “Security” tab.
32) Click here to require a secure SSL connection for the incoming IMAP server.
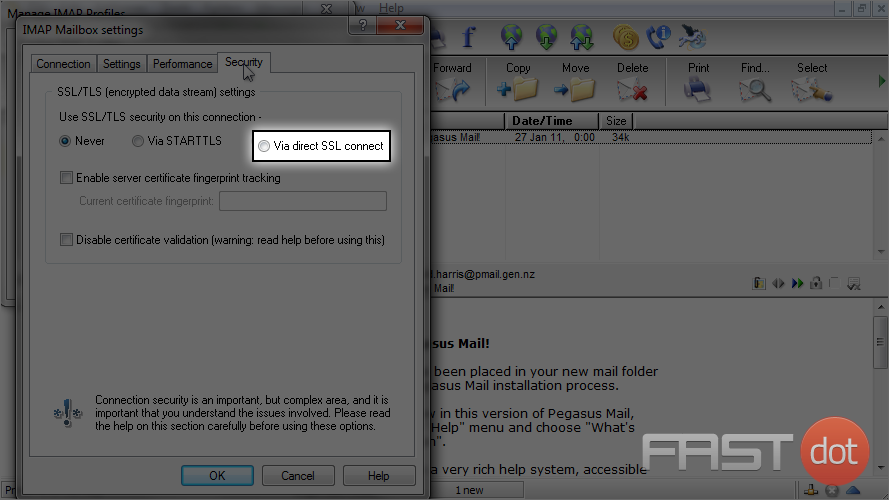
33) Then click “Change” so the port numbers are automatically adjusted.
34) Click the “Connection” tab.
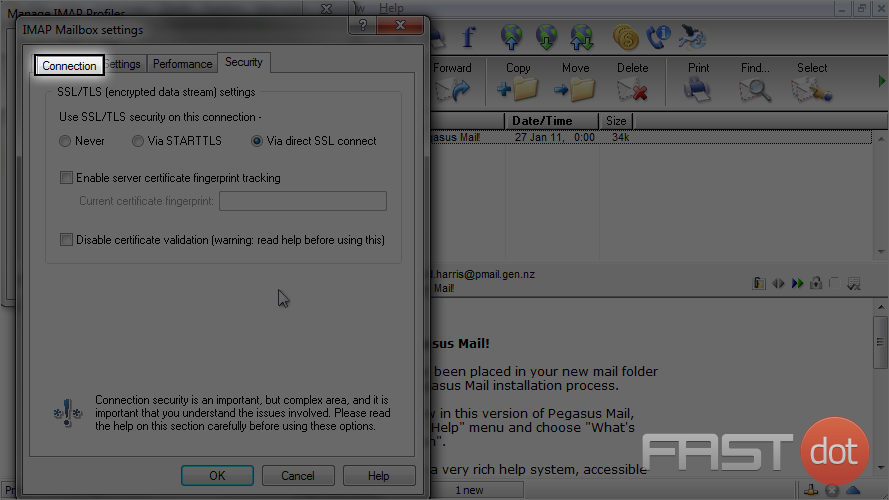
Note that the port number has been updated to 993, the standard port number for IMAP SSL.
35) Click “OK”.

36) Then click “Done”.
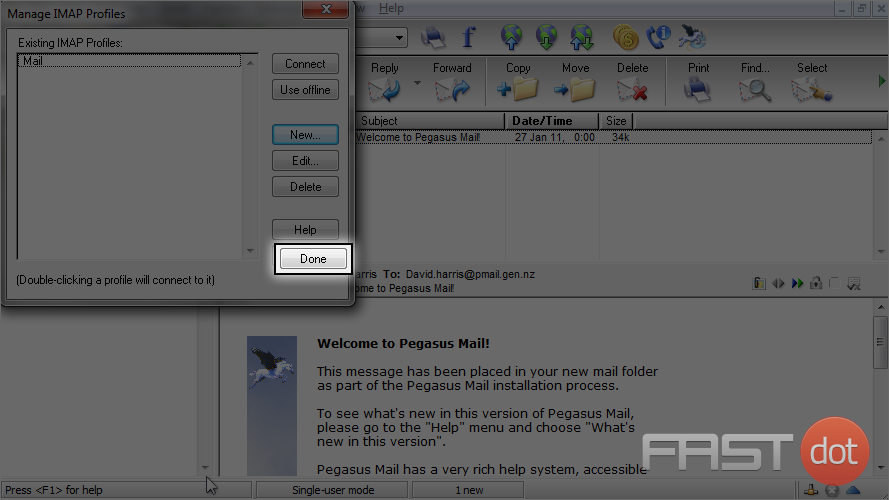
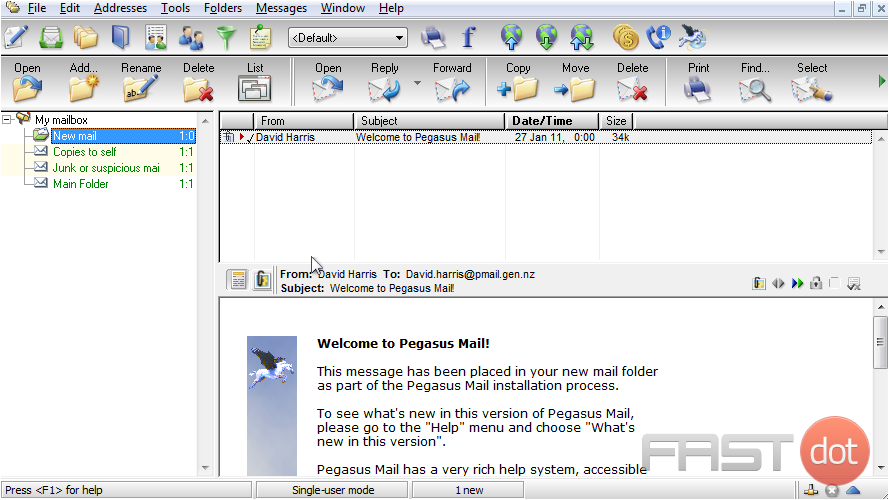
That’s it! The email account has been added.
Setup an IMAP account with SSL in Pegasus Mail
Setting up an IMAP account with SSL in Pegasus Mail involves several steps to ensure a secure and functional email configuration. IMAP (Internet Message Access Protocol) allows you to access your emails from a server without having to download them to your local computer, and using SSL (Secure Sockets Layer) ensures that your email data is encrypted during transmission. Here’s a step-by-step guide to setting up an IMAP account with SSL in Pegasus Mail:
Prerequisites
- Ensure you have Pegasus Mail installed on your computer.
- Have your IMAP email account details ready, including your email address, password, IMAP server name, and port number. Typically, the IMAP server name is something like
imap.yourdomain.com, and the default SSL port number is 993. - Ensure that SSL is supported and enabled on your email server.
Setting Up the IMAP Account
- Open Pegasus Mail:
- Launch Pegasus Mail on your computer.
- Access Account Configuration:
- Go to the
Toolsmenu and selectInternet options.... - Switch to the
Receiving (POP3)tab, even though you are setting up an IMAP account. Pegasus Mail uses this section for both POP3 and IMAP configurations.
- Go to the
- Add New Account:
- Click on the
Addbutton to create a new mail account. - In the dialog that appears, select
IMAPas the type of the account.
- Click on the
- Enter Account Details:
- Account Name: Enter a descriptive name for your account (e.g., My IMAP Account).
- IMAP Host: Enter the IMAP server name (e.g.,
imap.yourdomain.com). - Username: Enter your full email address.
- Password: Enter the password for your email account.
- Configure SSL Settings:
- Look for an option to enable SSL. This might be a checkbox labeled
Use SSLorEnable SSL, or you might need to select an SSL option from a dropdown menu. - Ensure that the port number is set to the IMAP SSL port, typically 993.
- Look for an option to enable SSL. This might be a checkbox labeled
- Advanced Settings (if necessary):
- Depending on your email provider, you may need to configure additional settings. This can include specifying IMAP path prefixes or adjusting server timeouts.
- Consult your email provider’s documentation for any specific settings required.
- Save and Test the Configuration:
- Save your settings and exit out of the account setup.
- Test the configuration by attempting to receive email. Pegasus Mail should connect to the IMAP server using SSL and download the list of messages.
- Sending Mail (SMTP Settings):
- Go back to
Internet options...and select theSending (SMTP)tab. - Set up your SMTP server settings, ensuring you enable SSL/TLS if required by your email provider. The SMTP server details, including the server name and port, are typically provided by your email service provider.
- Go back to
- Finalize and Test:
- Save all settings.
- Compose a test email to ensure you can send emails successfully.
Troubleshooting Tips
- If you encounter issues, double-check your server names, port numbers, and login credentials.
- Ensure that your internet connection is active and stable.
- Check if your email provider requires specific security settings or configurations that you might have missed.
- If you receive any SSL certificate warnings, verify the certificate’s validity or consult your email provider for guidance.
Conclusion
Setting up an IMAP account with SSL in Pegasus Mail enhances your email security and allows for flexible email management. It’s important to carefully enter all the required settings and consult your email provider’s documentation for any specific requirements. Once set up, you’ll be able to manage your emails securely and efficiently directly from Pegasus Mail.