How to setup a Gmail account on your iPad
Table of Contents
This tutorial will show you how to setup a Gmail account on your iPad.
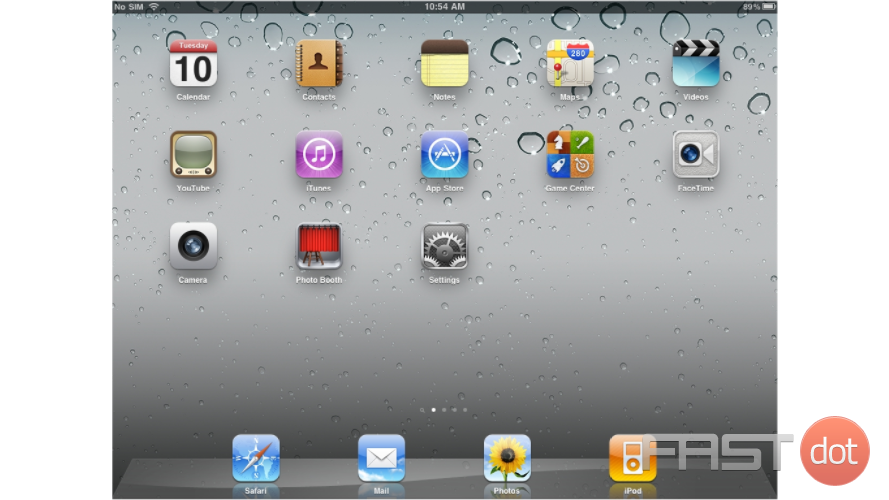
First, locate and press the “Settings” icon. It may be on a different screen or in a different location than shown here.
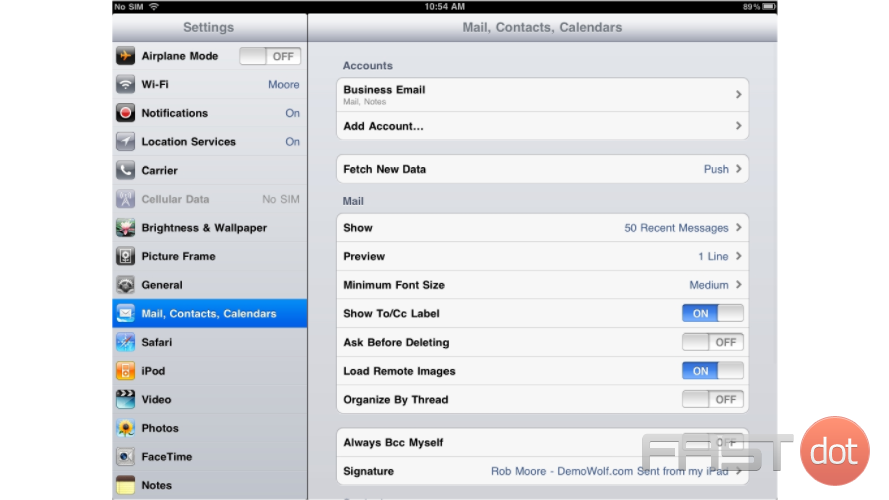
Then select “Mail, Contacts, Calendars”… then “Add Account”.
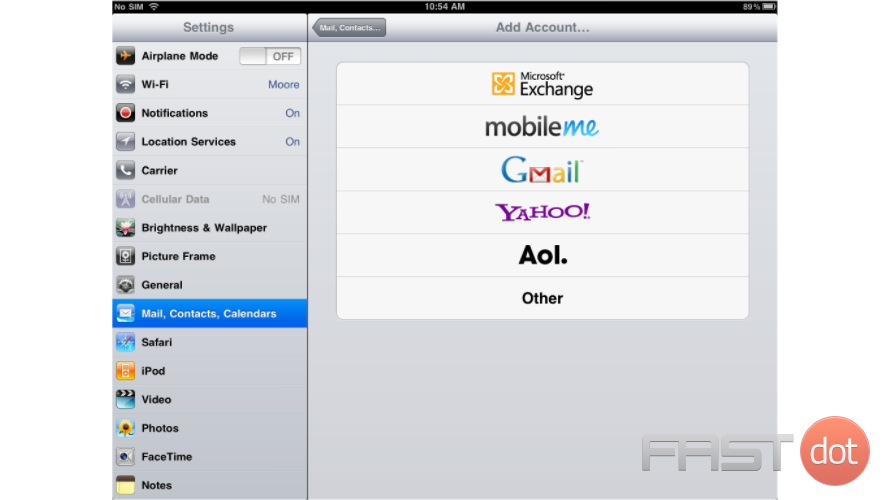
Then choose “Gmail”.
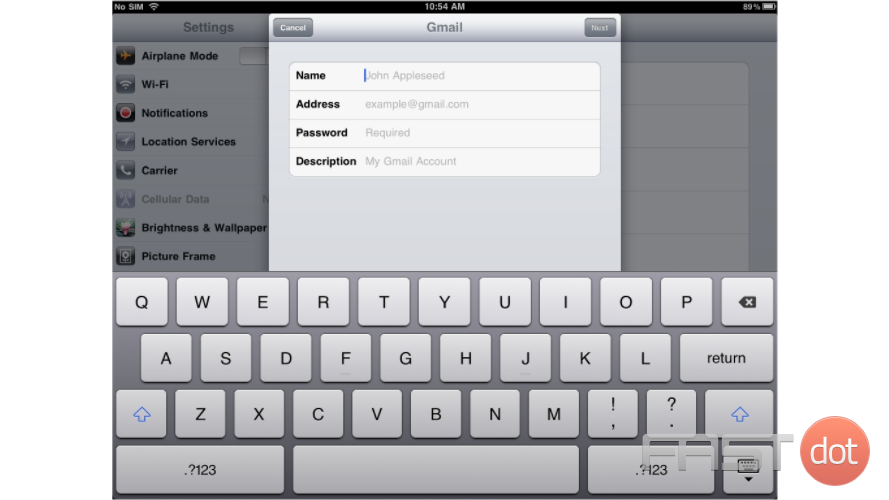
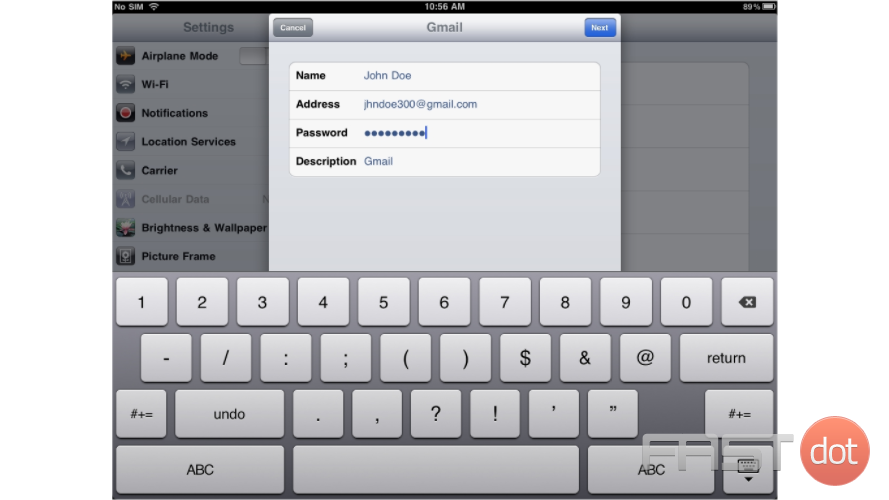
Enter the Name, Email address, and Email password of the Gmail account you’re adding
A “Description” will automatically appear, but you can change it if you like. When finished, press “Next”
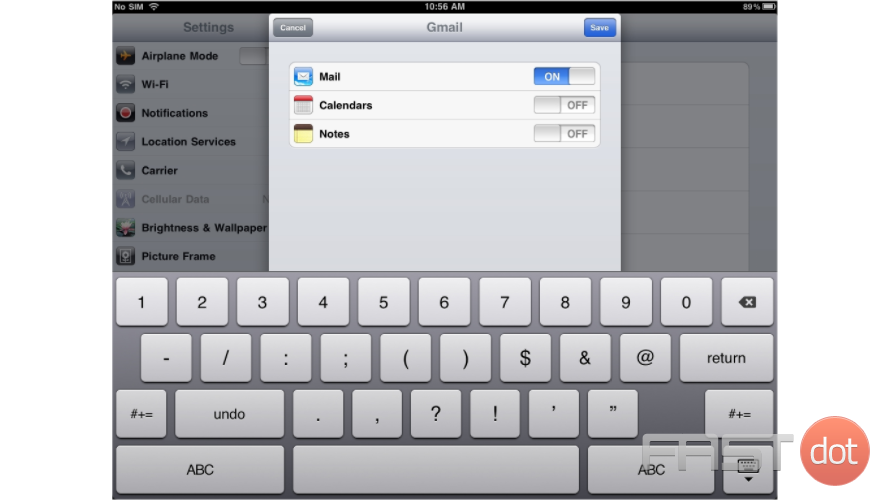
Press “Save”.
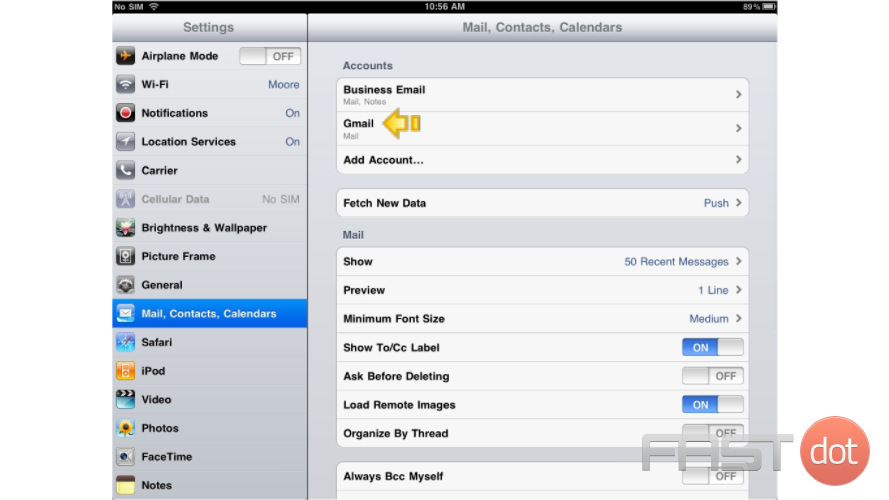
Success! The Gmail account has been setup on the iPad, and you can see it here listed under “Accounts”.
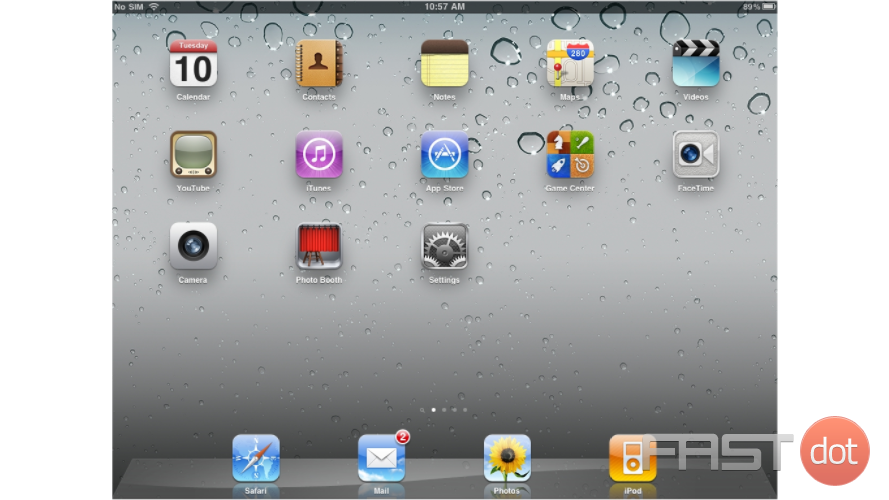
Let’s return to the home screen by pressing the Home button on the iPad. To check your email, press the “Mail” icon here (Note: the icon may be in a different location on your iPad)
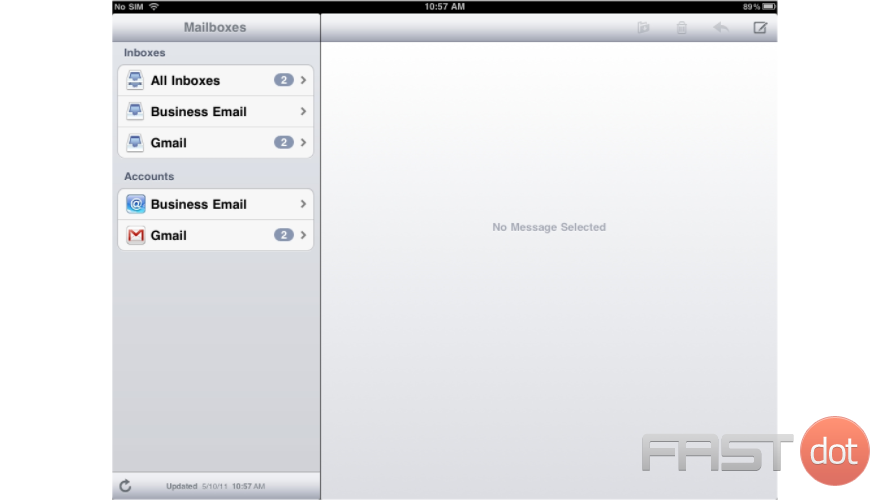
If you have multiple email accounts setup in your iPad, they’ll all be listed here. Select the Gmail account we just setup…
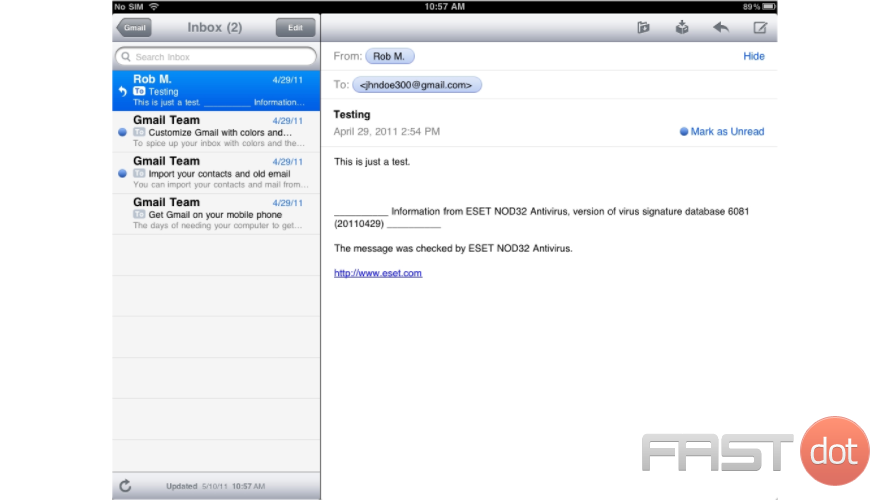
… and any emails in your inbox will be displayed here.
Setting up a Gmail account on your iPad allows you to access your emails, calendar, and contacts directly from the iPad’s native apps. Apple’s iOS makes it straightforward to add your Gmail account using the Mail app or by adding it to your iPad settings for a more integrated experience. Here’s a step-by-step guide to get you started:
Using the Mail App
Step 1: Open the Mail App
- From your iPad’s home screen, tap on the Mail app icon. If you haven’t set up an email account yet, you’ll be prompted to choose an email provider.
- If you’re already using Mail with another account, go to your Mailboxes list, tap “Edit” at the top right, then select “Add Mailbox” and “Add Account.”
Step 2: Select Google
- You’ll see a list of email providers. Tap on “Google” to set up your Gmail account.
Step 3: Log in to Your Gmail Account
- You’ll be redirected to the Google sign-in page. Enter your Gmail address and tap “Next,” then enter your password and tap “Next” again.
- If you have two-factor authentication enabled, follow the prompts to verify your identity.
Step 4: Permissions
- Google will ask for permissions to access your information. Tap “Allow” to proceed.
Step 5: Select What to Sync
- Choose which data you want to sync with your iPad, such as Mail, Contacts, Calendars, and Notes. By default, all options are turned on.
- Tap “Save” to finish the setup process.
Your Gmail account is now added to your Mail app, and depending on your sync settings, your Google contacts, calendars, and notes might also be available on your iPad.
Using iPad Settings for a More Integrated Experience
Step 1: Open iPad Settings
- Go to your iPad’s home screen and tap on the “Settings” icon.
Step 2: Scroll to “Mail”
- In the Settings menu, scroll down and tap on “Mail.”
Step 3: Tap on “Accounts”
- Find and tap on “Accounts” to see a list of your current accounts.
Step 4: Add Account
- Tap on “Add Account” and select “Google” from the list of email providers.
Step 5: Sign In
- Just like in the Mail app setup, you’ll be asked to enter your Gmail address and password. Follow through the sign-in process, including two-factor authentication if it’s enabled.
Step 6: Permissions and Sync
- After giving permissions, select the data you want to sync with your iPad.
Step 7: Save
- Don’t forget to tap “Save” after selecting your sync options.
Tips
- Two-Factor Authentication: If you have two-factor authentication enabled for your Google account (highly recommended for security reasons), you might need to use your phone or another method to verify your identity during the setup process.
- Using the Gmail App: For those who prefer a dedicated app, Google offers the Gmail app for iOS, available from the App Store. It provides a more Gmail-centric experience and might include features not available in the native Mail app.
- Sync Settings: You can adjust which services (Mail, Contacts, Calendars, Notes) you sync with your iPad at any time by going back into the “Accounts” section under “Mail” in your iPad settings.
By following these steps, you should have your Gmail account set up and synchronized with your iPad, providing convenient access to your emails and other Google services directly from your device.

